

Want a finished design to start from instead? See Templates — the gallery has 40+ ready-to-edit decks.
Open the editor
In the left sidebar, click Carousels › Create New. Carousify opens a fresh deck with one blank slide.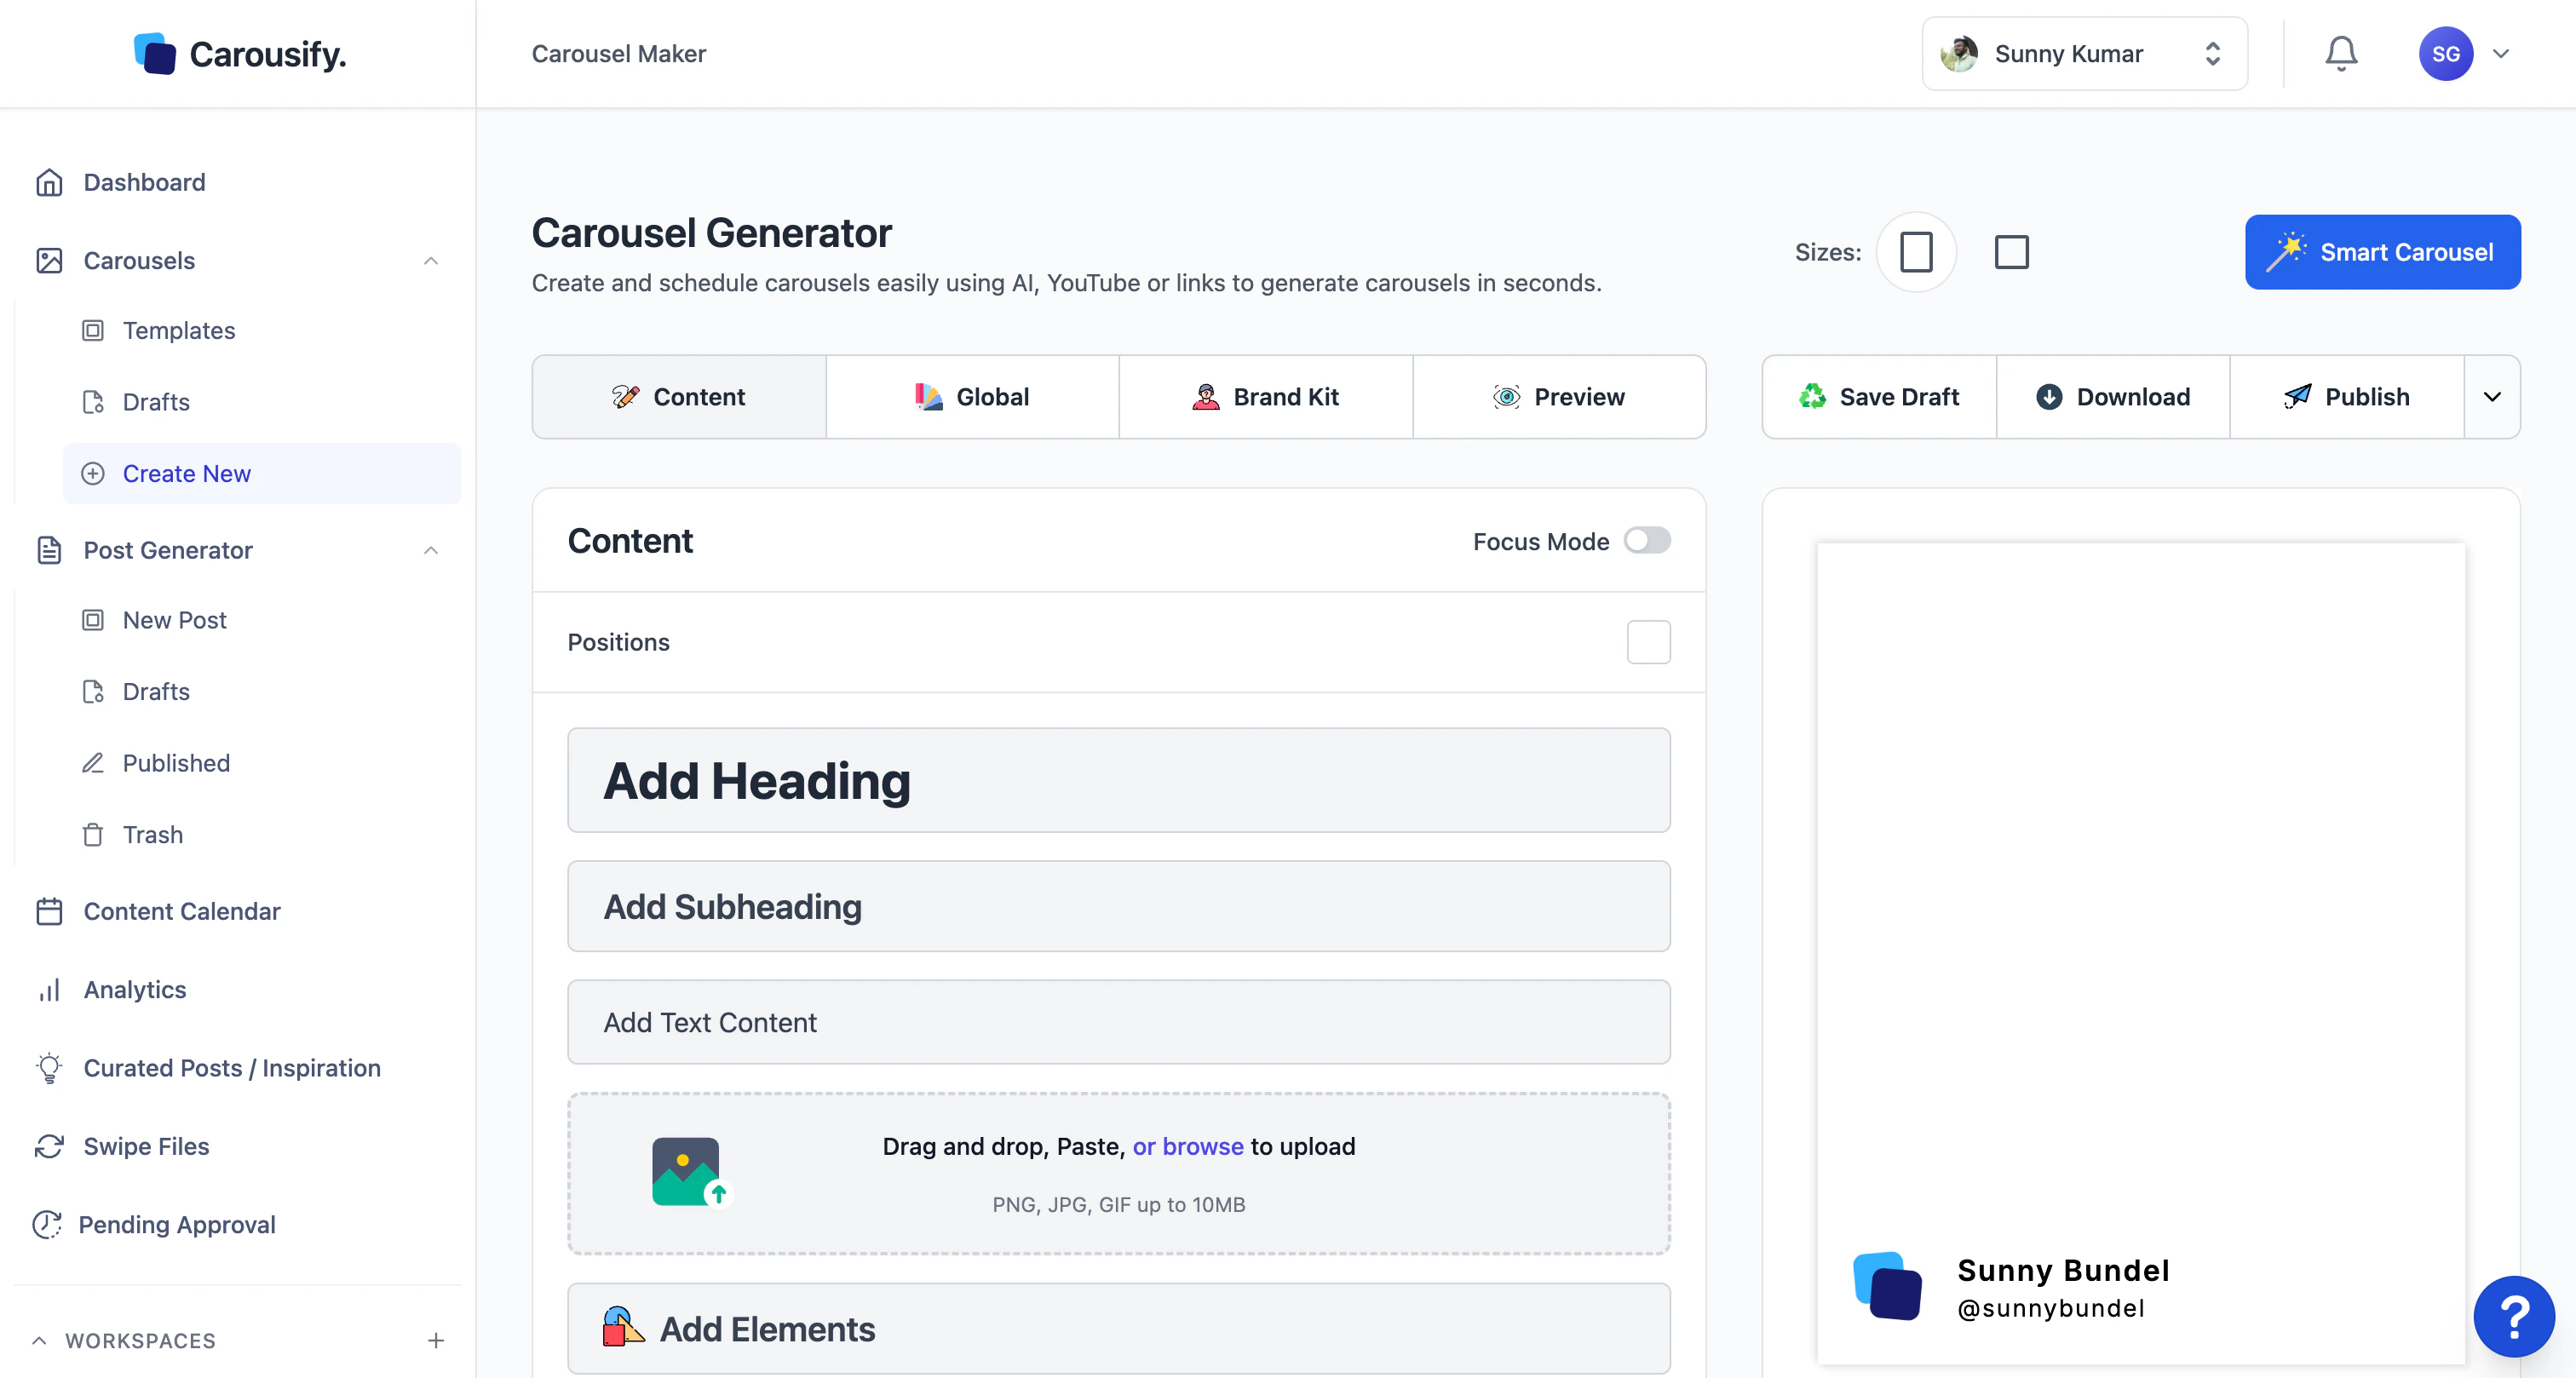
Sizes
Click Size in the top bar to switch the canvas. Decks open in Portrait by default.Generate with Smart Carousel
Smart Carousel is a copywriting tool, not a design tool. It only writes, rewrites, or expands the text on your slides — it does not generate slide layouts, choose colors, or place graphics. You bring the design (a template, your saved layouts, or slides you’ve laid out yourself) and Smart Carousel fills in the words. Once you have a base, click Smart Carousel to open the generator. It has four modes — pick the one that matches your source material.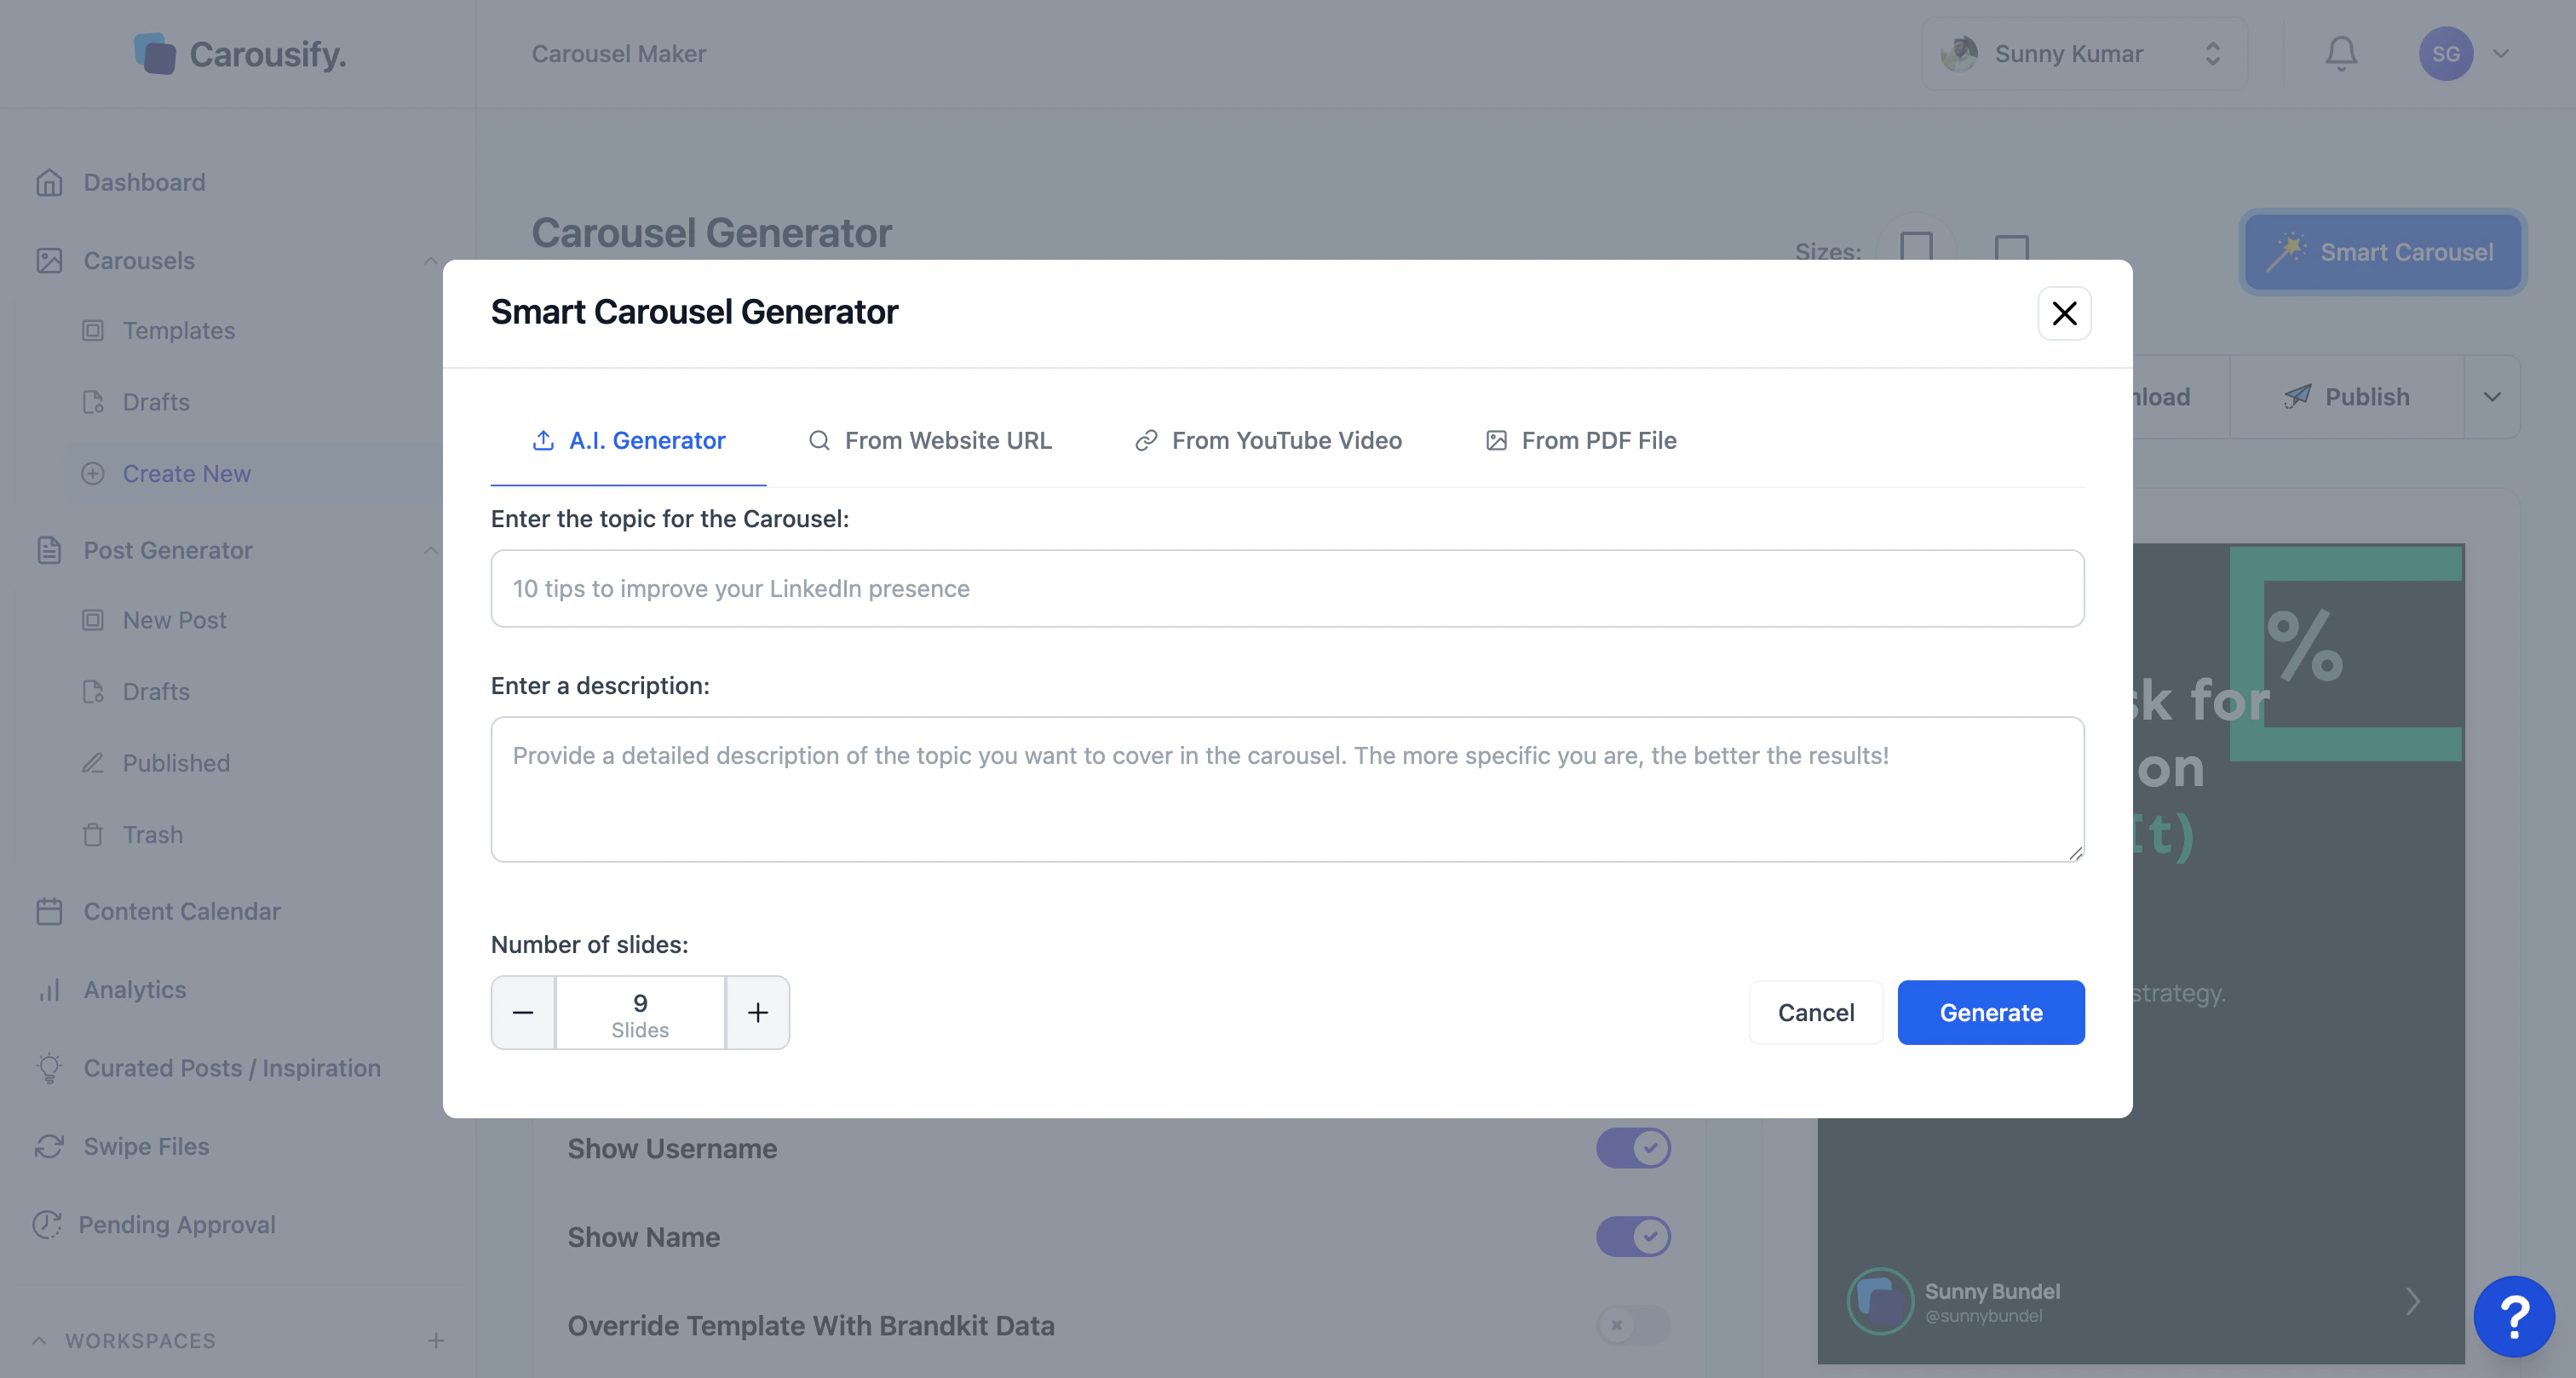
A.I. Generator
Describe the topic. AI writes the copy for each slide based on your description.
From Website URL
Paste a blog post or article URL. AI summarizes it into slide-by-slide copy.
From YouTube Video
Paste a YouTube link. AI pulls the transcript and turns it into slide copy.
From PDF File
Upload a PDF — research paper, ebook, report — and get a slide-by-slide rewrite.
1
Pick a mode
Switch tabs to A.I. Generator, From Website URL, From YouTube Video, or From PDF File.
2
Provide the source
- A.I. Generator — type a topic (e.g. 10 tips to improve your LinkedIn presence) and a short description. The more specific the description, the closer the result lands to what you want.
- From Website URL — paste the article URL.
- From YouTube Video — paste the video URL.
- From PDF File — upload a PDF.
3
Choose slide count
Use the − / + controls under Number of slides to set how many slides the AI should produce. Default is 9.
4
Generate
Click Generate. AI rewrites the text on your existing slides — same layout, same design, new copy. The slide count picker controls how many slides the rewrite spans (matching, expanding, or condensing your base design).
Build from a blank canvas
If you’d rather design slide by slide, ignore Smart Carousel and work directly in the Content tab.Add text
Three text styles are pre-set — heading, subheading, and body — so they pick up your Brand Kit’s typography automatically.
Click any text element to edit it inline. Highlight a section to change its color or weight without affecting the rest of the slide.
Add an image
The upload zone in the Content tab accepts:- Drag and drop files from Finder/Explorer.
- Paste images directly from the clipboard (
⌘ V). - Browse — click the zone to pick from your computer.
Add shapes, icons, and elements
Click Add Elements to open the elements library — shapes, icons, decorative graphics, and accent pieces. Drop one onto the canvas and resize/recolor it like any other layer.Edit a selected element
Click any element on a slide — text, image, or shape — and the Content panel switches to its settings. This is where you fine-tune everything about that one layer.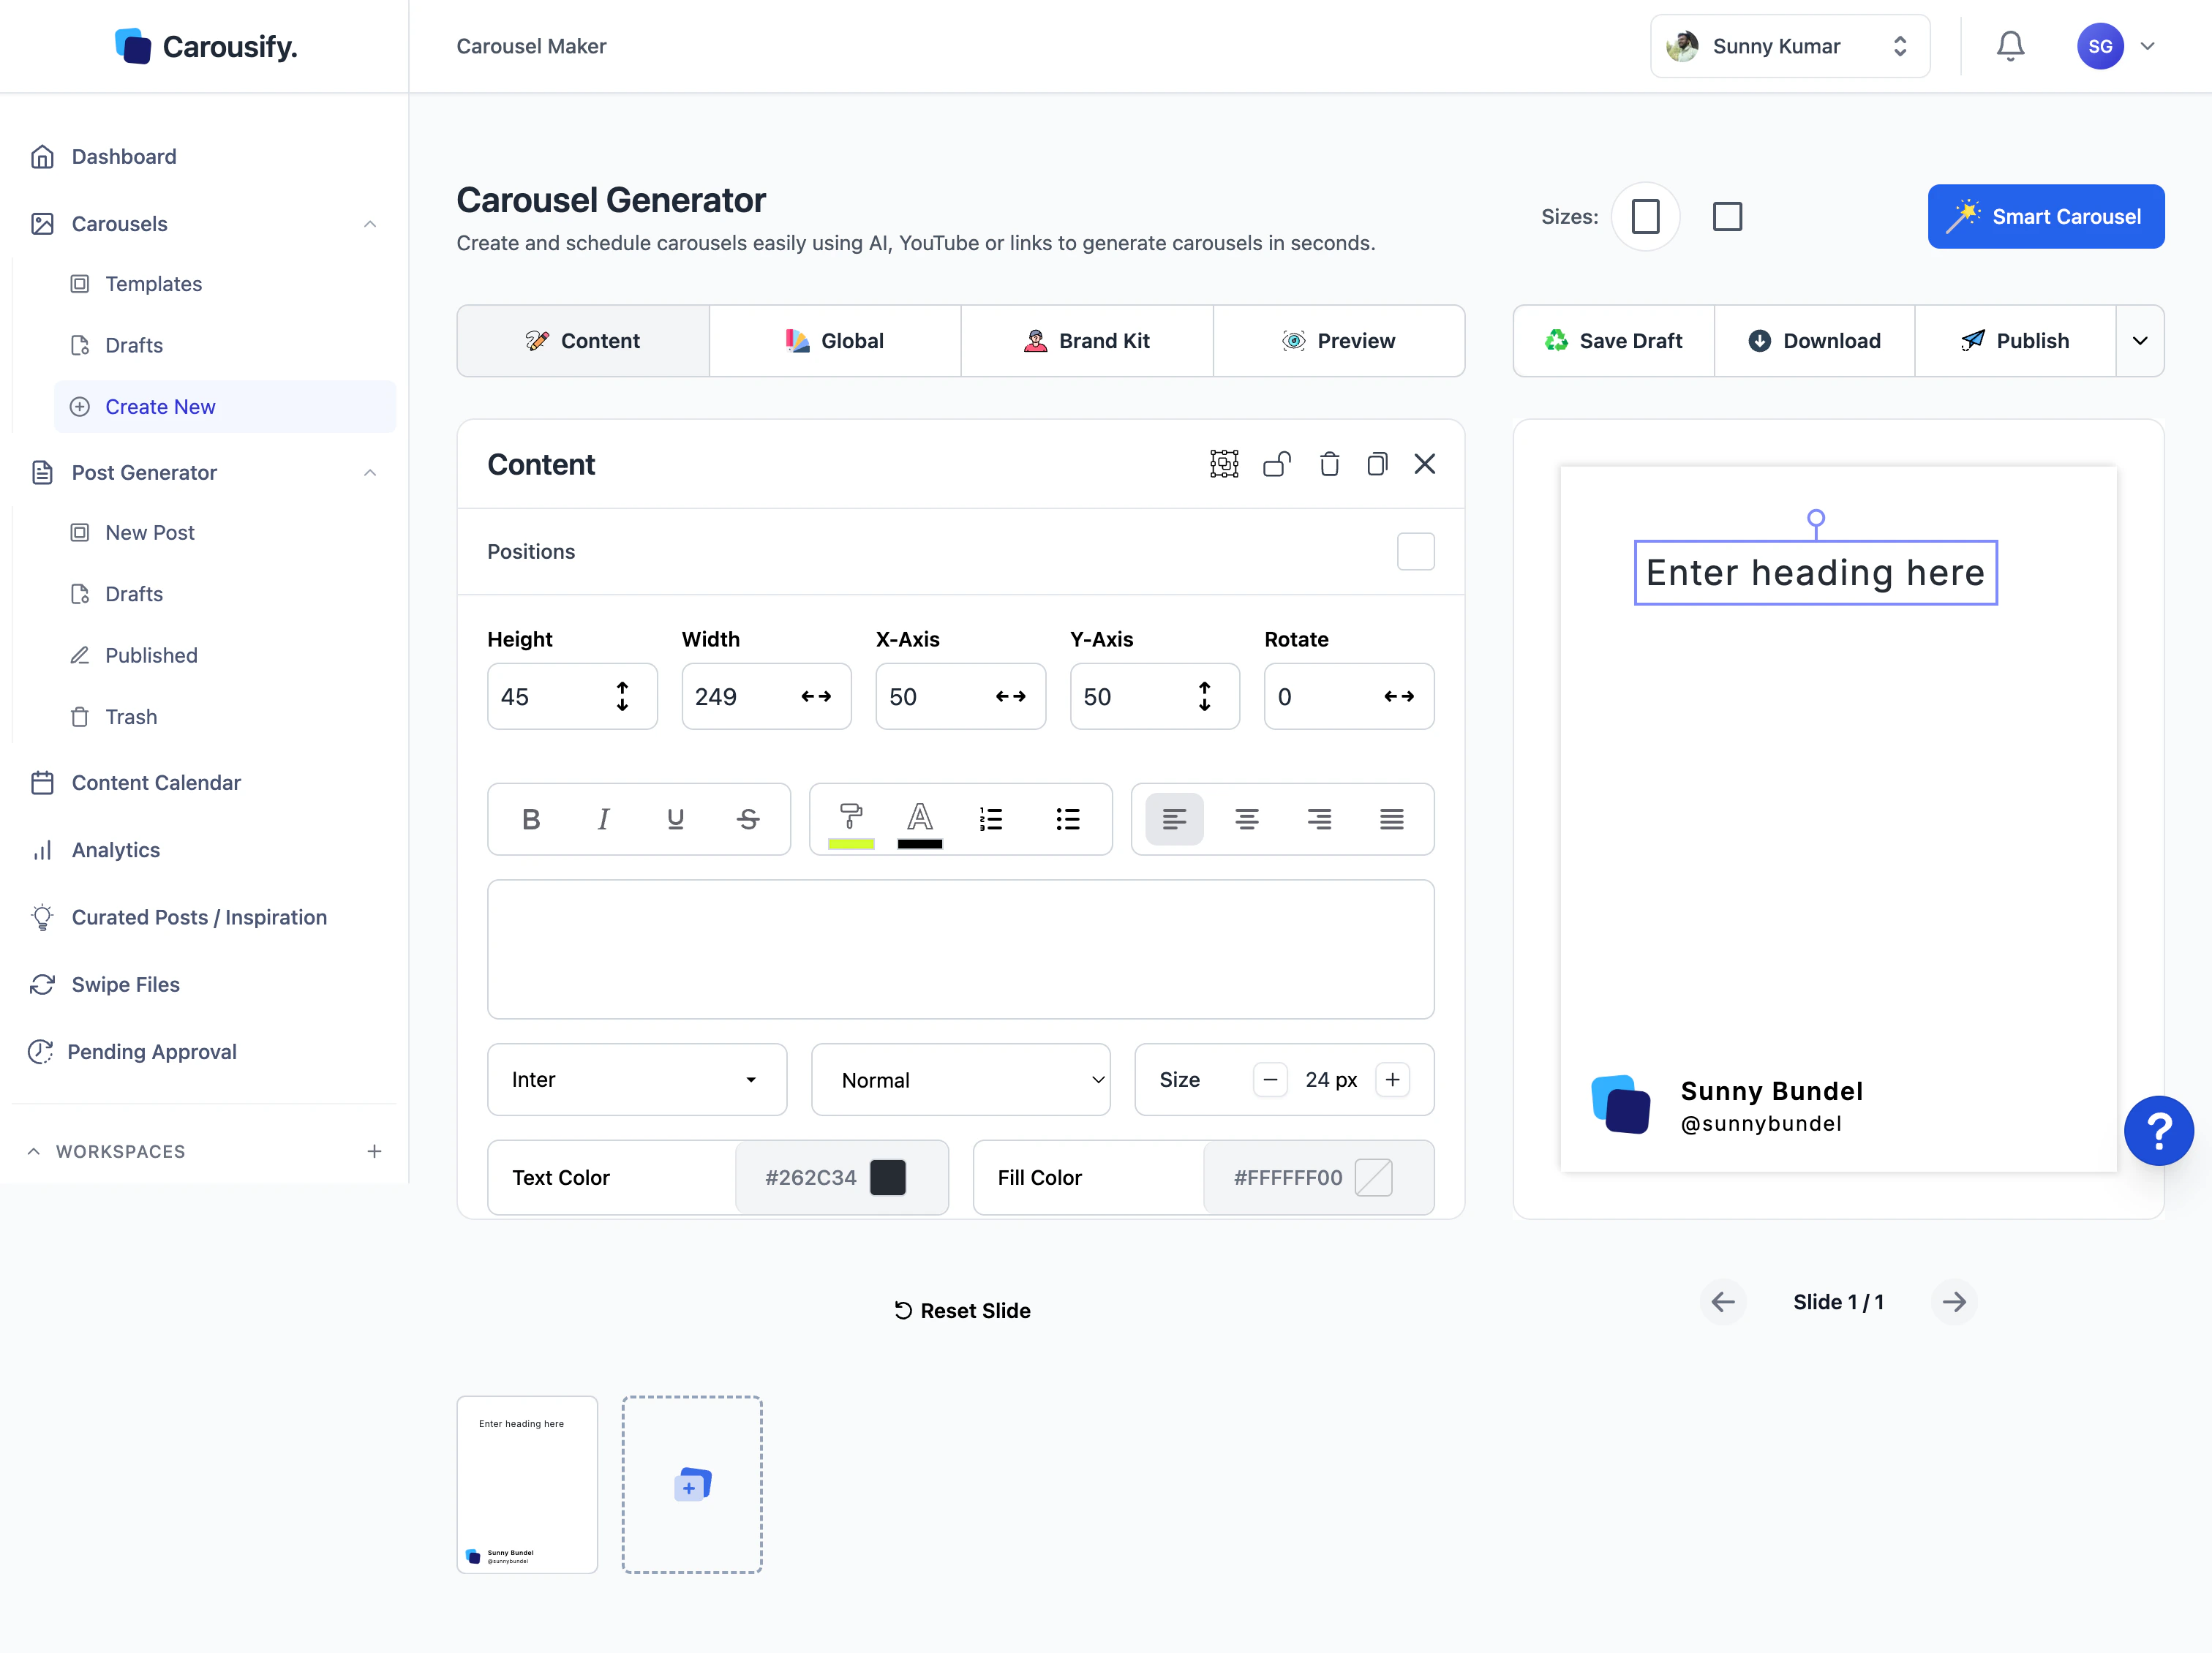
Use Esc to deselect and return to the default Content tab.
Manage slides
The slide tray below the canvas shows every slide in the deck.- Reorder — drag and drop to change slide order.
- Add a new slide — duplicate an existing one (
⌘ C/⌘ Von a slide) or scroll to the end of the tray for the + button. - Reset Slide — undoes changes on the current slide and reverts it to its starting state.
- Slide N / M — current slide indicator with Previous / Next buttons.
Set deck-wide styles (Global tab)
The Global tab is for changes that should apply to every slide at once — no need to update each slide individually.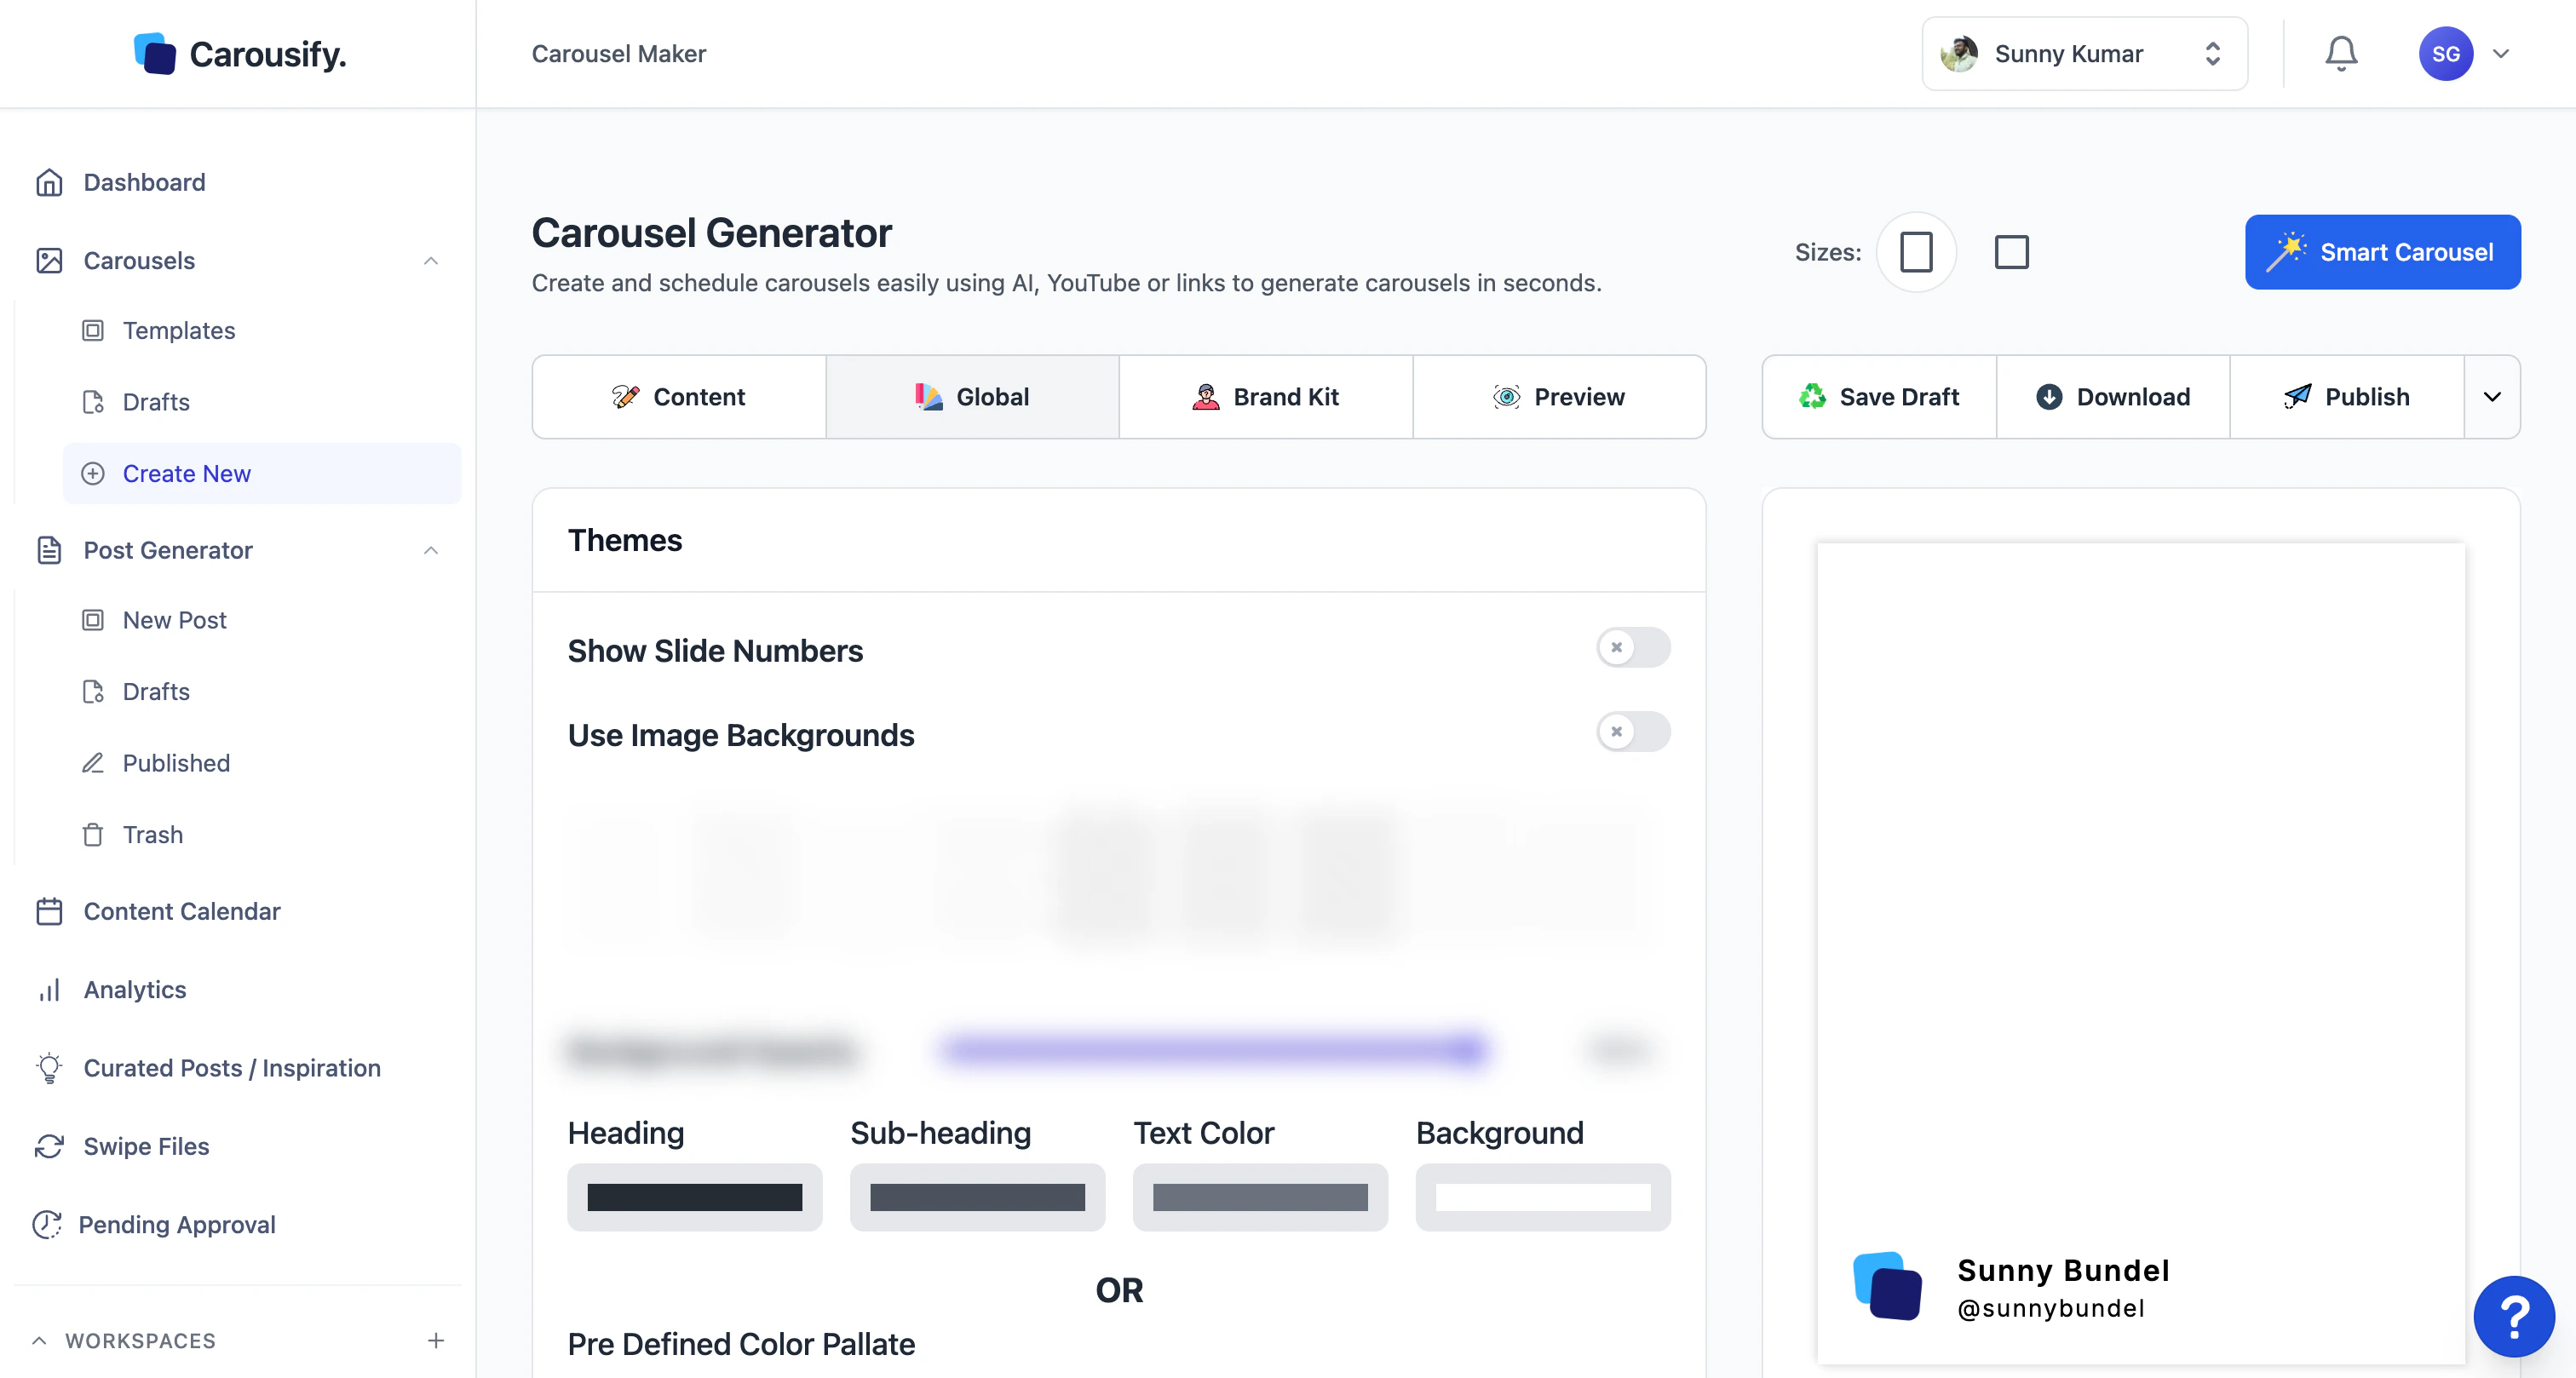
- Themes — pick from a grid of pre-built theme presets. One click swaps colors and typography across the whole deck.
- Show Slide Numbers — toggle slide numbers on/off across the deck.
- Use Image Backgrounds — turn image backgrounds on, then upload an image and adjust Background Opacity to set how strongly it shows behind text.
- Heading / Sub-heading / Text Color / Background — color pickers that apply to every slide at once. Use the Pre Defined Color Pallate below if you want a curated combination.
Apply your Brand Kit
Open the Brand Kit tab to apply your saved logo, name, fonts, and colors to the whole deck in one click. Toggle Override Template With Brandkit Data if you want the kit’s typography and background to replace whatever the slides started with.Brand Kit setup
Configure your logo, fonts, and colors so every deck picks them up automatically.
Preview before you ship
Click the Preview tab to see exactly how the deck will render on LinkedIn — same aspect ratio, same swipe behavior — before you export.When you’re done
You have four options for getting the deck out of the editor:Export and download
Walk through PDF/Image exports and the publish-to-LinkedIn flow.
What’s next
Templates
Skip the blank canvas next time and start from a pre-designed deck.
Brand Kit
Save your colors, fonts, and logos for one-click brand consistency.
Export and download
Get a finished deck out of Carousify as PDF, images, or a LinkedIn post.
Schedule a post
Pick the LinkedIn account and time when the deck should go live.