> ## Documentation Index
> Fetch the complete documentation index at: https://docs.carousify.com/llms.txt
> Use this file to discover all available pages before exploring further.
# Roles and permissions
> Built-in roles, the approval gate, and how to build custom roles for your workspace.
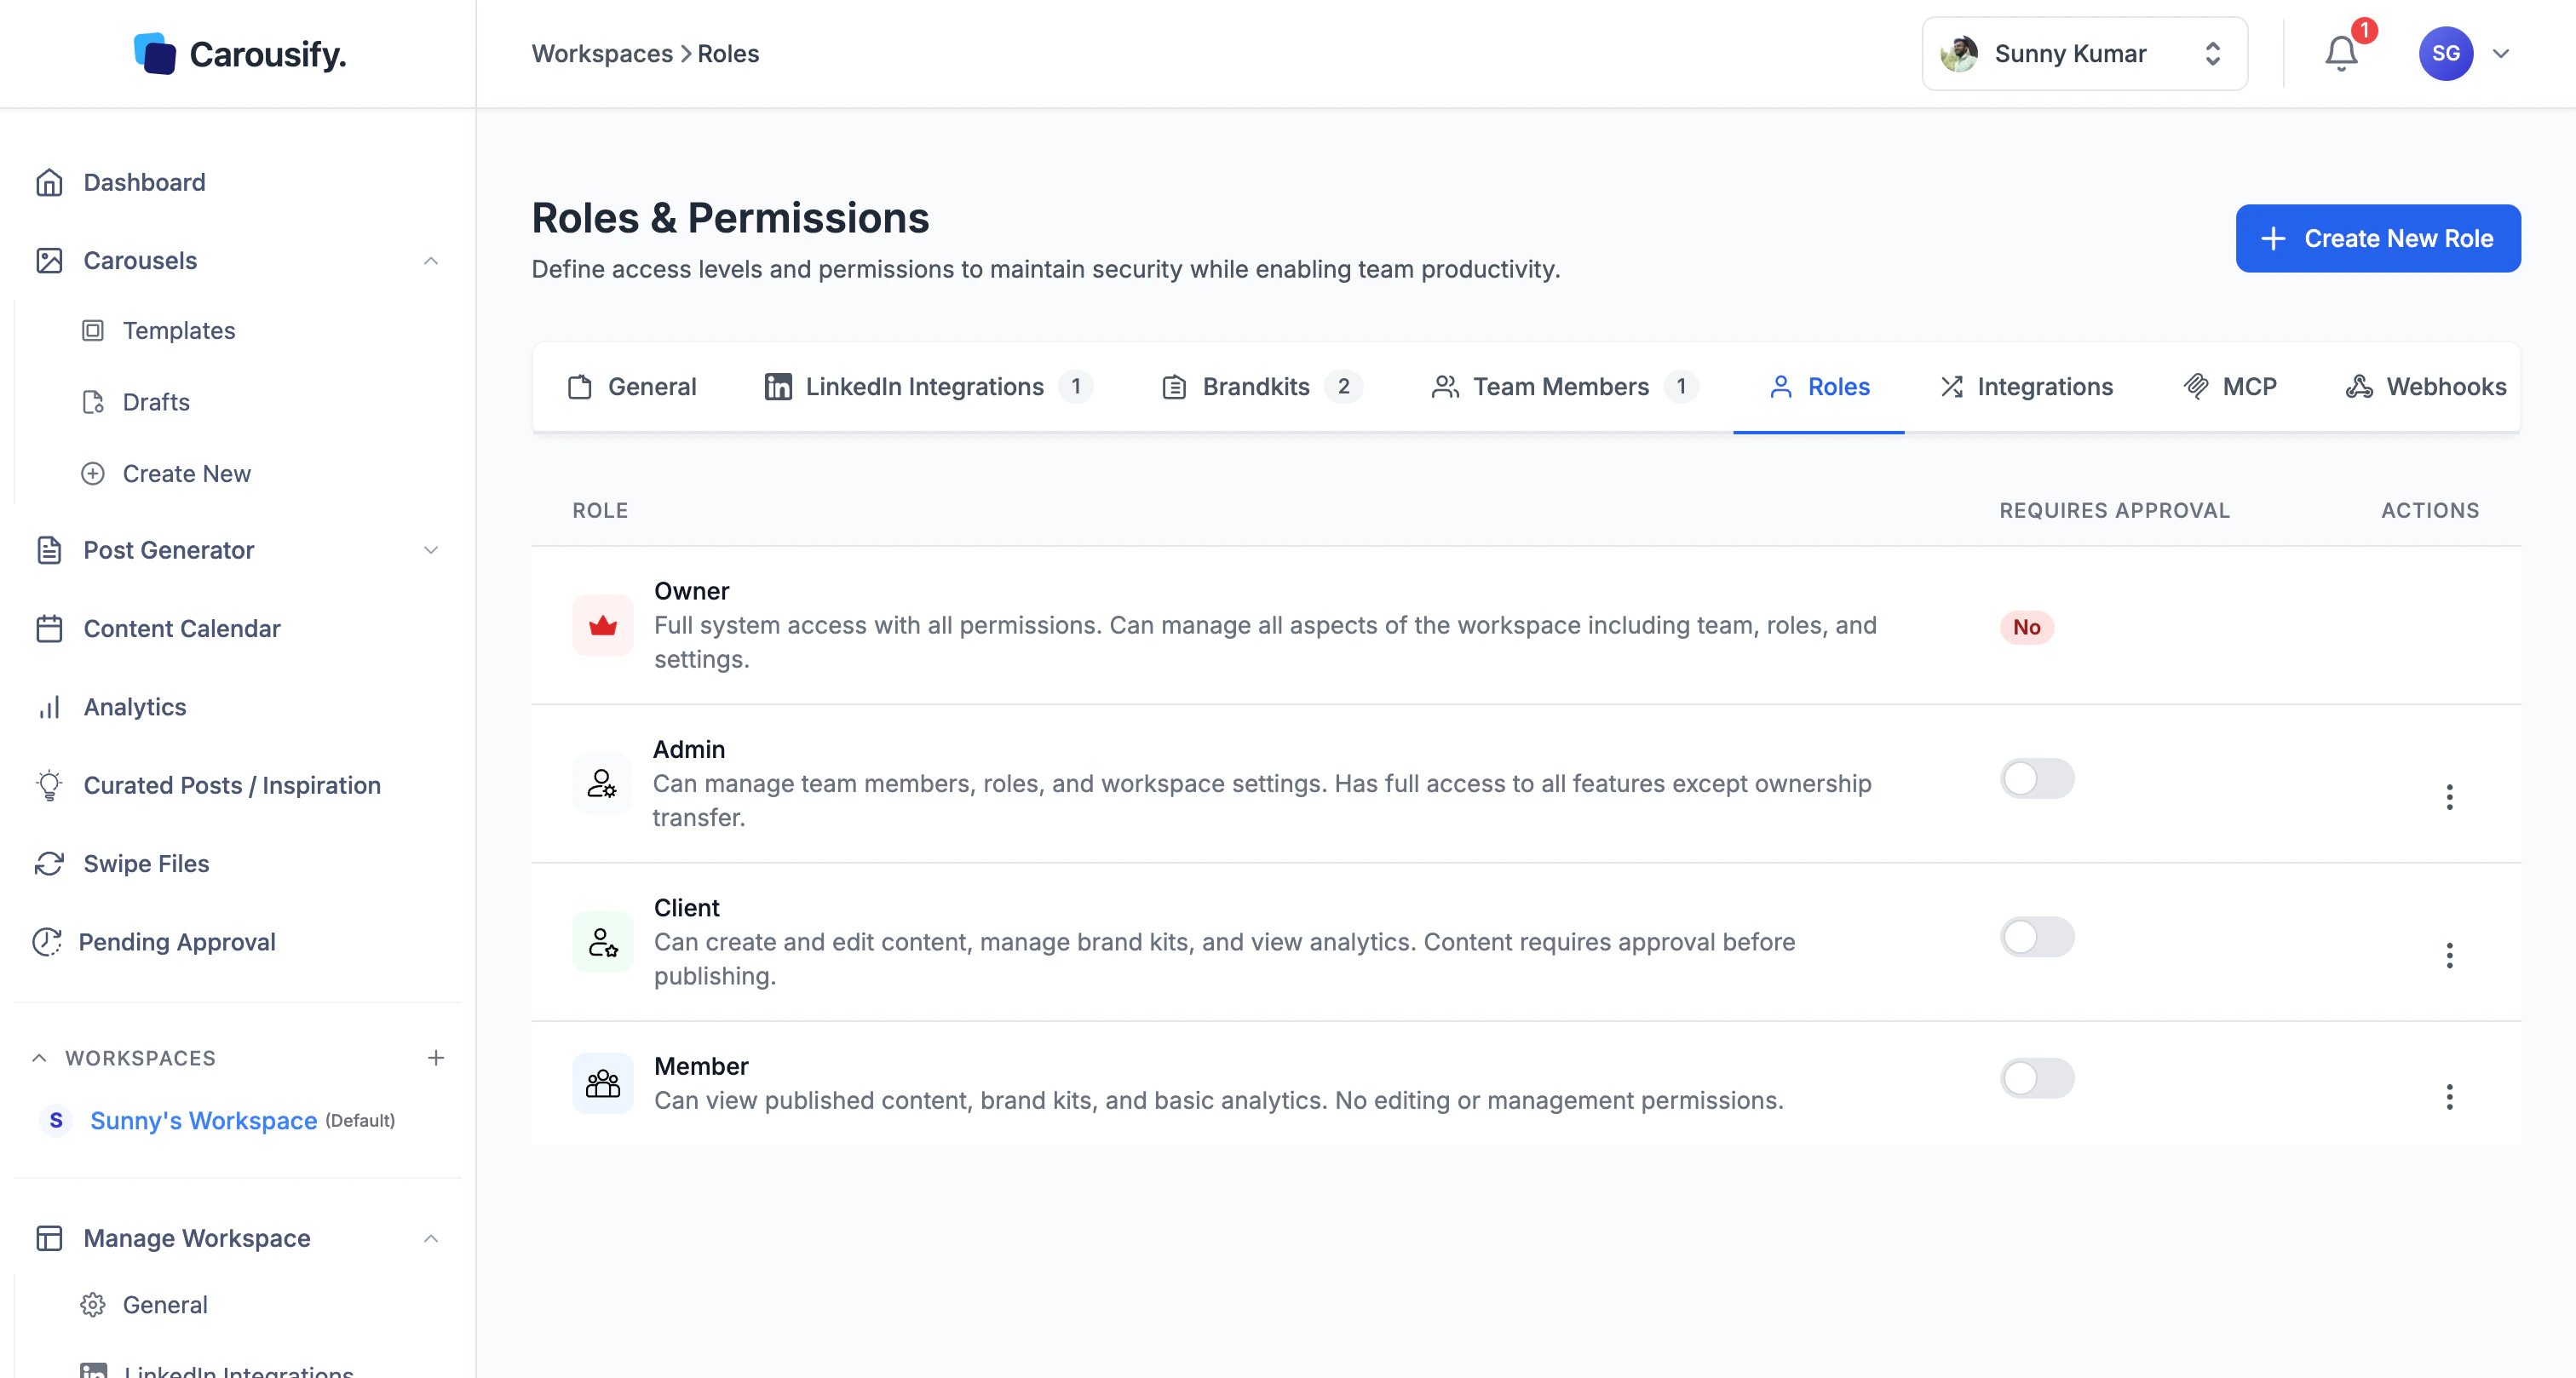
Every member of a workspace acts under a **role** — a named bundle of permissions. Carousify ships with four built-in roles and lets you create your own with granular permission toggles for teams that need something tighter or looser.
Open **Manage Workspace › Roles** to see them.
 ## Built-in roles
| Role | What they can do |
| ---------- | ------------------------------------------------------------------------------------------------------------------------------------------------------------ |
| **Owner** | Full system access. Manages team, roles, billing, and workspace settings. Created automatically with the workspace and can't be removed. |
| **Admin** | Everything except ownership transfer — manages team, roles, integrations, brand kits, and content. |
| **Member** | Creates and edits content, manages brand kits, views analytics. The default for writers, designers, and editors. |
| **Client** | View-only — sees published content, brand kits, and basic analytics. Can't create or edit anything. The right role for the brand owner you're producing for. |
## The approval gate
Each role has a **Requires Approval** toggle on the roles table. Turn it on and any post a member of that role schedules or publishes lands in **Pending Approval** instead of going live — an Admin or Owner has to sign off first.
This is how Carousify's [approval workflow](/workspaces/approval) is wired. Requires Approval is **off** for every role by default — turn it on for the roles you want to gate (typically **Member**, so writers ship to a queue an Admin signs off on). **Client** is view-only, so the toggle has no effect there.
Toggle it from the roles table any time. The change applies to *future* posts — anything already scheduled keeps its existing approval state.
## Create a custom role
If the four built-ins don't fit, click **Create New Role** in the top right.
## Built-in roles
| Role | What they can do |
| ---------- | ------------------------------------------------------------------------------------------------------------------------------------------------------------ |
| **Owner** | Full system access. Manages team, roles, billing, and workspace settings. Created automatically with the workspace and can't be removed. |
| **Admin** | Everything except ownership transfer — manages team, roles, integrations, brand kits, and content. |
| **Member** | Creates and edits content, manages brand kits, views analytics. The default for writers, designers, and editors. |
| **Client** | View-only — sees published content, brand kits, and basic analytics. Can't create or edit anything. The right role for the brand owner you're producing for. |
## The approval gate
Each role has a **Requires Approval** toggle on the roles table. Turn it on and any post a member of that role schedules or publishes lands in **Pending Approval** instead of going live — an Admin or Owner has to sign off first.
This is how Carousify's [approval workflow](/workspaces/approval) is wired. Requires Approval is **off** for every role by default — turn it on for the roles you want to gate (typically **Member**, so writers ship to a queue an Admin signs off on). **Client** is view-only, so the toggle has no effect there.
Toggle it from the roles table any time. The change applies to *future* posts — anything already scheduled keeps its existing approval state.
## Create a custom role
If the four built-ins don't fit, click **Create New Role** in the top right.
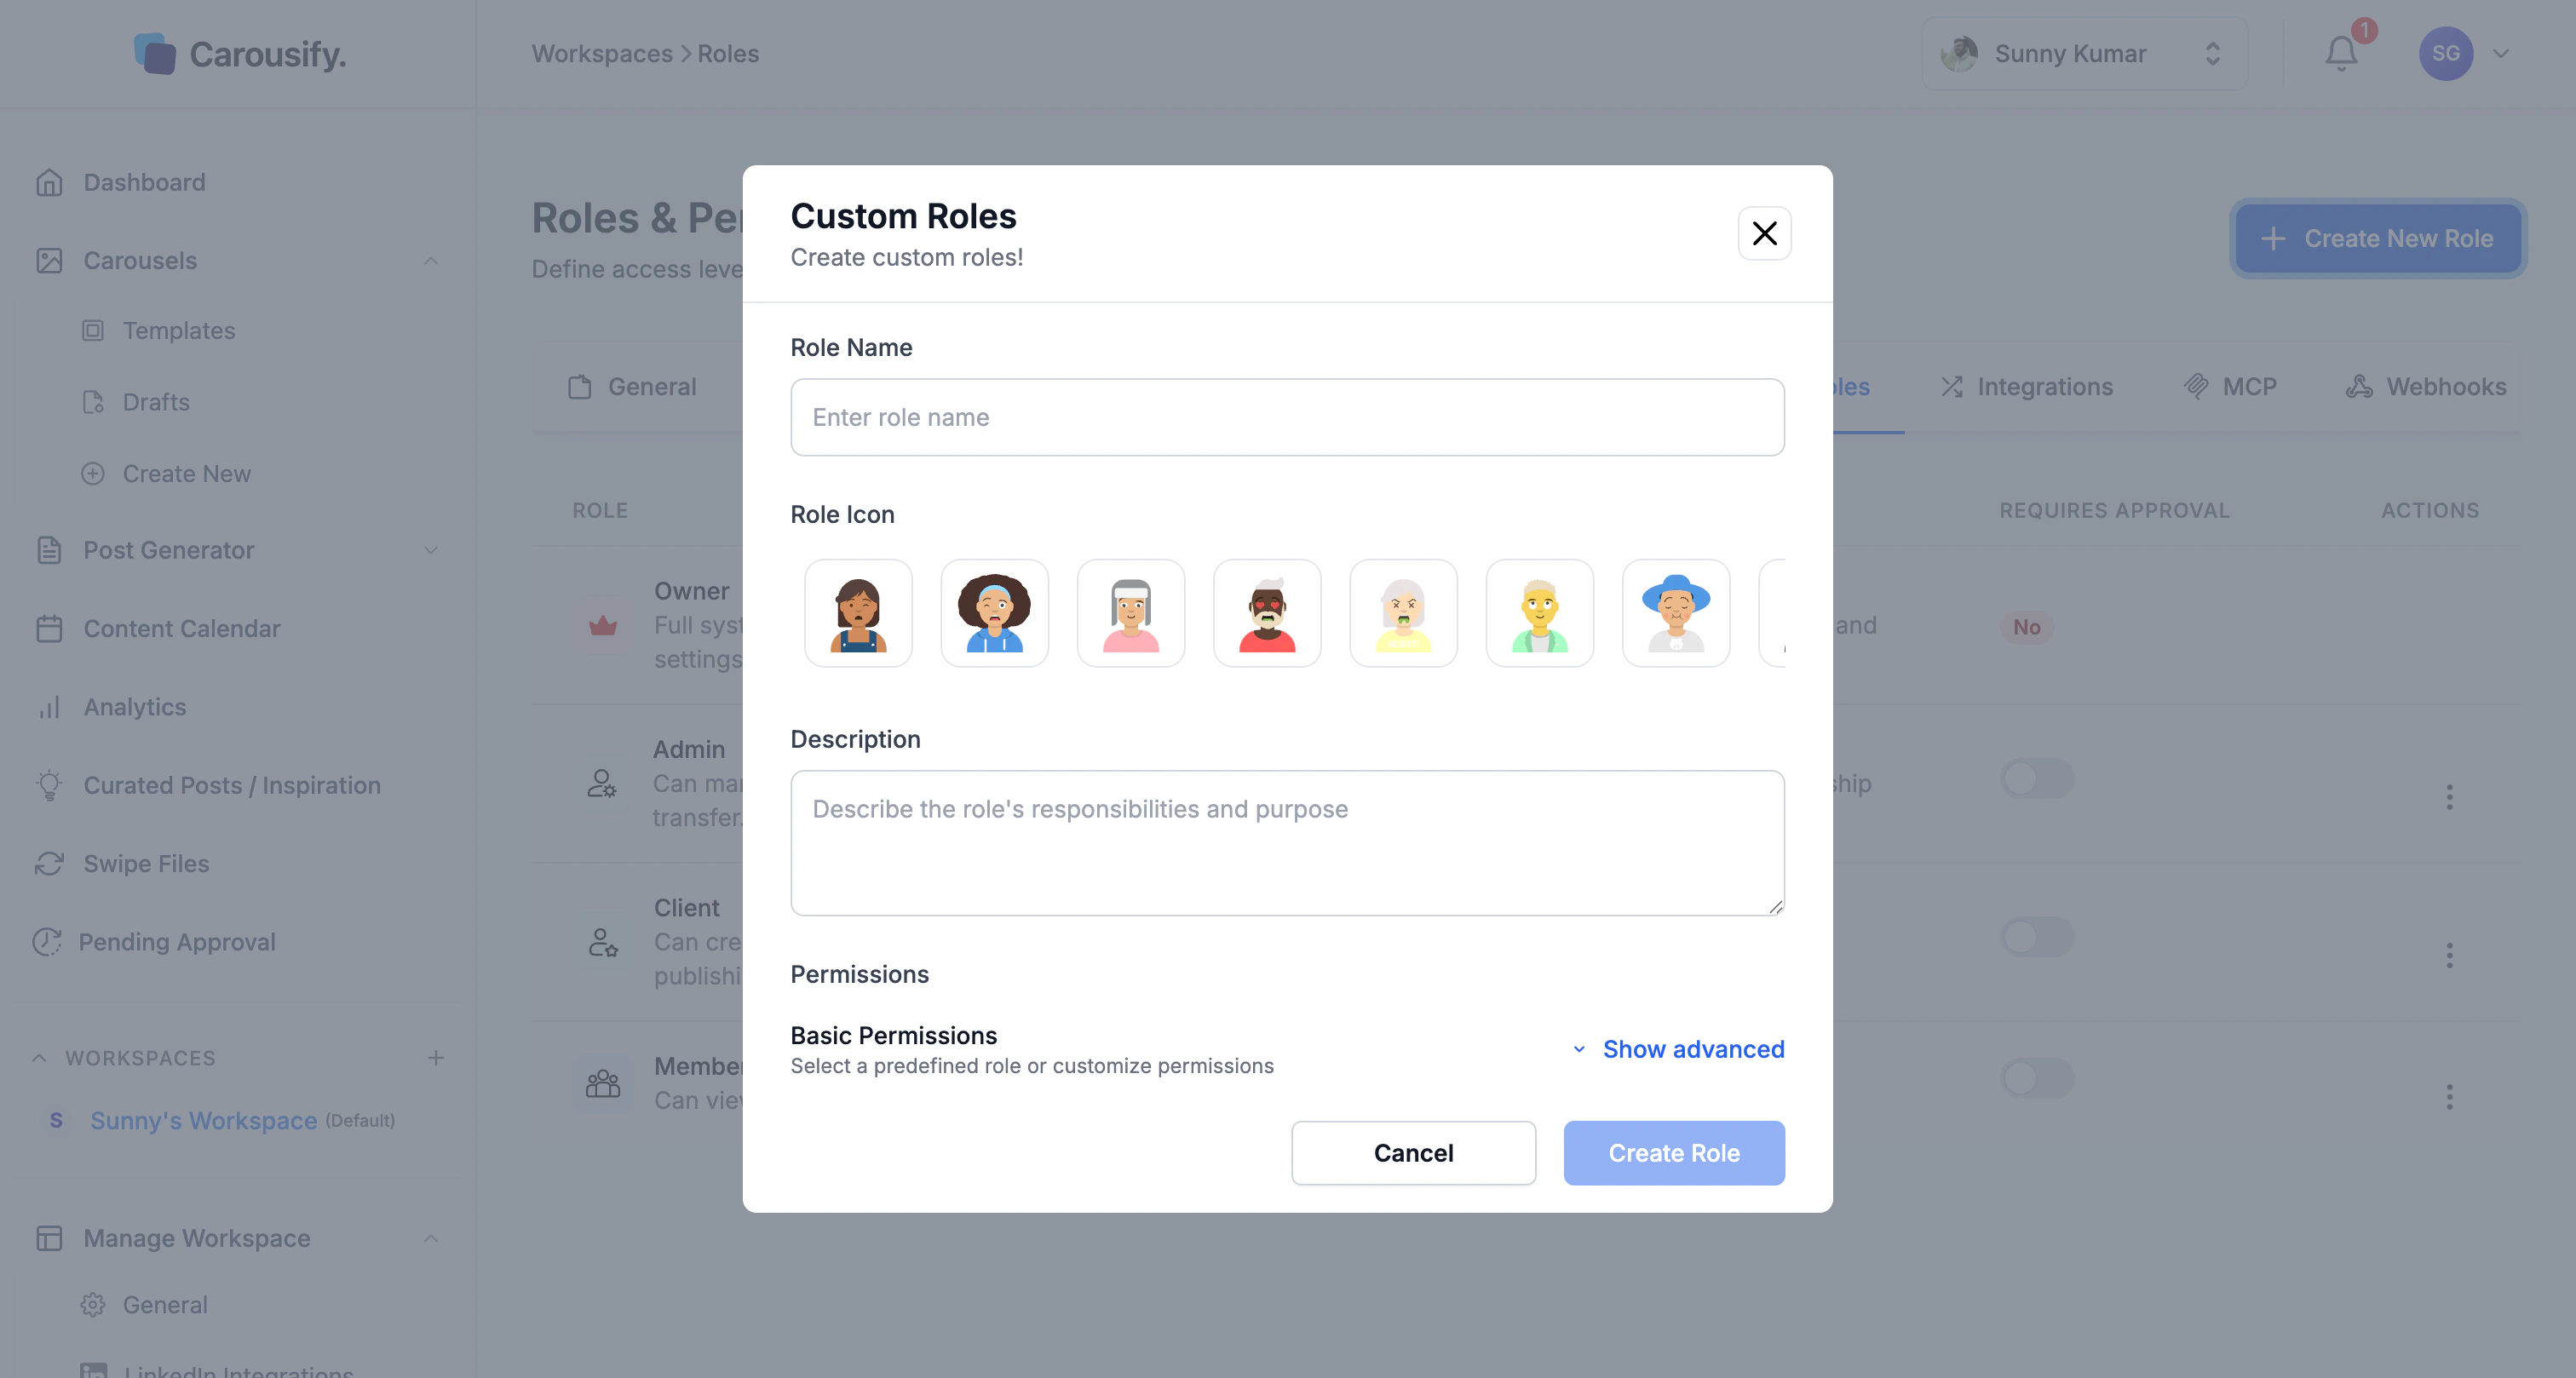 Pick a name your team will recognize — *Editor*, *Junior Writer*, *Approver*.
Choose from admin, editor, approver, viewer, analyst, manager, contributor, or guest. Purely cosmetic — shows up next to the role on the team list.
One-liner so future Admins know what the role is for.
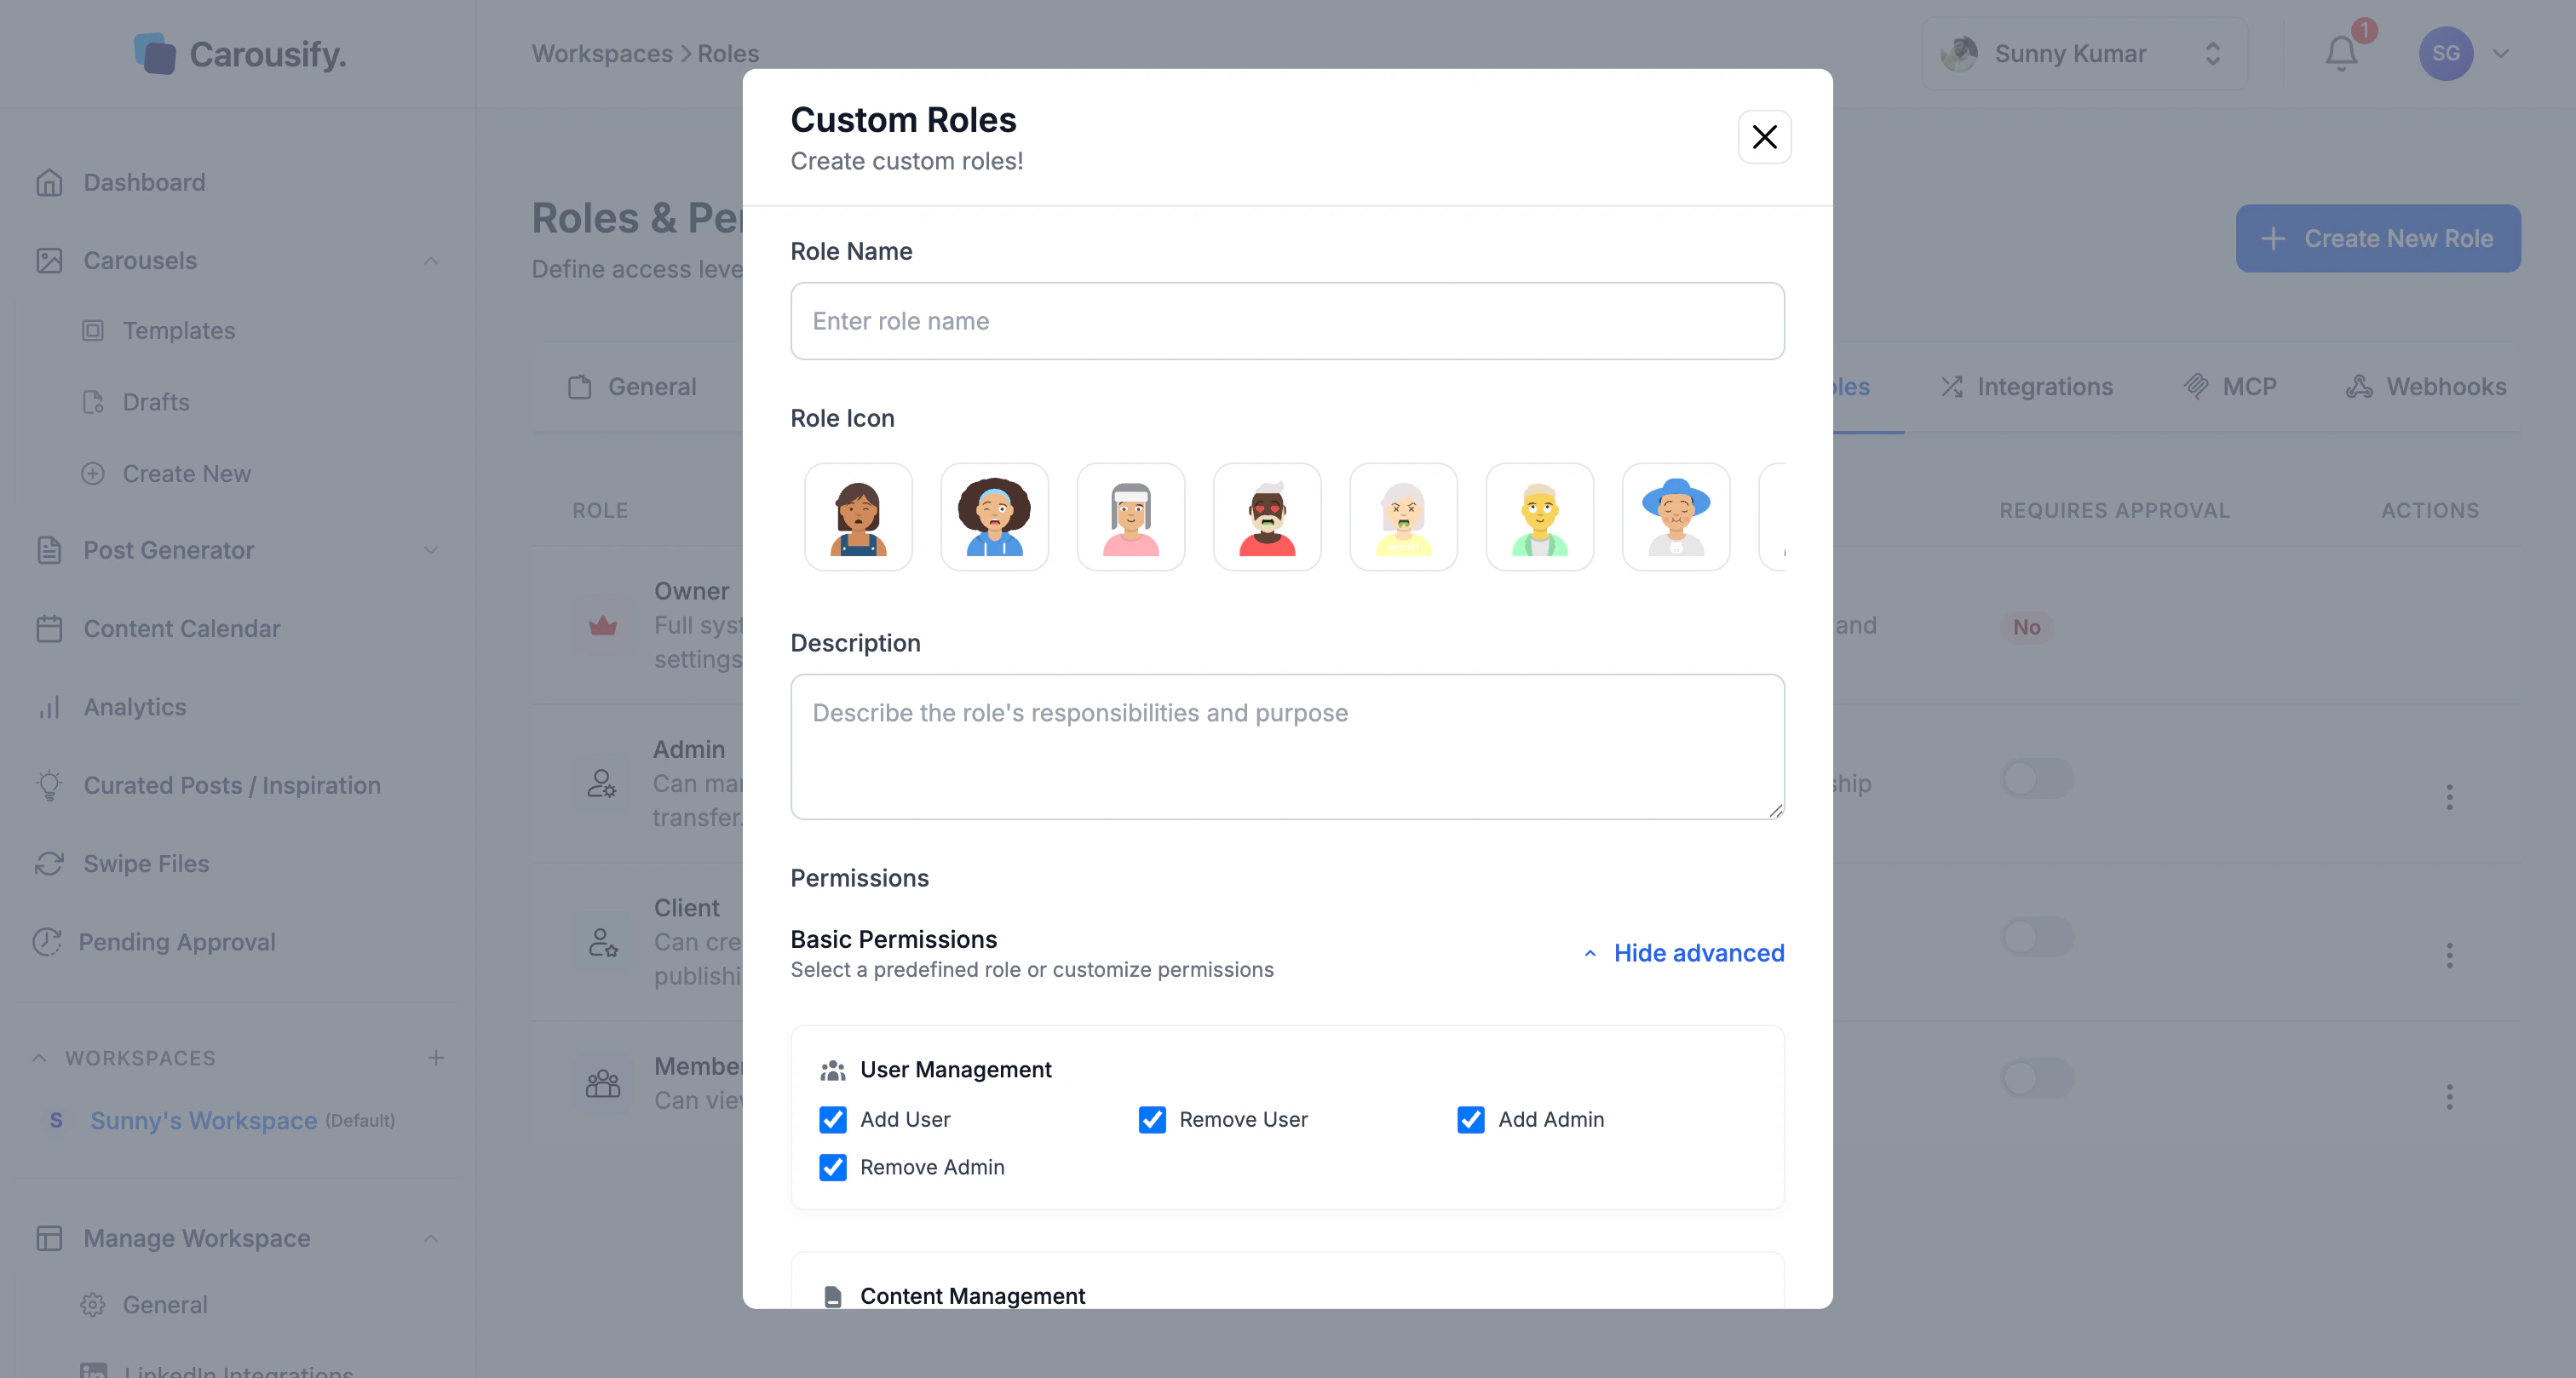
The dialog opens with a sensible default set. Click **Show advanced** to see every individual permission toggle.
### The permission checklist
**Show advanced** opens five permission groups:
Pick a name your team will recognize — *Editor*, *Junior Writer*, *Approver*.
Choose from admin, editor, approver, viewer, analyst, manager, contributor, or guest. Purely cosmetic — shows up next to the role on the team list.
One-liner so future Admins know what the role is for.
The dialog opens with a sensible default set. Click **Show advanced** to see every individual permission toggle.
### The permission checklist
**Show advanced** opens five permission groups:
 | Group | Permissions |
| ---------------------- | ---------------------------------------------------------------------------------------------------------------- |
| **User Management** | Add User, Remove User, Add Admin, Remove Admin |
| **Content Management** | Schedule Post, Publish Post, View Scheduled Posts, View Published Posts, Approve Posts, Edit Drafts, Add Clients |
| **Integrations** | Add LinkedIn, Remove LinkedIn |
| **Templates** | Create Template, Edit Template, Delete Template |
| **Brand & Workspace** | Modify Workspace, Delete Workspace, Add Brand Kit, Edit Brand Kit |
Use the **Quick select** buttons at the bottom to **Select All**, **Select None**, or reset to **Default**.
The fastest way to build a custom role: pick the closest built-in as a mental starting point, hit **Default** to load it, then tick or untick the few permissions that differ. Naming a role *Editor without delete* is faster than re-checking 20 boxes.
Click **Create Role** when you're done. The role appears in the table immediately and shows up in the **Select Role** dropdown when you [invite a new member](/workspaces/invite-team).
## Edit or delete a role
Each role row has an **Actions** menu. Built-in roles can have their **Requires Approval** toggle changed but their permission set is fixed. Custom roles can be edited, duplicated, or deleted from the same menu.
Deleting a custom role doesn't remove the people on it — they fall back to **Member** until you re-assign them. Re-assign first if you don't want anyone temporarily losing access.
## What's next
Send invites and assign one of these roles.
How Requires Approval routes posts through Pending Approval.
Run a workspace for a client without sharing logins.
Where roles fit alongside brand kits, integrations, and members.
| Group | Permissions |
| ---------------------- | ---------------------------------------------------------------------------------------------------------------- |
| **User Management** | Add User, Remove User, Add Admin, Remove Admin |
| **Content Management** | Schedule Post, Publish Post, View Scheduled Posts, View Published Posts, Approve Posts, Edit Drafts, Add Clients |
| **Integrations** | Add LinkedIn, Remove LinkedIn |
| **Templates** | Create Template, Edit Template, Delete Template |
| **Brand & Workspace** | Modify Workspace, Delete Workspace, Add Brand Kit, Edit Brand Kit |
Use the **Quick select** buttons at the bottom to **Select All**, **Select None**, or reset to **Default**.
The fastest way to build a custom role: pick the closest built-in as a mental starting point, hit **Default** to load it, then tick or untick the few permissions that differ. Naming a role *Editor without delete* is faster than re-checking 20 boxes.
Click **Create Role** when you're done. The role appears in the table immediately and shows up in the **Select Role** dropdown when you [invite a new member](/workspaces/invite-team).
## Edit or delete a role
Each role row has an **Actions** menu. Built-in roles can have their **Requires Approval** toggle changed but their permission set is fixed. Custom roles can be edited, duplicated, or deleted from the same menu.
Deleting a custom role doesn't remove the people on it — they fall back to **Member** until you re-assign them. Re-assign first if you don't want anyone temporarily losing access.
## What's next
Send invites and assign one of these roles.
How Requires Approval routes posts through Pending Approval.
Run a workspace for a client without sharing logins.
Where roles fit alongside brand kits, integrations, and members.