> ## Documentation Index
> Fetch the complete documentation index at: https://docs.carousify.com/llms.txt
> Use this file to discover all available pages before exploring further.
# Branding
> Set the logo, favicon, name, support email, and accent color your clients see across the whitelabeled app.
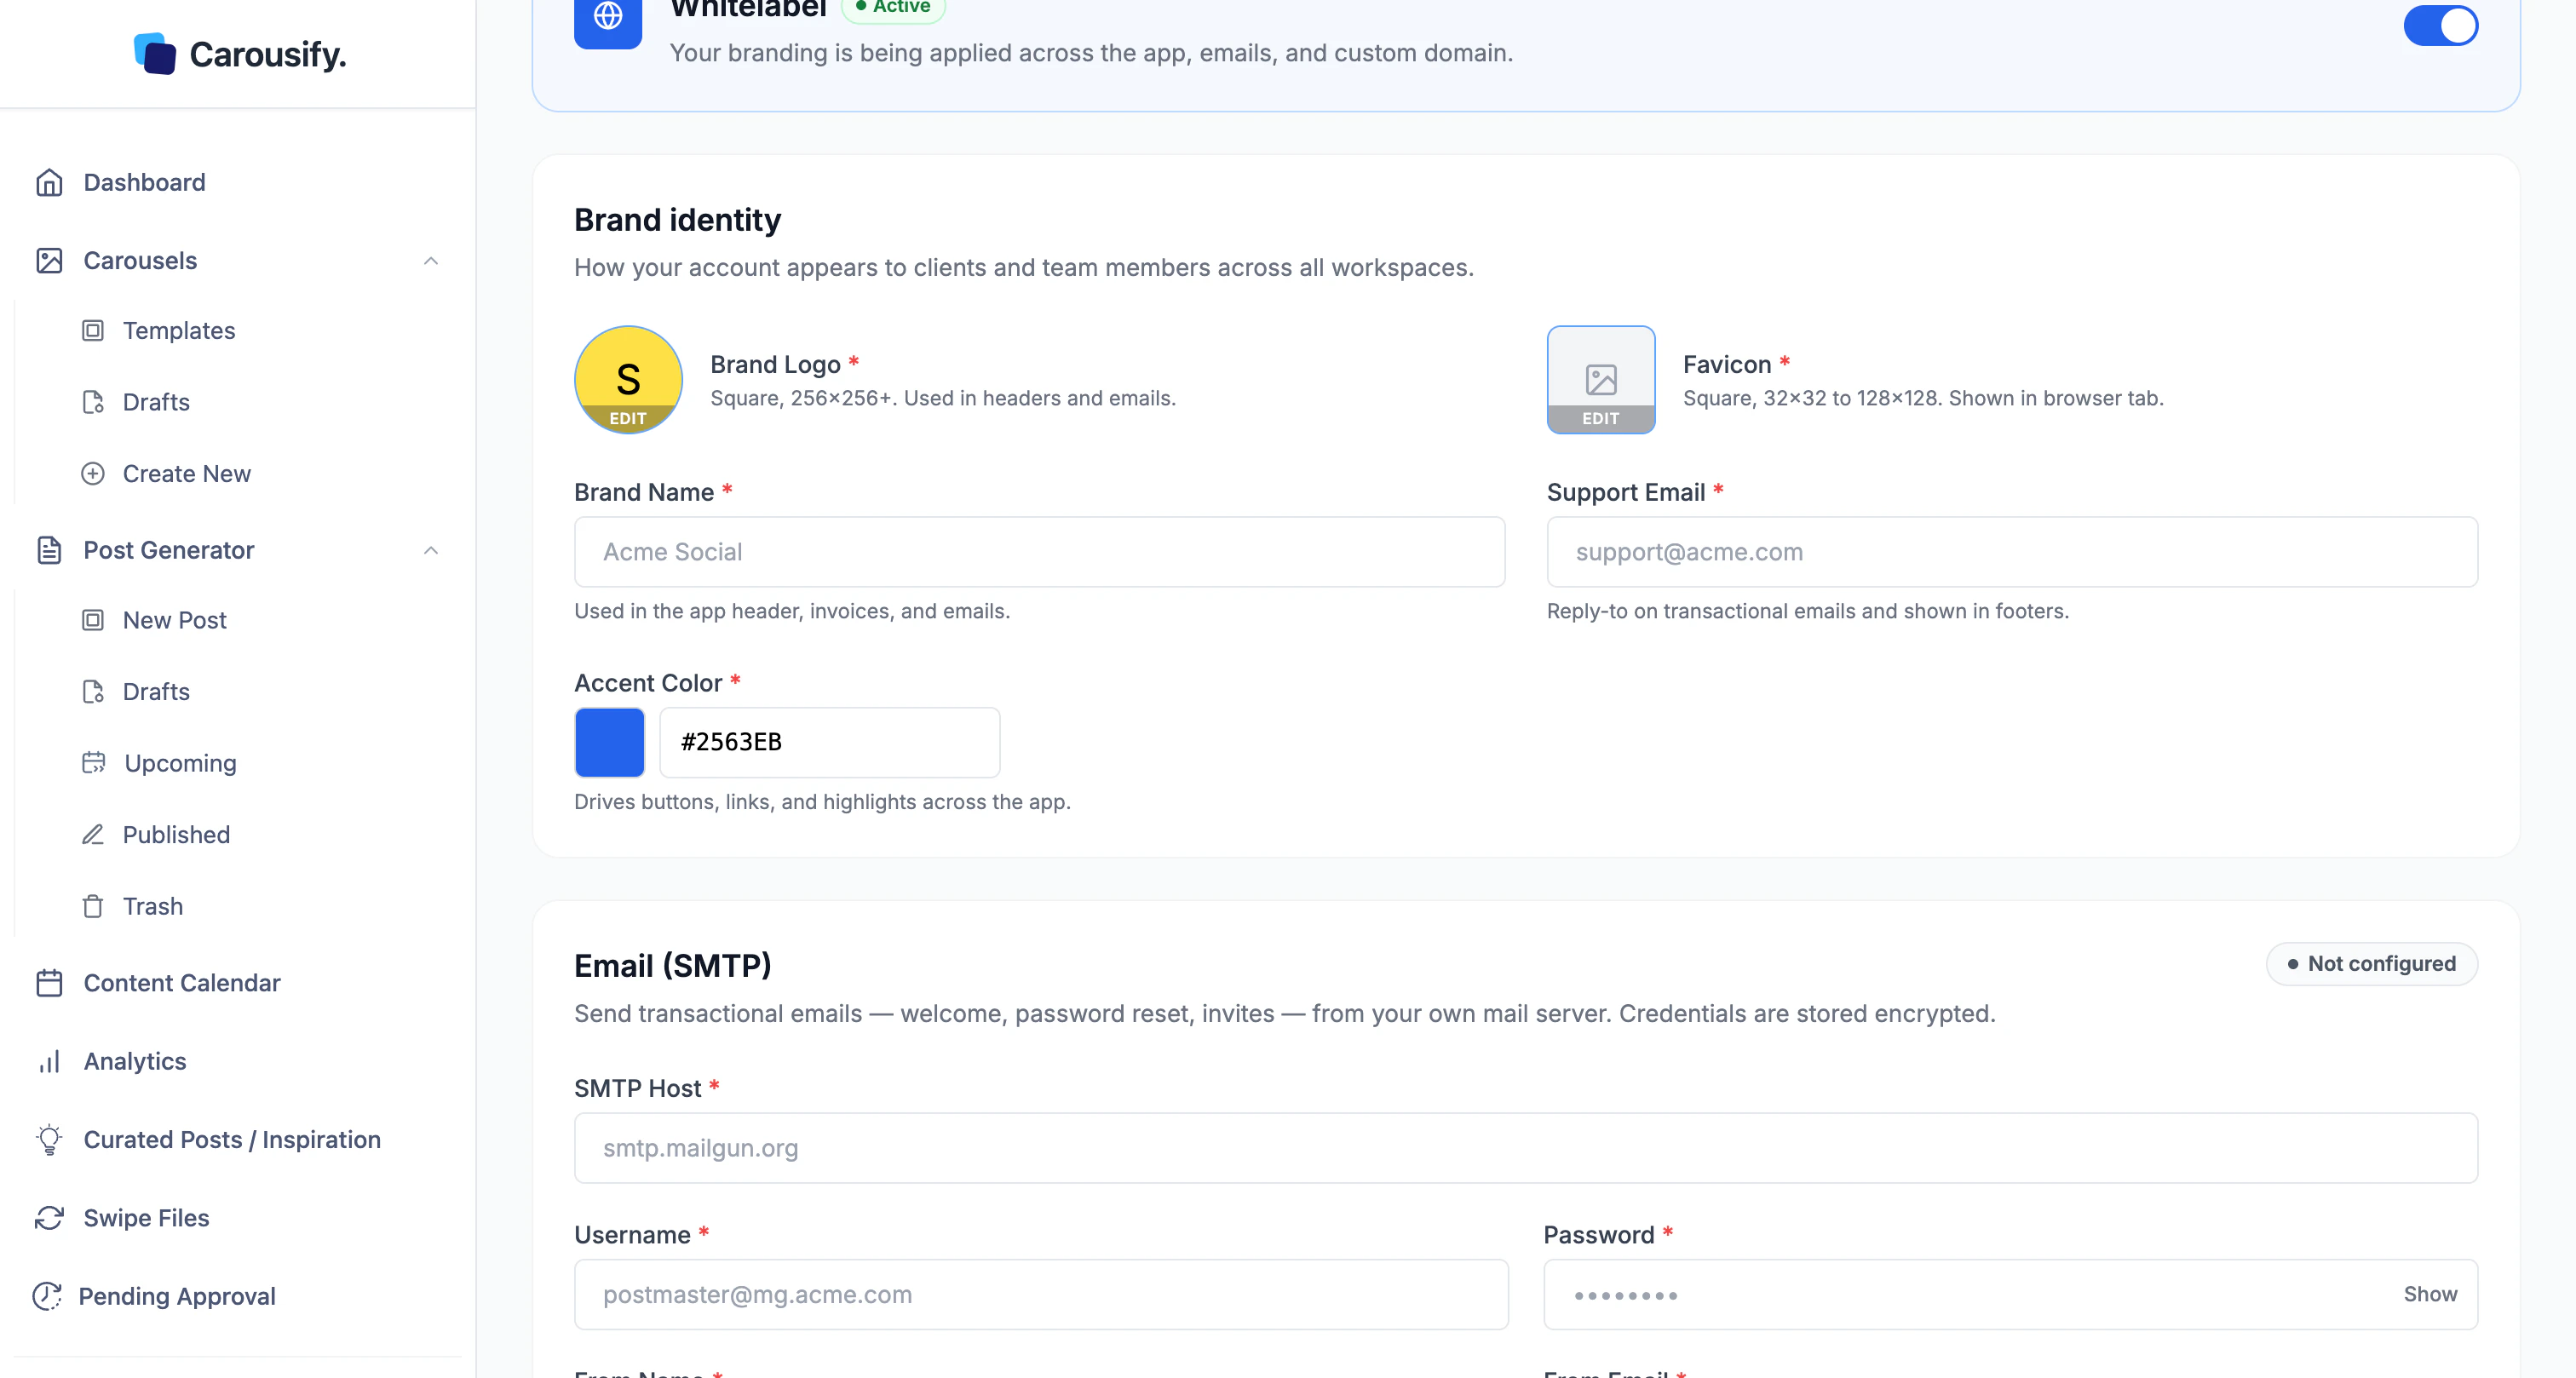
Branding is the visible layer of whitelabel — the logo in the header, the favicon in the browser tab, the product name, the support address on emails, and the accent color on key actions. Get these right and the app simply looks like yours.
It lives in the **Brand identity** section of the [Whitelabel](/whitelabel/overview) page.
Branding is part of whitelabel, an **Enterprise** feature, and applies once whitelabel is switched **Active** (see [Whitelabel overview](/whitelabel/overview)). On other plans, contact [Support](https://carousify.com/contact-us/) to enable it at an additional charge.
## Where to find it
In the left sidebar, open **Settings › Whitelabeling** and find the **Brand identity** section.
 ## The fields
Every field is required for branding to render cleanly.
| Field | What it sets |
| ----------------- | ----------------------------------------------------------------------------------- |
| **Brand Logo** | The logo in app headers and emails. Square image, **256×256 px or larger**. |
| **Favicon** | The icon in the browser tab. Square, **32×32 to 128×128 px**. |
| **Brand Name** | The product name in the app header and emails. |
| **Support Email** | Where clients and team members reach you for help. Also the reply-to on app emails. |
| **Accent Color** | The accent on key actions. |
## Set it up
Click **EDIT** on **Brand Logo** and pick a square image. Do the same for **Favicon** — a simplified mark reads better at tab size than a full logo with text.
The name shows in the header and emails. Set the support email to your own inbox — it's where clients and team members reach you for help.
Click the color picker or type your brand's hex code (e.g. `#2563EB`).
**Save Changes** is at the top and bottom of the page. Branding applies right after you save — there's nothing to wait on.
Use a logo with a transparent or clean background so it sits well on both the light app header and email templates. A busy or photo-based logo tends to look off at small sizes — a simple mark travels better.
## What your clients see
On the whitelabeled domain, the sign-in screen, app header, and emails all carry your identity. Here's the sign-in screen with a brand logo, name, and accent color applied:
## The fields
Every field is required for branding to render cleanly.
| Field | What it sets |
| ----------------- | ----------------------------------------------------------------------------------- |
| **Brand Logo** | The logo in app headers and emails. Square image, **256×256 px or larger**. |
| **Favicon** | The icon in the browser tab. Square, **32×32 to 128×128 px**. |
| **Brand Name** | The product name in the app header and emails. |
| **Support Email** | Where clients and team members reach you for help. Also the reply-to on app emails. |
| **Accent Color** | The accent on key actions. |
## Set it up
Click **EDIT** on **Brand Logo** and pick a square image. Do the same for **Favicon** — a simplified mark reads better at tab size than a full logo with text.
The name shows in the header and emails. Set the support email to your own inbox — it's where clients and team members reach you for help.
Click the color picker or type your brand's hex code (e.g. `#2563EB`).
**Save Changes** is at the top and bottom of the page. Branding applies right after you save — there's nothing to wait on.
Use a logo with a transparent or clean background so it sits well on both the light app header and email templates. A busy or photo-based logo tends to look off at small sizes — a simple mark travels better.
## What your clients see
On the whitelabeled domain, the sign-in screen, app header, and emails all carry your identity. Here's the sign-in screen with a brand logo, name, and accent color applied:
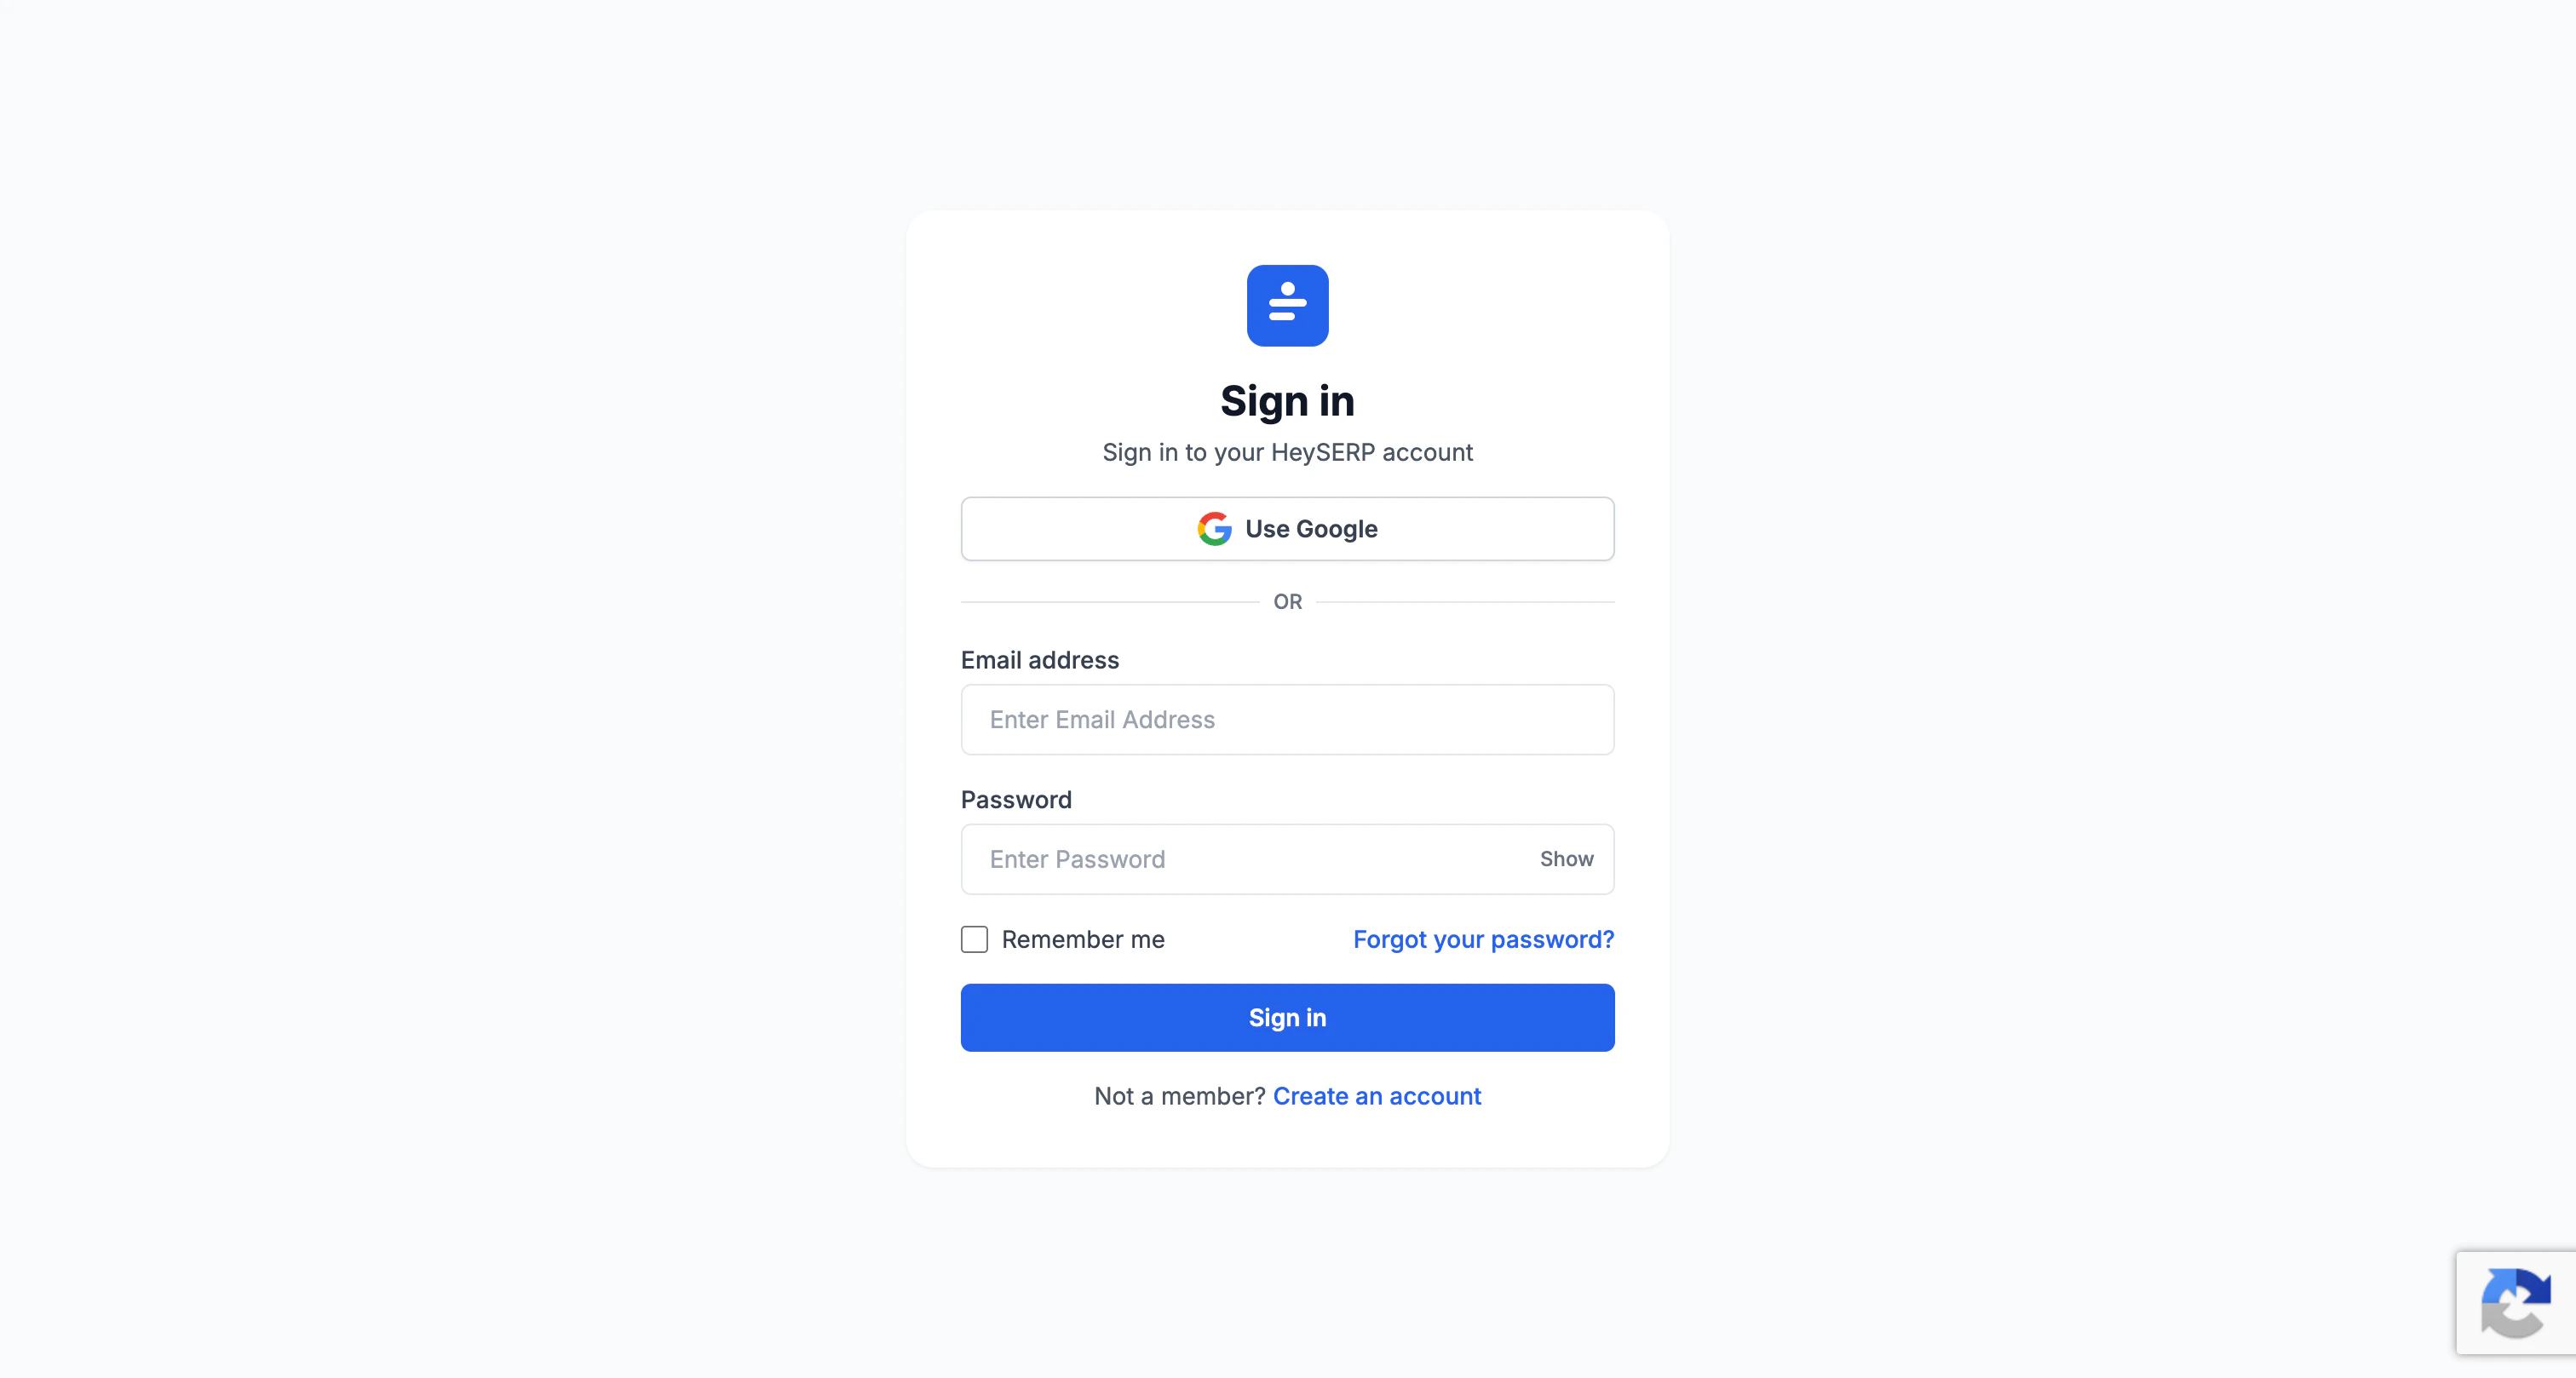 Notice the accent shows up only where it matters — the primary button and the links — while everything else stays clean and neutral.
To put this on your own URL, pair branding with a [custom domain](/whitelabel/custom-domain). To make the emails match too, set up [SMTP](/whitelabel/smtp).
## What's next
Serve the branded app from a domain you own.
Send transactional emails from your own mail server.
How branding fits with the rest of the whitelabel setup.
Run client workspaces inside your branded setup.
Notice the accent shows up only where it matters — the primary button and the links — while everything else stays clean and neutral.
To put this on your own URL, pair branding with a [custom domain](/whitelabel/custom-domain). To make the emails match too, set up [SMTP](/whitelabel/smtp).
## What's next
Serve the branded app from a domain you own.
Send transactional emails from your own mail server.
How branding fits with the rest of the whitelabel setup.
Run client workspaces inside your branded setup.