> ## Documentation Index
> Fetch the complete documentation index at: https://docs.carousify.com/llms.txt
> Use this file to discover all available pages before exploring further.
# Connect Carousify to Claude
> Add Carousify as a custom connector in Claude — or wire it into Claude Code — and draft, schedule, or check LinkedIn posts straight from a chat.
Claude supports remote MCP servers everywhere it runs — the web app, the desktop app, and the [Claude Code](https://claude.com/claude-code) CLI. Add Carousify once and you can ask Claude to draft a LinkedIn post, schedule it, or pull recent performance without leaving the chat (or the terminal).
## Before you start
You'll need:
* MCP enabled on the workspace — see [MCP overview](/mcp/overview) for the one-click flow
* An MCP key from **Manage Workspace › MCP** (only shown once, right after creating it)
* A Claude account, or [Claude Code](https://claude.com/claude-code) installed and signed in
## Step 1 — Copy your Carousify MCP URL
In Carousify, open **Manage Workspace › MCP**. Use the auto-provisioned **MCP System Key** or click **Create API Key** to mint a fresh one (e.g. `claude-laptop`).
Your MCP URL has this shape:
```
https://app.carousify.com/api/mcp?token=YOUR_MCP_KEY
```
The **Claude** tab on the same page renders the URL with your token already substituted — copy it from there.
Treat the MCP URL like a password. Anyone with it can act on your workspace. Carousify reveals the full key only once — copy it the moment it's generated.
## Step 2 — Add Carousify as a custom connector
Go to [claude.ai/settings/connectors](https://claude.ai/settings/connectors) (or **Settings › Connectors** from inside Claude). Scroll past the built-in connectors to the bottom of the page.
Claude opens a small dialog with two fields.
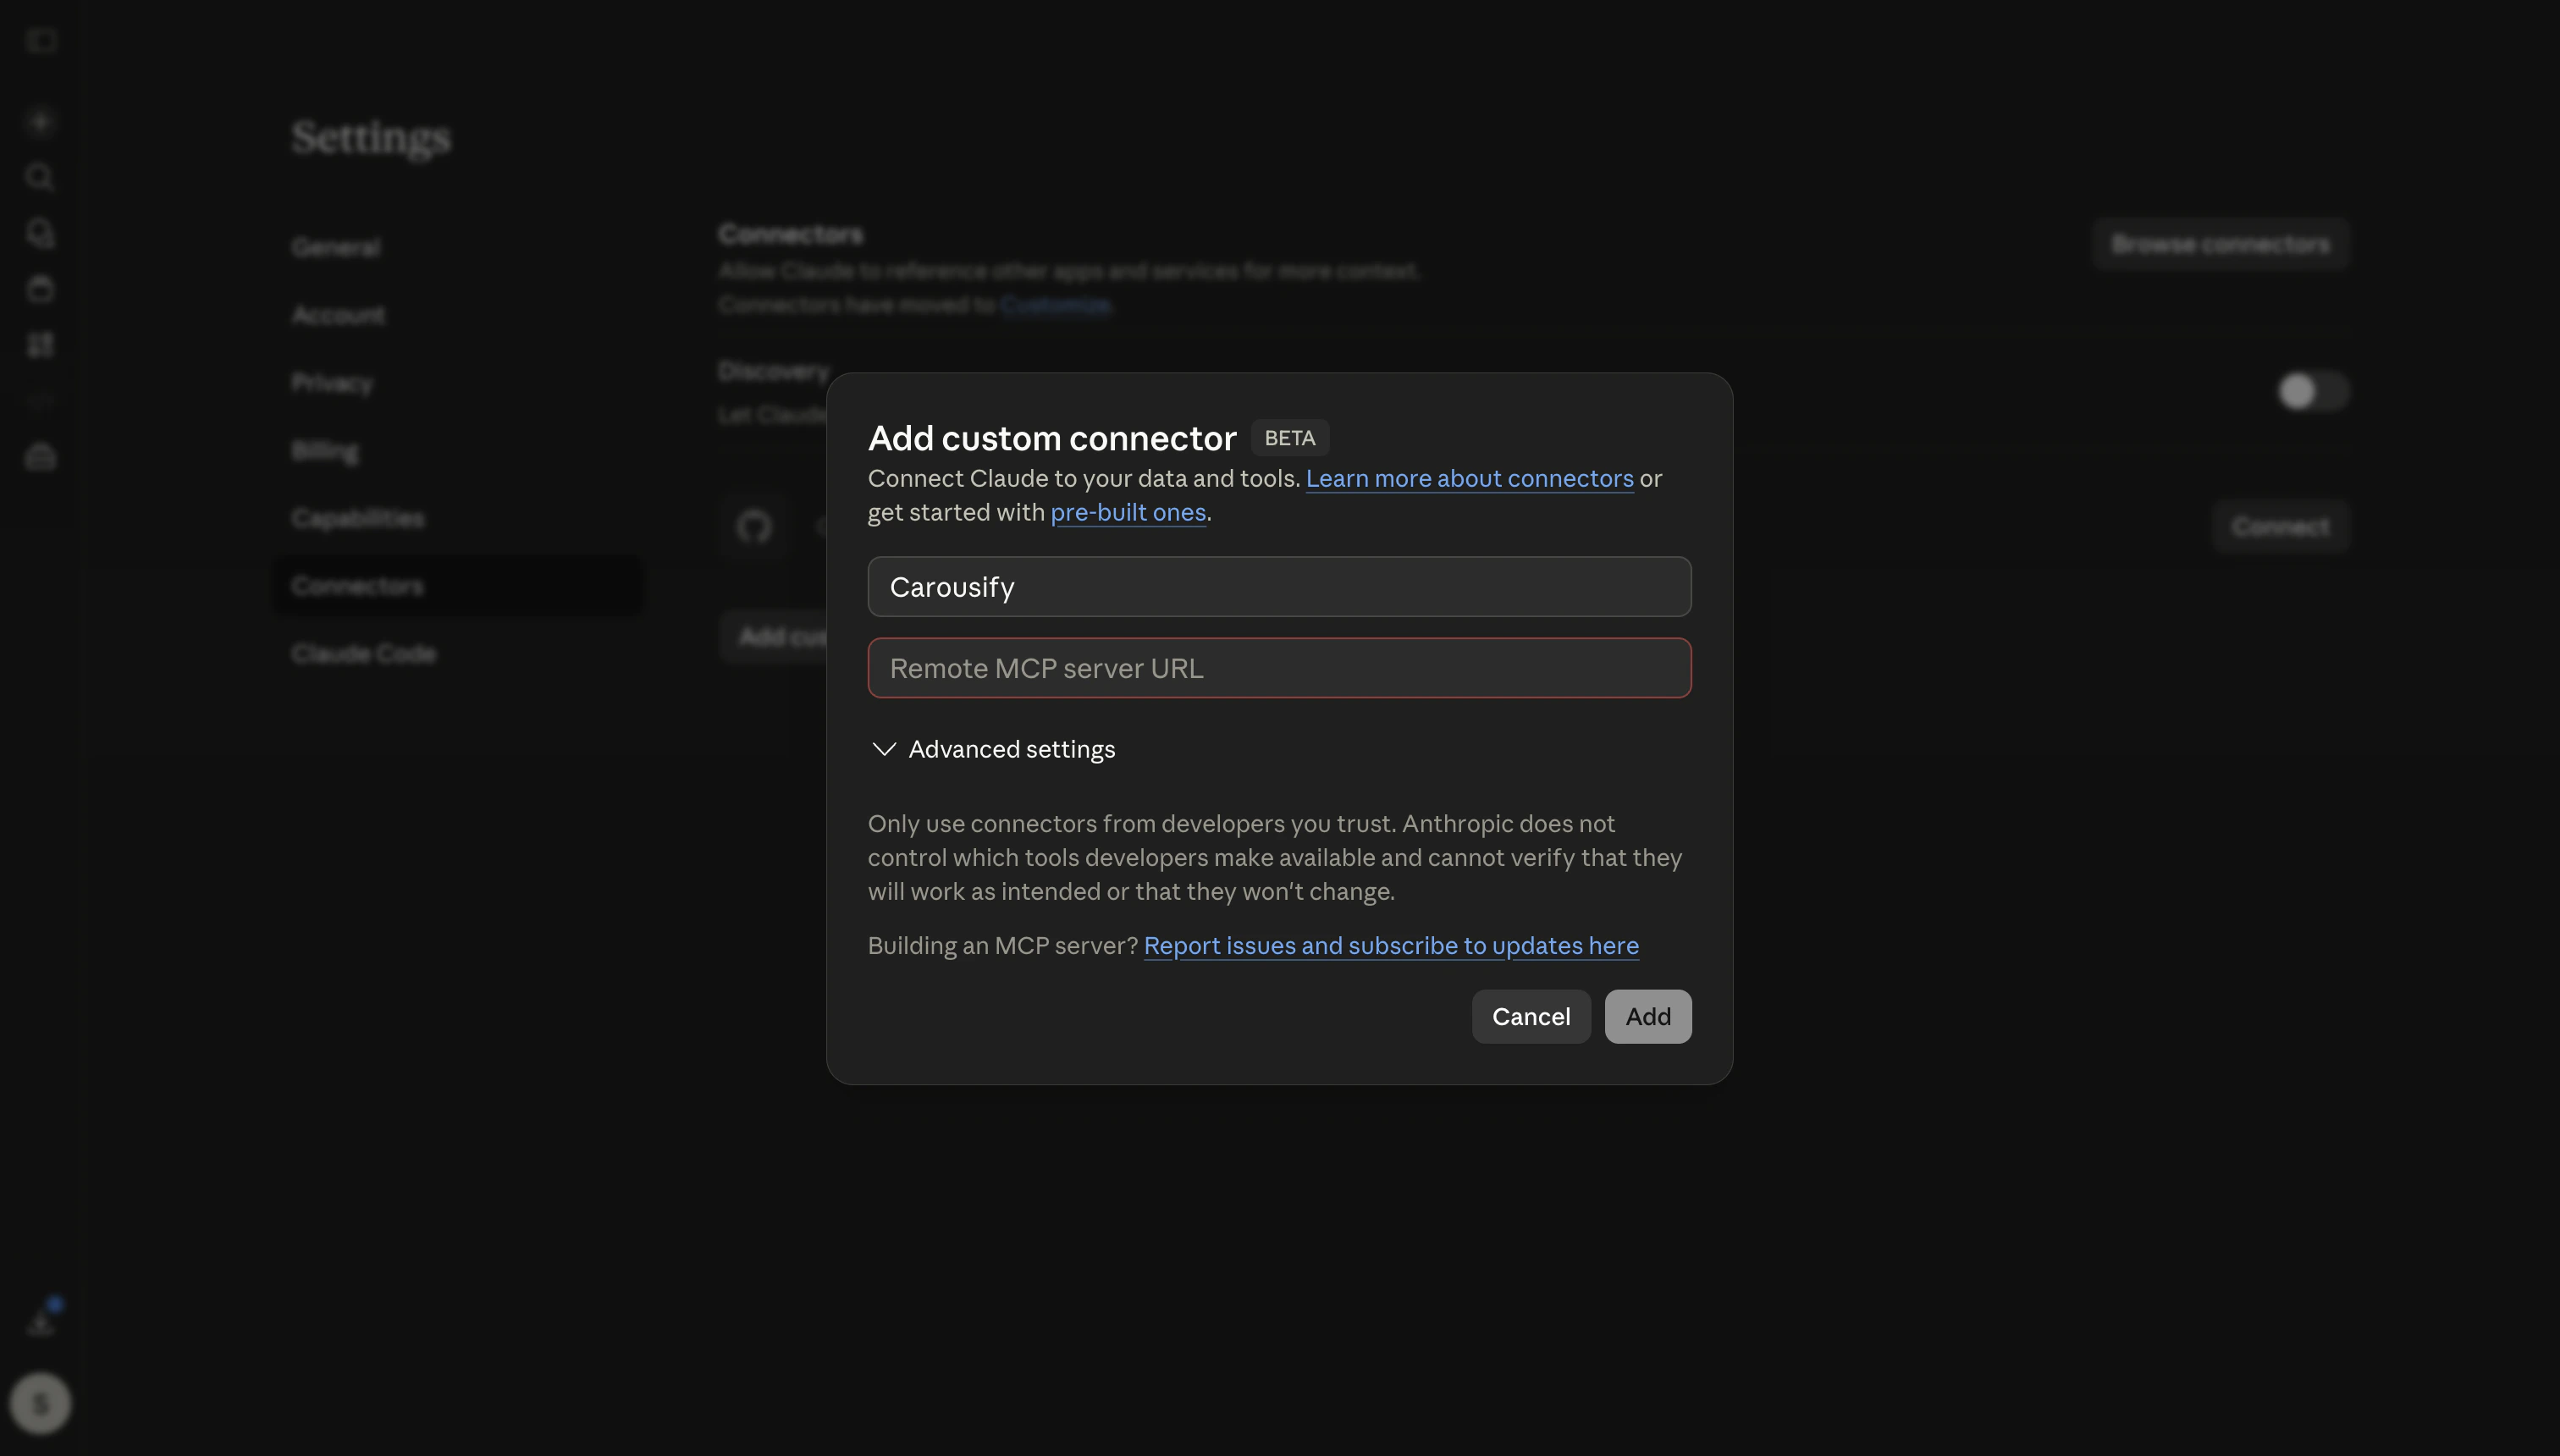 | Field | What to enter |
| ------------------------- | ----------------------------- |
| **Name** | `Carousify` |
| **Remote MCP server URL** | The URL you copied in Step 1. |
Claude validates the URL, opens the connection, and lists the Carousify tools it discovered. The connector now shows up in **Settings › Connectors** as **Active**.
## Step 3 — Use it in a chat
Start a new conversation. Click the **+ tools** icon (or the `/` slash menu) in the composer and tick **Carousify** so it's enabled for this chat. Then try:
* *"Draft a LinkedIn post about why agencies use Collaboration Links to onboard clients without sharing logins, then schedule it for Tuesday 9 AM IST."*
* *"Show me my top three posts from the last 14 days."*
* *"Did the post I scheduled this morning go live?"*
Claude picks the matching Carousify tool, asks you to approve the action the first time, and then runs it.
Connectors are off by default in new chats. To keep Carousify on without re-ticking it every time, create a **Carousify** project — Claude remembers connector toggles per project.
## Prefer the terminal? Use Claude Code
If you spend most of your time in [Claude Code](https://claude.com/claude-code), skip the web UI entirely and add Carousify in one command:
```bash theme={null}
claude mcp add --transport http carousify "https://app.carousify.com/api/mcp?token=YOUR_MCP_KEY"
```
By default the server is added at the **local** scope (this project only). Pick a wider scope if you want it everywhere:
| Scope | Flag | Where it's stored |
| ------------------- | ------------ | ------------------------------------------------------------------- |
| **Local** (default) | — | This project, your machine only. |
| **User** | `-s user` | Every project on this machine. |
| **Project** | `-s project` | Committed to `.mcp.json` in the current repo, shared with the team. |
For project scope, keep the token out of `.mcp.json` by referencing an env var instead of hard-coding it:
```bash theme={null}
export CAROUSIFY_MCP_TOKEN="your_mcp_key"
claude mcp add --transport http -s project carousify "https://app.carousify.com/api/mcp?token=\${CAROUSIFY_MCP_TOKEN}"
```
Verify the connection with `claude mcp list` — you should see `carousify` with the discovered tool count and a green status. From the next `claude` session, the agent can call Carousify tools directly.
Use **user** scope for personal day-to-day work, **project** scope when your whole team needs Carousify wired into a specific repo (e.g. an agency repo for one client).
## Disconnect or rotate
* **Disconnect (web/desktop)** — open **Settings › Connectors**, click **⋯** on the Carousify entry, then **Remove**. Claude stops calling the URL immediately.
* **Disconnect (Claude Code)** — run `claude mcp remove carousify` (add `-s user` or `-s project` if that's where you registered it).
* **Rotate the key** — in Carousify, delete the row in **MCP Keys**, then click **Create API Key** to mint a new one. Update the URL in Claude (or rerun `claude mcp add`) with the new token.
## Troubleshooting
* **"Failed to connect to server"** — the token is wrong or has been revoked. Confirm the key shows **Active** in **Manage Workspace › MCP** and that the URL ends with the full token, not the masked `XXXX...` version.
* **`claude mcp list` shows the server as failed** — most often a stale token. Generate a fresh key in Carousify and re-add the server.
## What's next
How MCP keys, tools, and workspace scoping fit together.
Same MCP URL, inside VS Code's chat agent.
Add Carousify to the Codex CLI's `config.toml`.
Quick refresher on how scheduling works inside Carousify.
| Field | What to enter |
| ------------------------- | ----------------------------- |
| **Name** | `Carousify` |
| **Remote MCP server URL** | The URL you copied in Step 1. |
Claude validates the URL, opens the connection, and lists the Carousify tools it discovered. The connector now shows up in **Settings › Connectors** as **Active**.
## Step 3 — Use it in a chat
Start a new conversation. Click the **+ tools** icon (or the `/` slash menu) in the composer and tick **Carousify** so it's enabled for this chat. Then try:
* *"Draft a LinkedIn post about why agencies use Collaboration Links to onboard clients without sharing logins, then schedule it for Tuesday 9 AM IST."*
* *"Show me my top three posts from the last 14 days."*
* *"Did the post I scheduled this morning go live?"*
Claude picks the matching Carousify tool, asks you to approve the action the first time, and then runs it.
Connectors are off by default in new chats. To keep Carousify on without re-ticking it every time, create a **Carousify** project — Claude remembers connector toggles per project.
## Prefer the terminal? Use Claude Code
If you spend most of your time in [Claude Code](https://claude.com/claude-code), skip the web UI entirely and add Carousify in one command:
```bash theme={null}
claude mcp add --transport http carousify "https://app.carousify.com/api/mcp?token=YOUR_MCP_KEY"
```
By default the server is added at the **local** scope (this project only). Pick a wider scope if you want it everywhere:
| Scope | Flag | Where it's stored |
| ------------------- | ------------ | ------------------------------------------------------------------- |
| **Local** (default) | — | This project, your machine only. |
| **User** | `-s user` | Every project on this machine. |
| **Project** | `-s project` | Committed to `.mcp.json` in the current repo, shared with the team. |
For project scope, keep the token out of `.mcp.json` by referencing an env var instead of hard-coding it:
```bash theme={null}
export CAROUSIFY_MCP_TOKEN="your_mcp_key"
claude mcp add --transport http -s project carousify "https://app.carousify.com/api/mcp?token=\${CAROUSIFY_MCP_TOKEN}"
```
Verify the connection with `claude mcp list` — you should see `carousify` with the discovered tool count and a green status. From the next `claude` session, the agent can call Carousify tools directly.
Use **user** scope for personal day-to-day work, **project** scope when your whole team needs Carousify wired into a specific repo (e.g. an agency repo for one client).
## Disconnect or rotate
* **Disconnect (web/desktop)** — open **Settings › Connectors**, click **⋯** on the Carousify entry, then **Remove**. Claude stops calling the URL immediately.
* **Disconnect (Claude Code)** — run `claude mcp remove carousify` (add `-s user` or `-s project` if that's where you registered it).
* **Rotate the key** — in Carousify, delete the row in **MCP Keys**, then click **Create API Key** to mint a new one. Update the URL in Claude (or rerun `claude mcp add`) with the new token.
## Troubleshooting
* **"Failed to connect to server"** — the token is wrong or has been revoked. Confirm the key shows **Active** in **Manage Workspace › MCP** and that the URL ends with the full token, not the masked `XXXX...` version.
* **`claude mcp list` shows the server as failed** — most often a stale token. Generate a fresh key in Carousify and re-add the server.
## What's next
How MCP keys, tools, and workspace scoping fit together.
Same MCP URL, inside VS Code's chat agent.
Add Carousify to the Codex CLI's `config.toml`.
Quick refresher on how scheduling works inside Carousify.