> ## Documentation Index
> Fetch the complete documentation index at: https://docs.carousify.com/llms.txt
> Use this file to discover all available pages before exploring further.
# Zapier integration
> Send Carousify post events into Google Sheets, Microsoft Teams, Airtable, or any of Zapier's 5,000+ apps.
The Zapier integration turns three Carousify events — **Post Published**, **Post Scheduled**, and **Post Publishing Failed** — into Zap triggers. From there, you can route them into any of the 5,000+ apps Zapier supports without writing code: log every published post into a Google Sheet for client reports, post a card in Microsoft Teams, append a row to Airtable, send an SMS via Twilio, anything.
This is the integration to reach for when Carousify's native Slack and Notion integrations don't cover what you want to wire up.
Carousify on Zapier is currently invite-only — you'll use a public invite link to install the integration on your Zapier account. Once you've accepted, every Zap you build with Carousify behaves exactly like a publicly-listed app.
## What you can build
A few of the most common Zaps teams set up on day one:
| Use case | Trigger | Action |
| ----------------------------------------------------- | -------------------------------------------- | -------------------------------------- |
| Log every published post for client reports | Post Published | Google Sheets — Create Spreadsheet Row |
| Alert a Microsoft Teams channel on publish failures | Post Publishing Failed | Microsoft Teams — Send Channel Message |
| Append scheduled posts to a content calendar | Post Scheduled | Airtable — Create Record |
| SMS the team when a high-priority client's post fails | Post Publishing Failed (filtered by Account) | Twilio — Send SMS |
This page walks through the **Google Sheets** example end-to-end. The same pattern works for any other action Zapier supports.
## Triggers
Carousify exposes three instant triggers:
| Trigger | Fires when |
| -------------------------- | ------------------------------------------------------------- |
| **Post Published** | A post goes live on LinkedIn (instant or scheduled). |
| **Post Scheduled** | A post is queued for a future date and time. |
| **Post Publishing Failed** | LinkedIn rejected the post or auth expired before publishing. |
All three are "Instant" triggers — Carousify pushes the event to Zapier in real time, so Zaps run within seconds of the event firing in your Carousify workspace.
## Trigger payload
Every event sends the same shape so you can map fields consistently across Zaps. Here's the reference:
| Field | Type | Notes |
| ------------------- | ----------------- | ------------------------------------------------------------ |
| `Event` | string | `post.published`, `post.scheduled`, or `post.failed`. |
| `Timestamp` | unix ms | When the event fired. |
| `Data Id` | string | The internal Carousify post ID. |
| `Data Workspace Id` | string | Which workspace the post belongs to. |
| `Data User Id` | string | The Carousify user who created the post. |
| `Data Account Type` | string | `profile` or `pages`. |
| `Data Account Id` | string | LinkedIn vanity name of the account/page (e.g. `carousify`). |
| `Data Content` | string | The post body text. |
| `Data Title` | string (optional) | Post title, if you set one. Often empty. |
| `Data Media` | array (optional) | URLs of images/videos attached to the post. |
| `Data Status` | string | `scheduled`, `published`, `failed`. |
| `Data Post Urn` | string (optional) | LinkedIn URN once published — useful as a stable identifier. |
| `Data Utm Campaign` | string (optional) | UTM tag if link tracking was on. |
| `Data Posting Time` | ISO 8601 | When the post is/was scheduled to publish. |
| `Data Created At` | ISO 8601 | When the post record was created in Carousify. |
| `Data Updated At` | ISO 8601 | Last modification timestamp. |
## Step 1 — Generate a Carousify API key
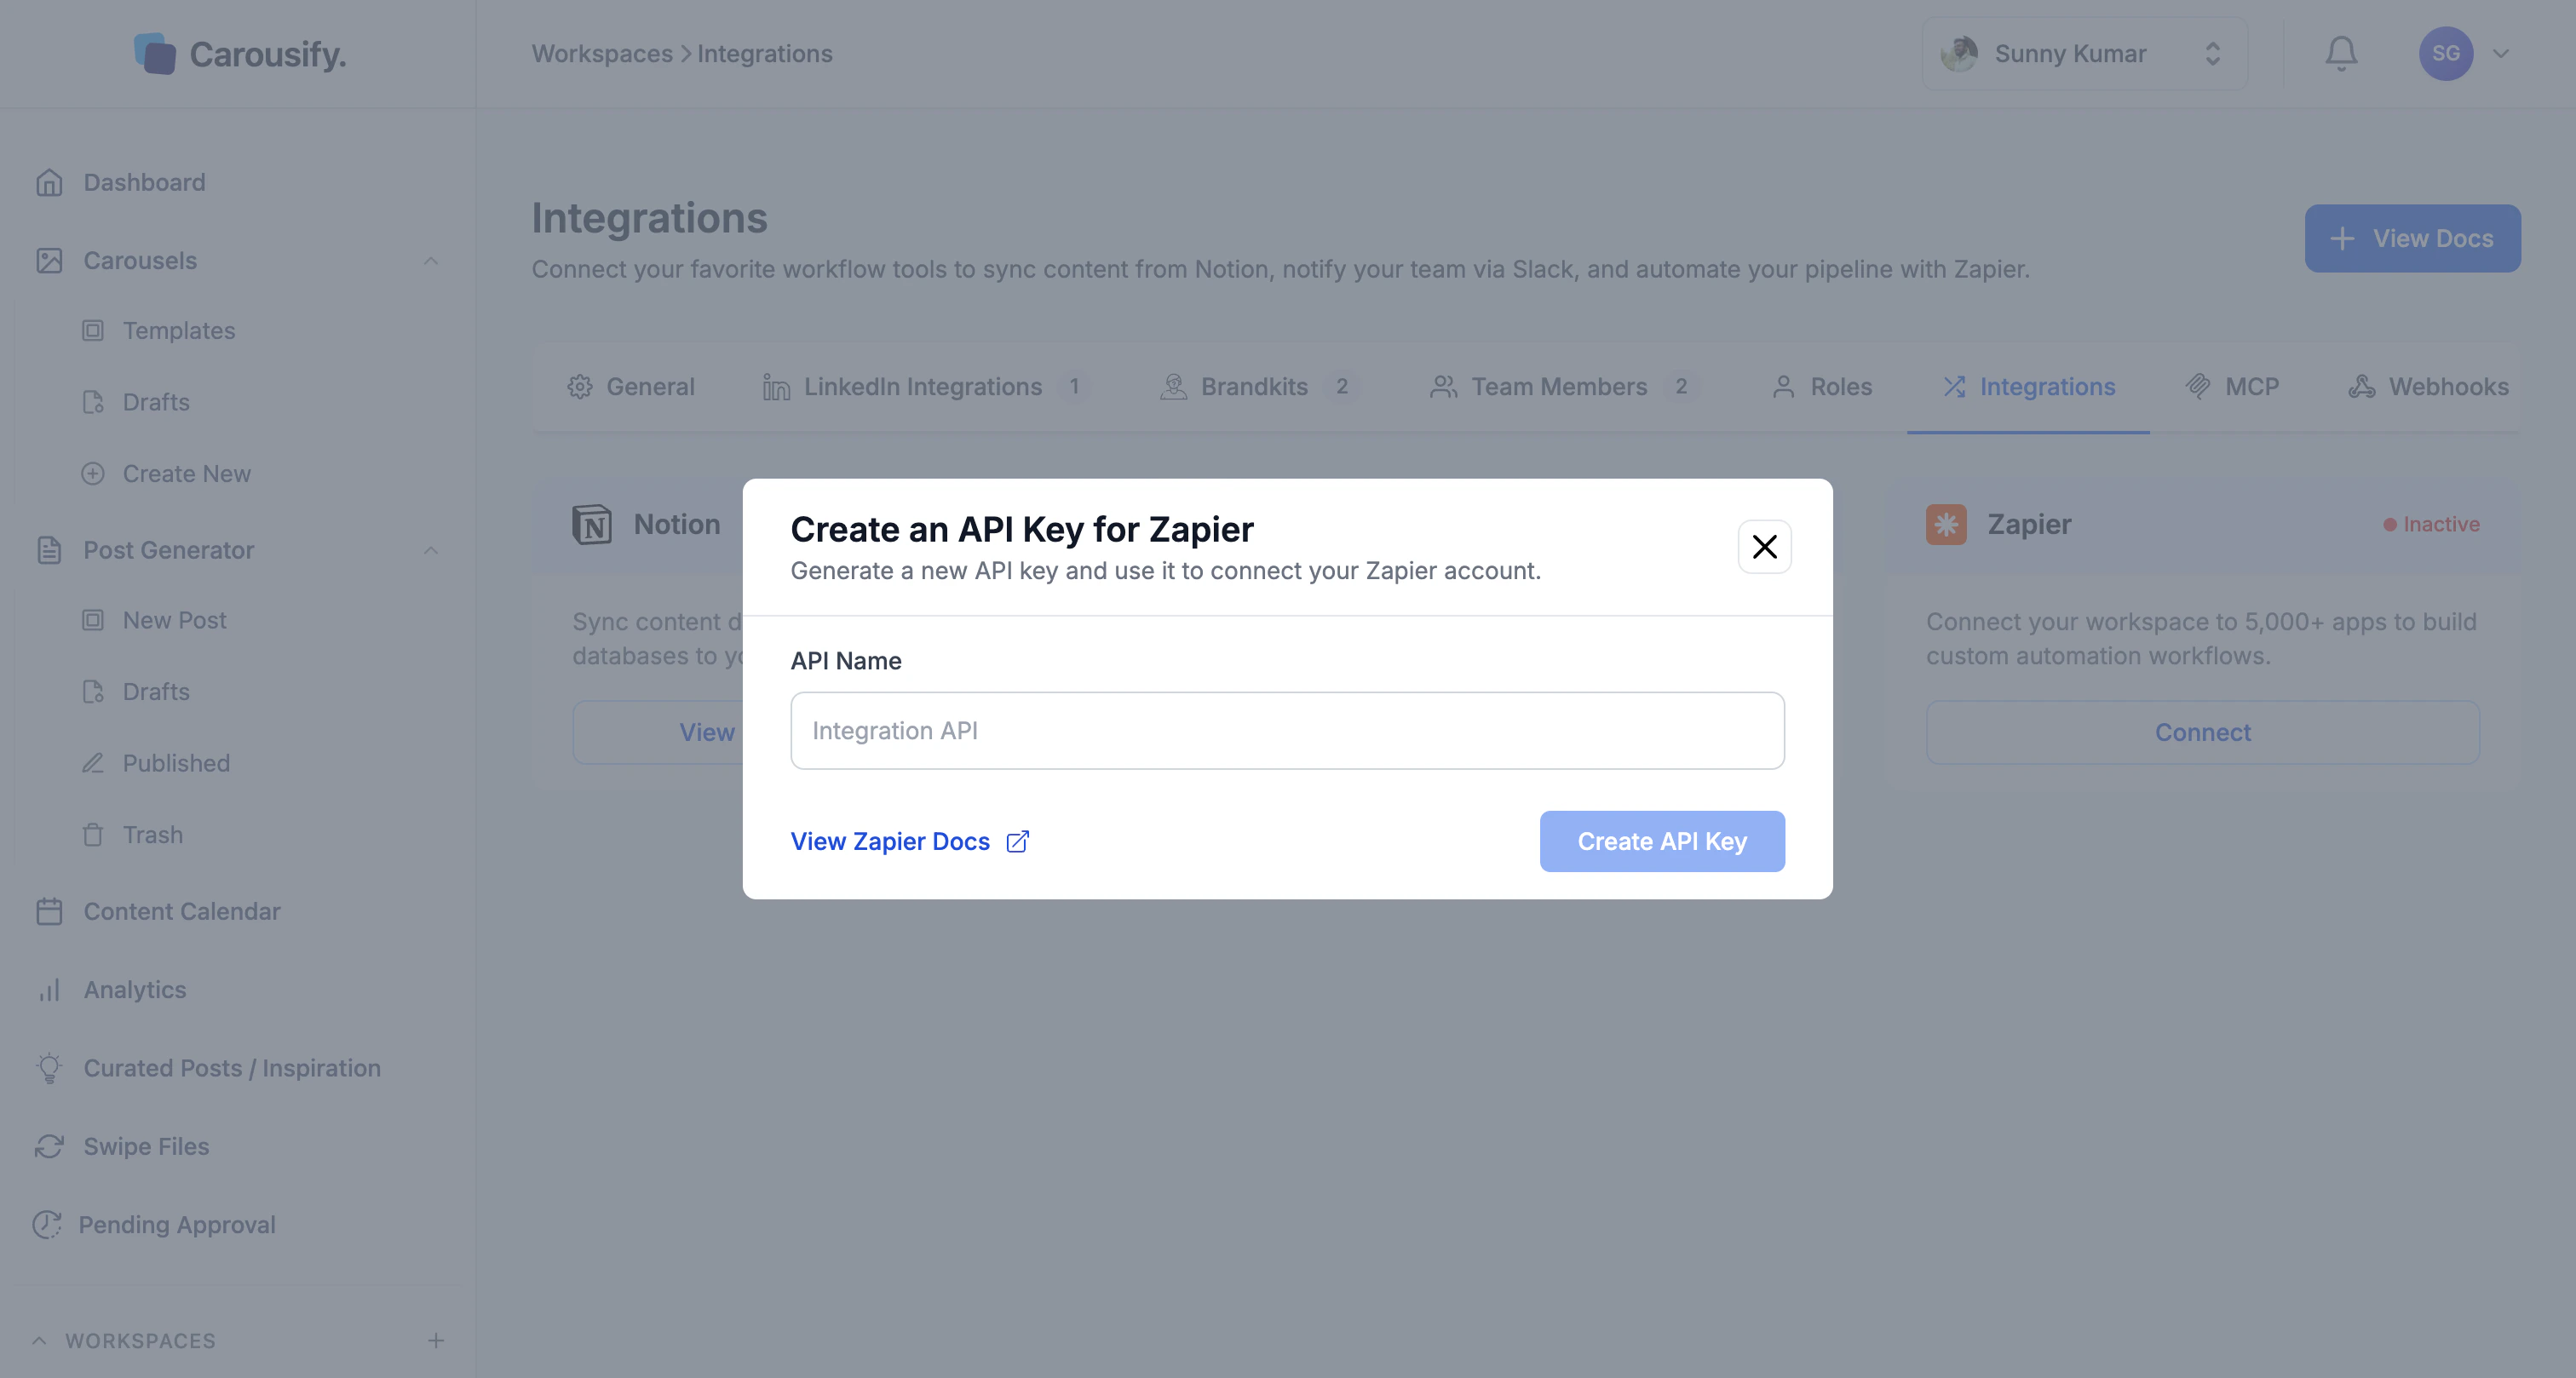
In Carousify, go to **Manage Workspace › Integrations** and click **Connect** on the Zapier card. Give the key a name you'll recognise later (e.g. `Carousify Zapier`) and click **Create API Key**.
 Carousify reveals a 32-character key. Copy it — you'll paste it into Zapier in Step 4.
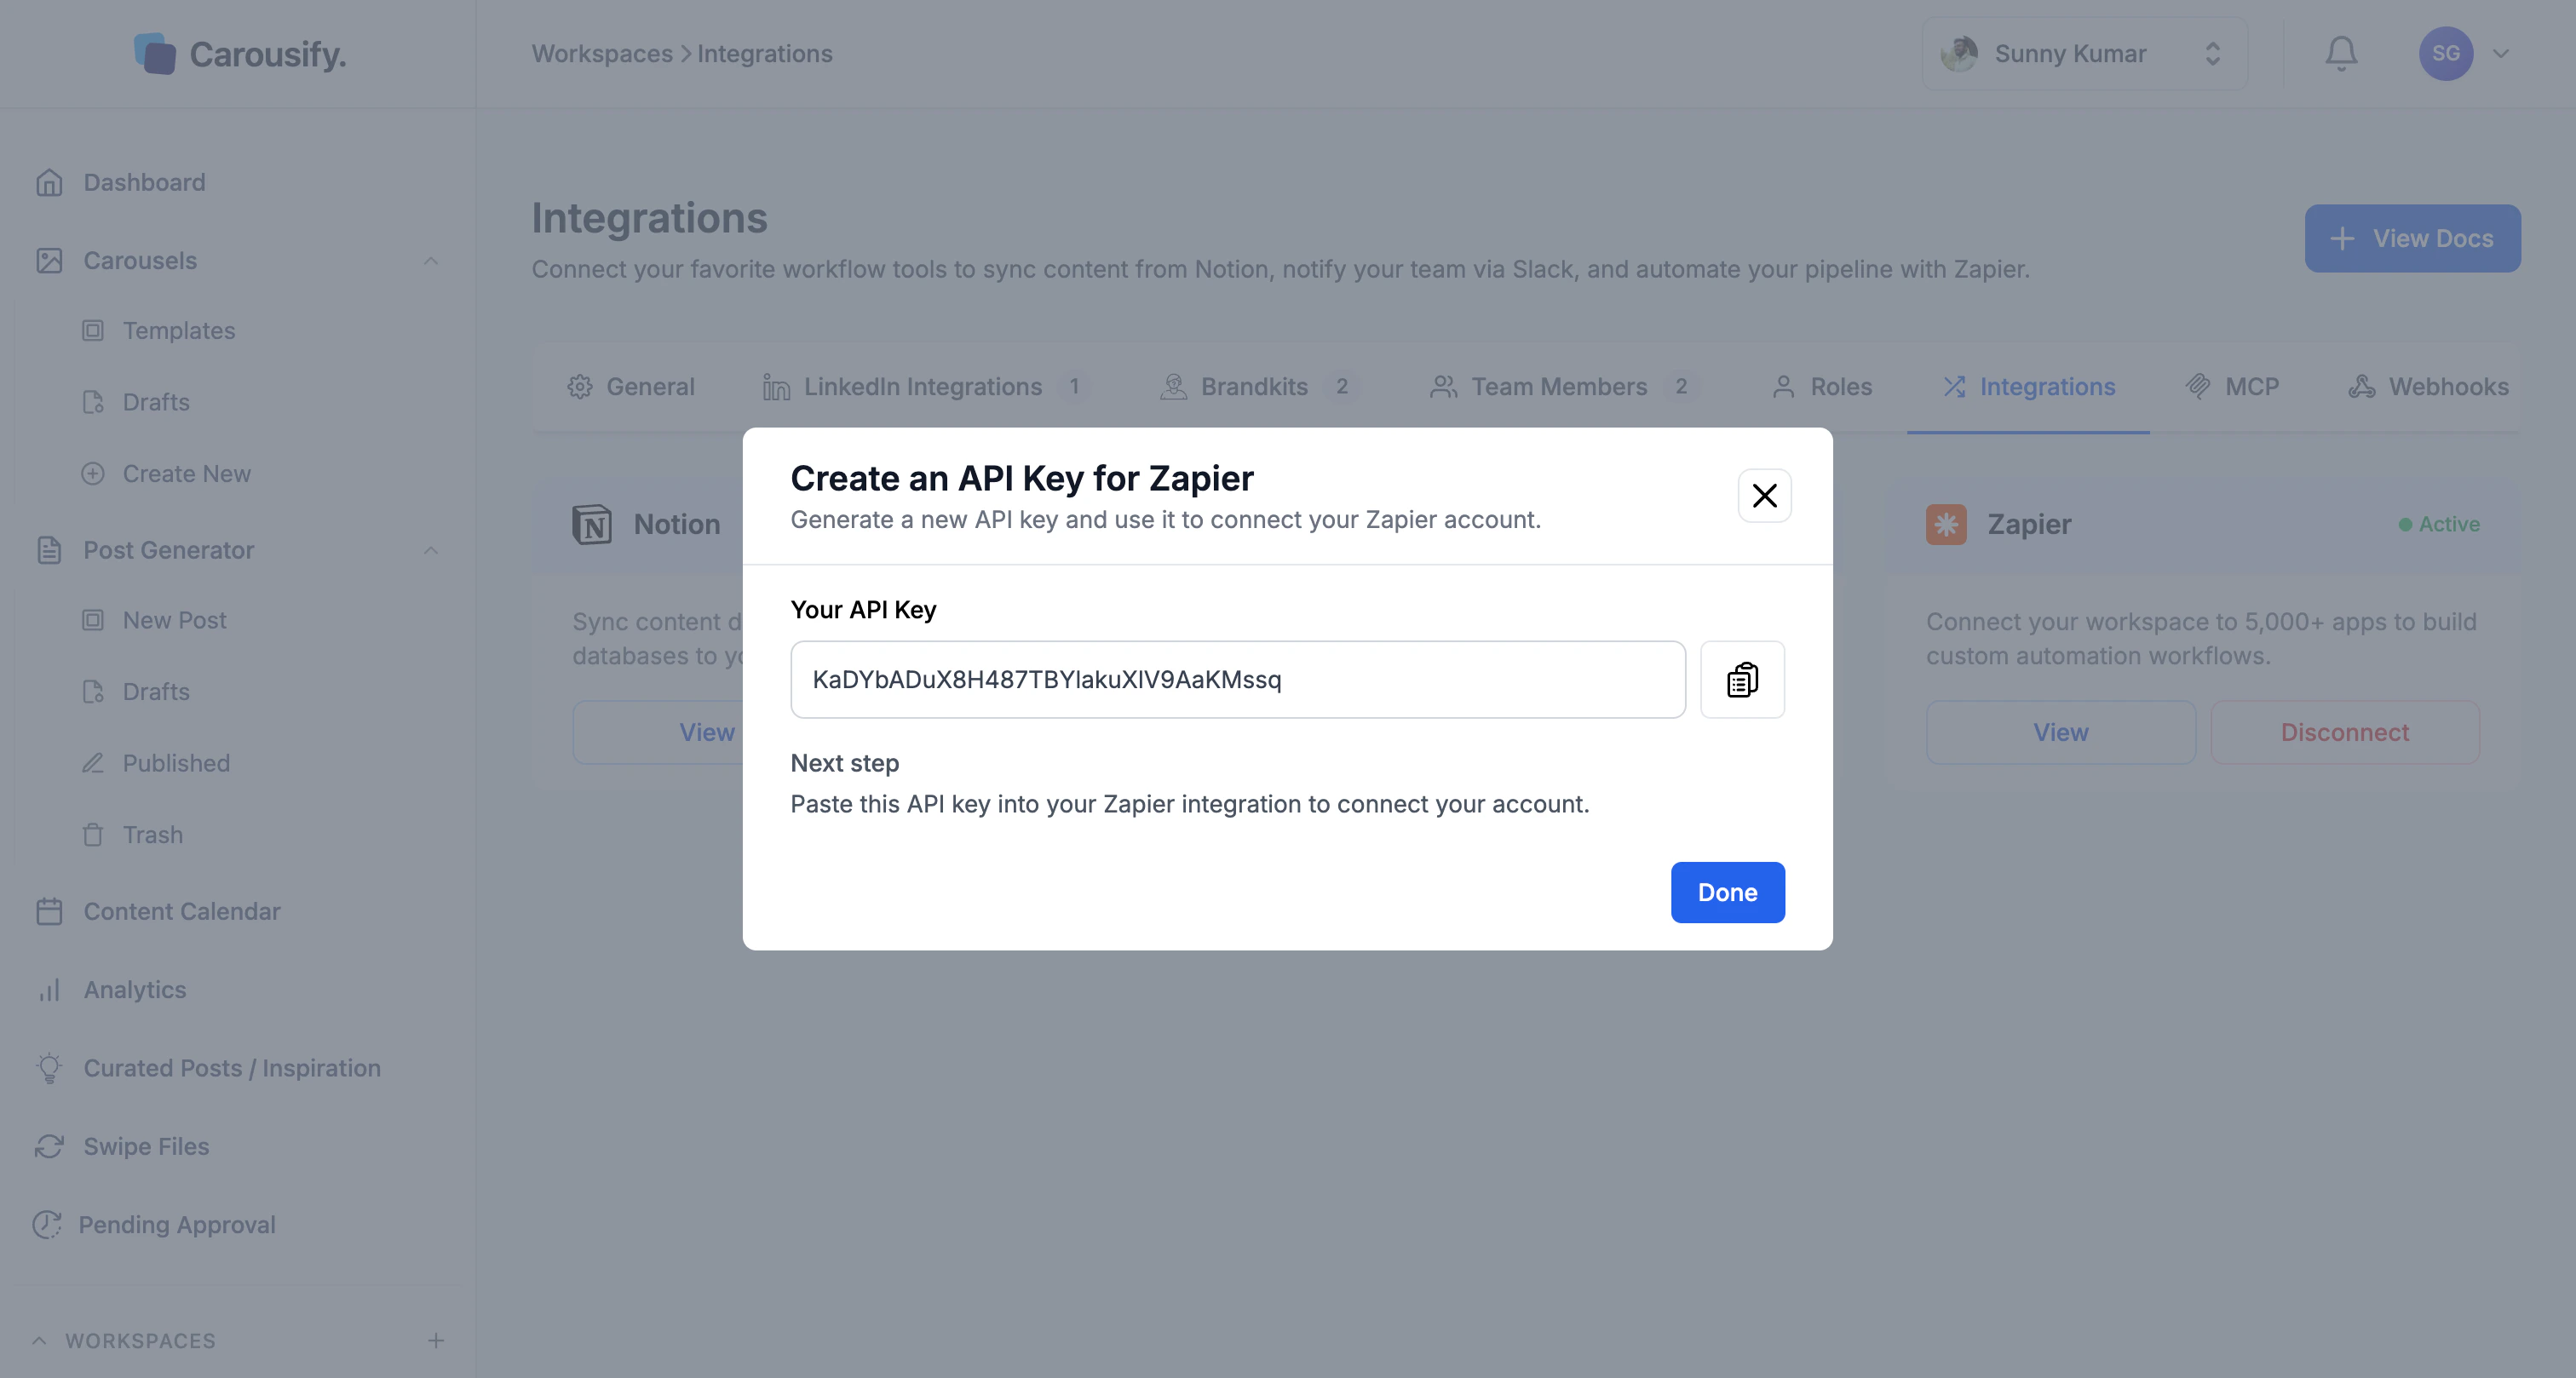 Treat this key like a password. Anyone with it can pull post data and connect to Carousify on your behalf. If it leaks, click **Disconnect** on the Zapier card in Carousify — that revokes the key — and run through the flow again to generate a new one.
## Step 2 — Accept the public invite
Open the Carousify-on-Zapier invite in a new tab:
[zapier.com/developer/public-invite/240907/e0a7c942dc2c8d7f5c376a77233141a0/](https://zapier.com/developer/public-invite/240907/e0a7c942dc2c8d7f5c376a77233141a0/)
Treat this key like a password. Anyone with it can pull post data and connect to Carousify on your behalf. If it leaks, click **Disconnect** on the Zapier card in Carousify — that revokes the key — and run through the flow again to generate a new one.
## Step 2 — Accept the public invite
Open the Carousify-on-Zapier invite in a new tab:
[zapier.com/developer/public-invite/240907/e0a7c942dc2c8d7f5c376a77233141a0/](https://zapier.com/developer/public-invite/240907/e0a7c942dc2c8d7f5c376a77233141a0/)
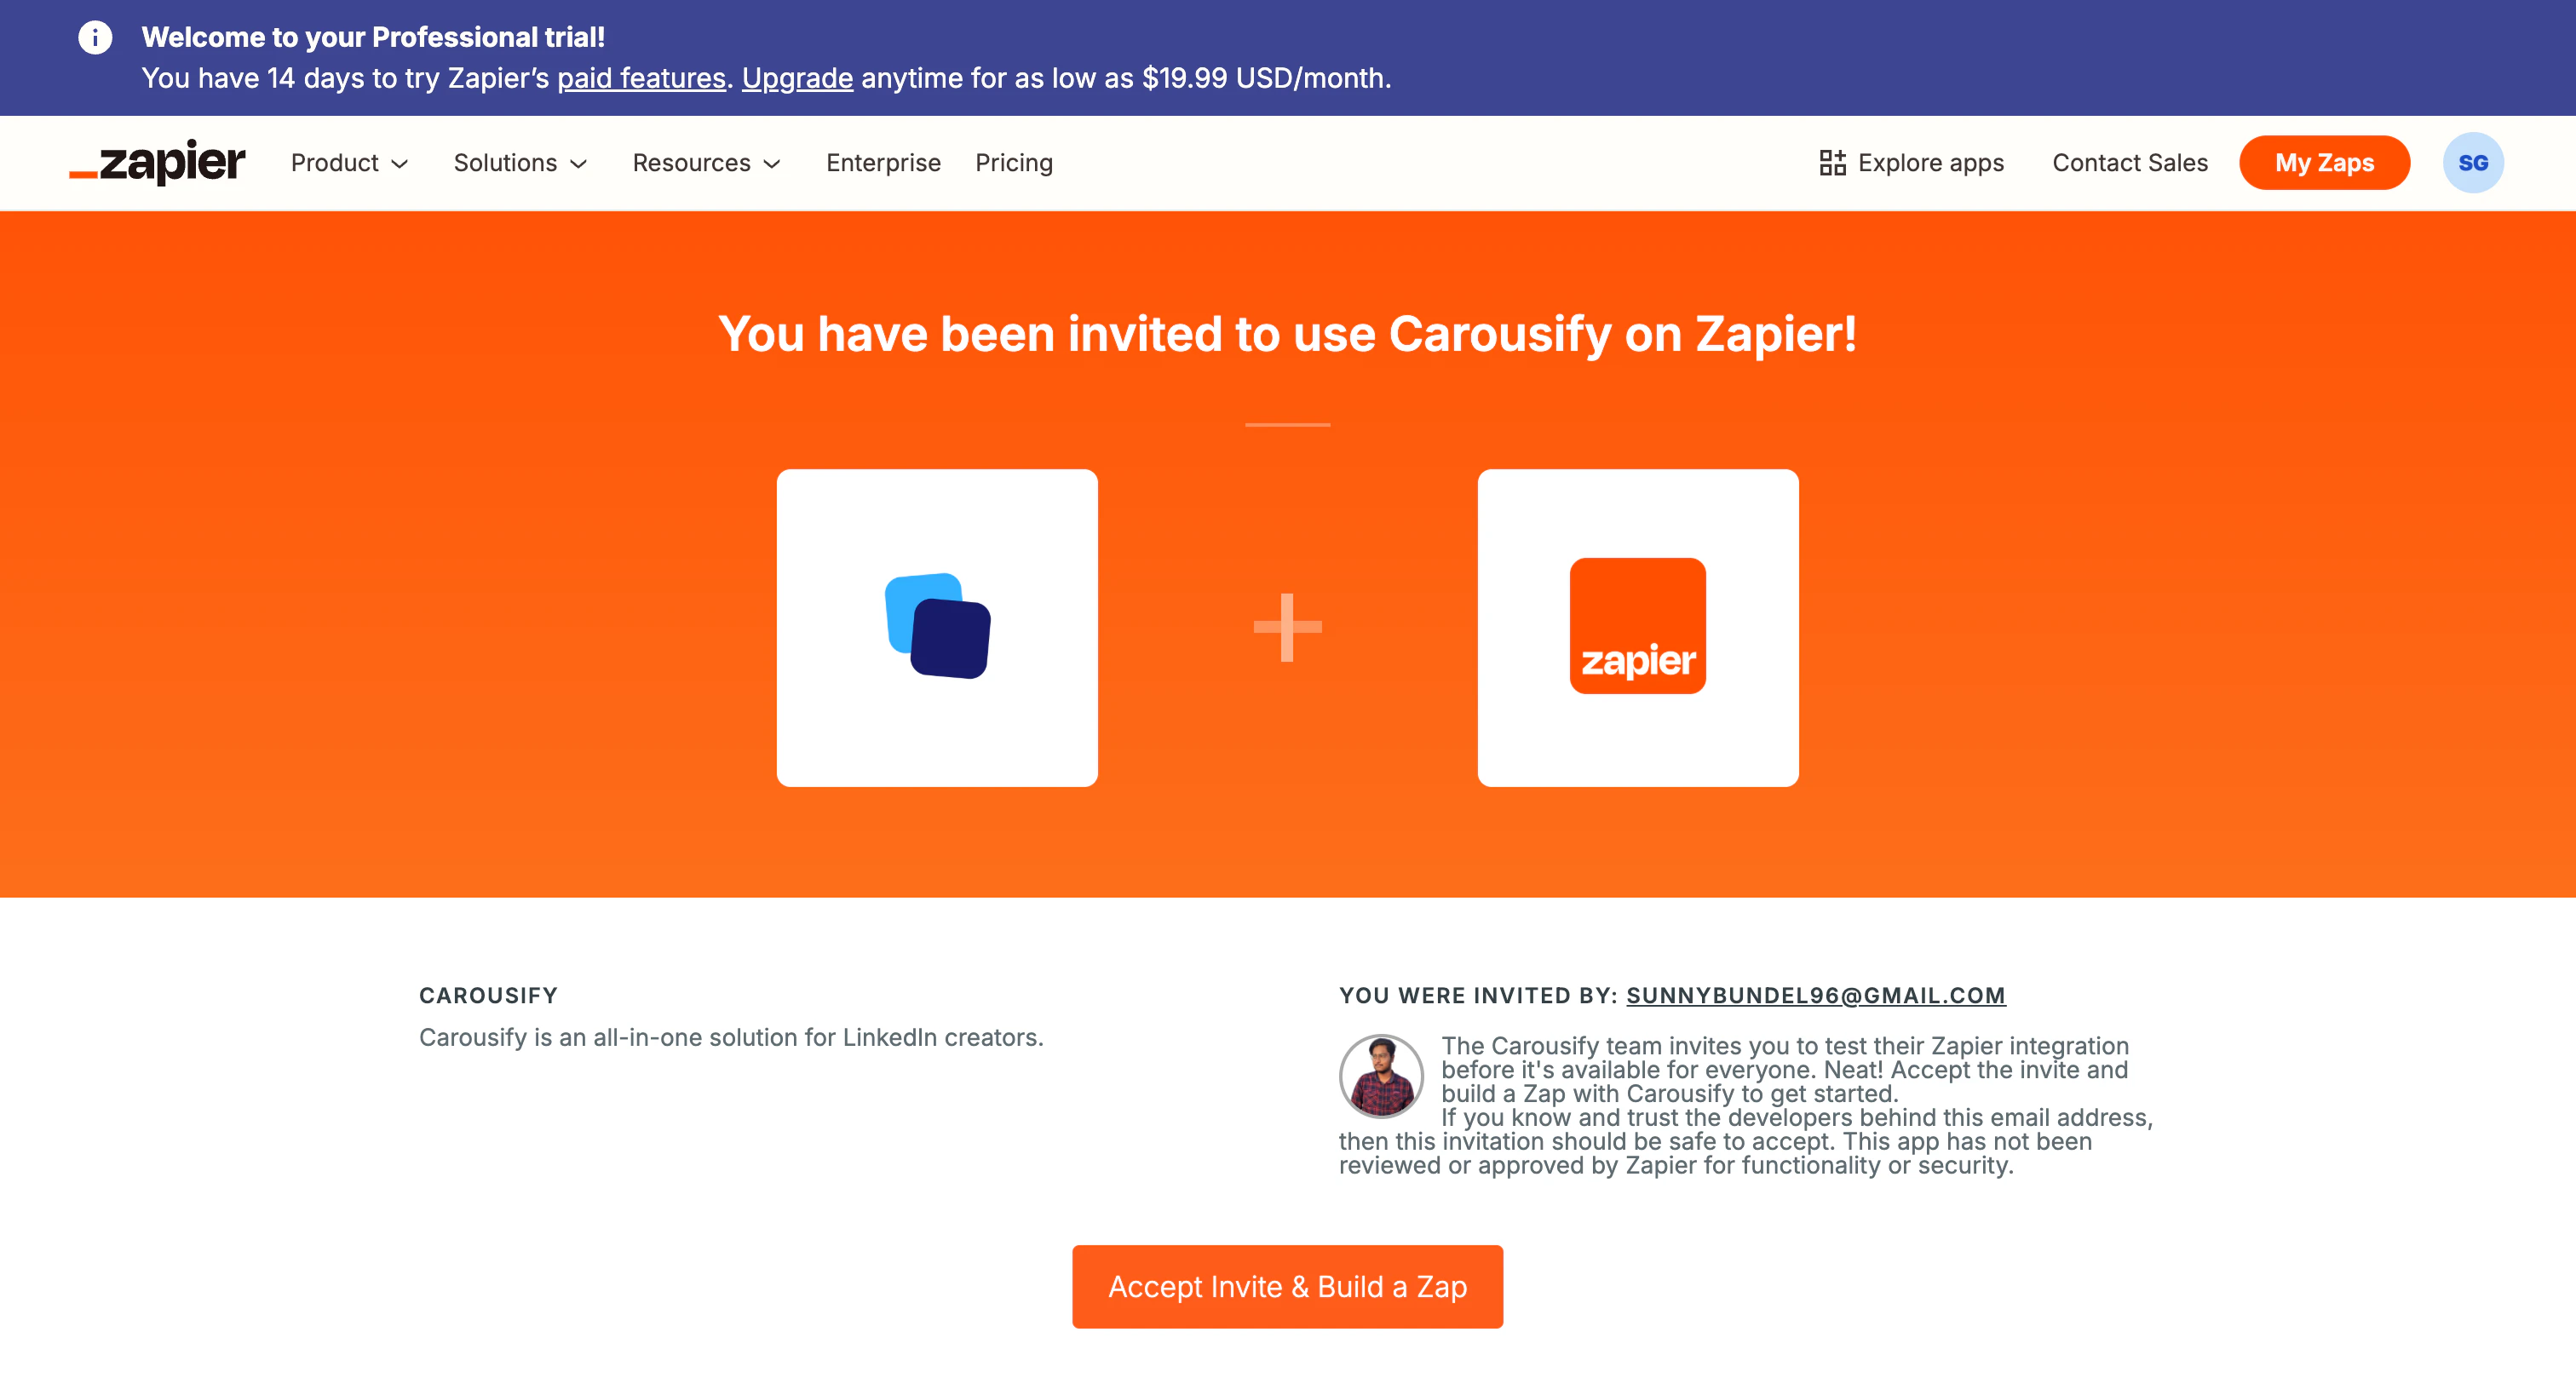 Click **Accept Invite & Build a Zap**. Zapier installs the Carousify app on your account and lands you on your Zaps dashboard.
## Step 3 — Start a new Zap
Click **Create Zap** (or **+ Create** in the sidebar). Zapier opens an empty editor with a placeholder trigger and action.
Click **Accept Invite & Build a Zap**. Zapier installs the Carousify app on your account and lands you on your Zaps dashboard.
## Step 3 — Start a new Zap
Click **Create Zap** (or **+ Create** in the sidebar). Zapier opens an empty editor with a placeholder trigger and action.
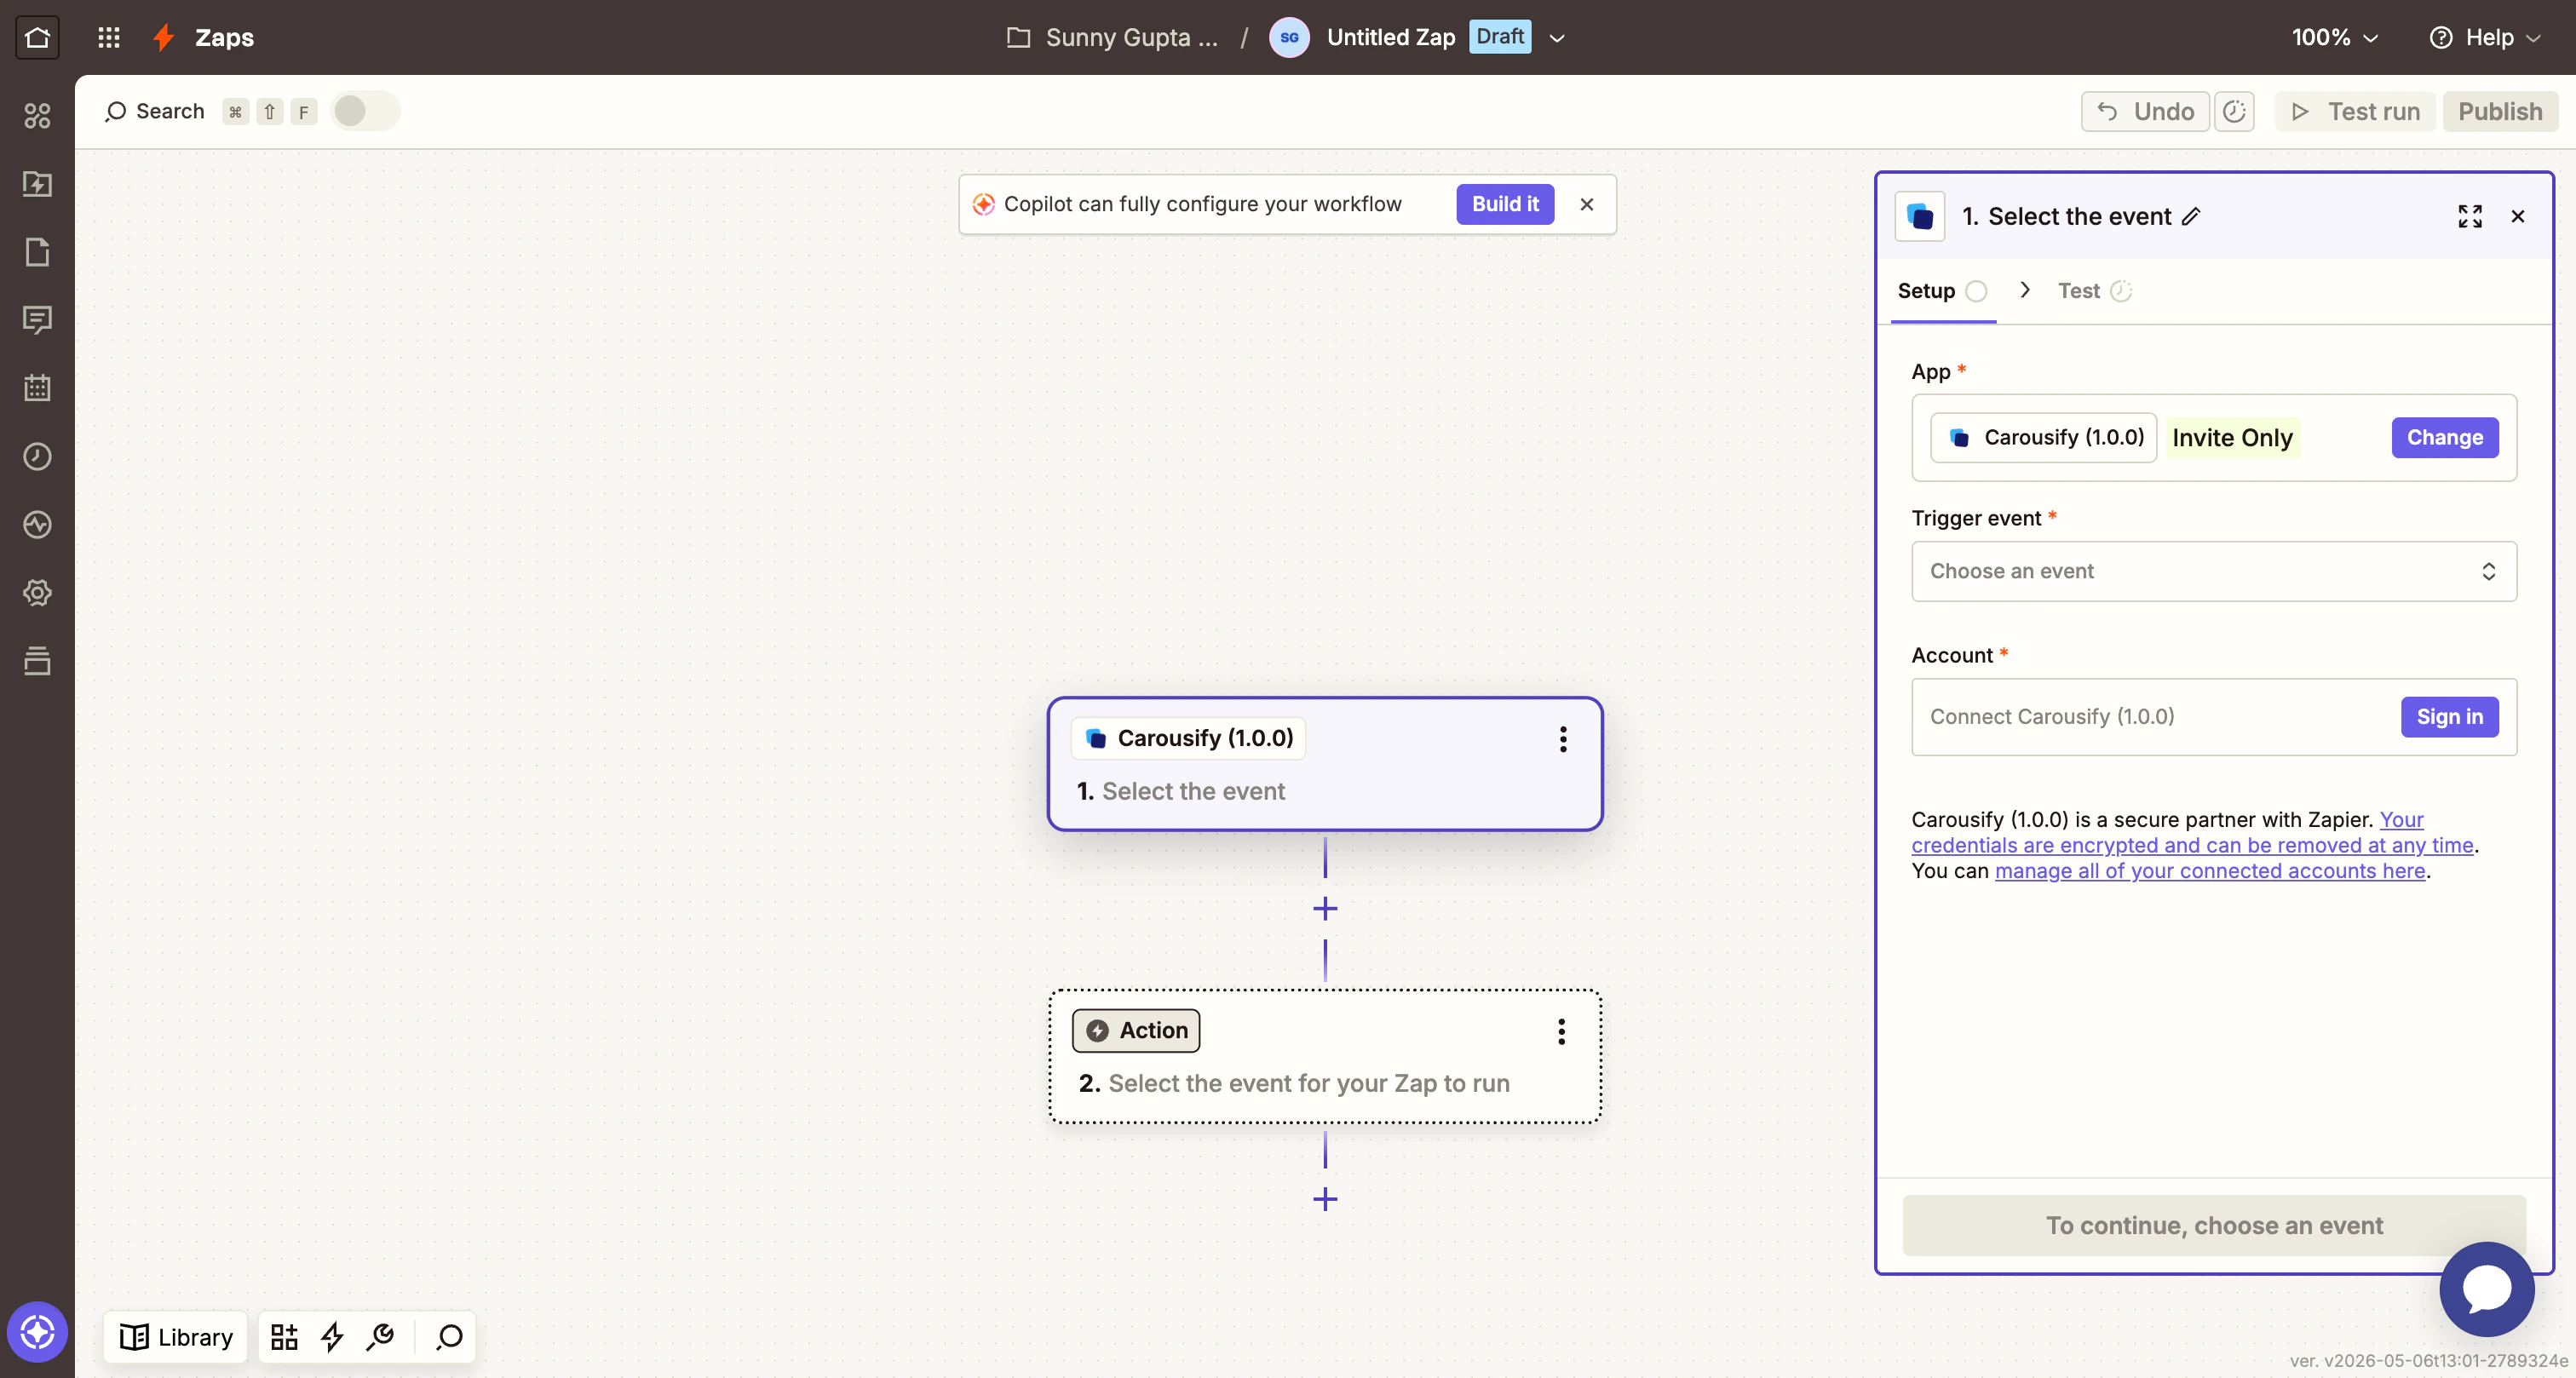
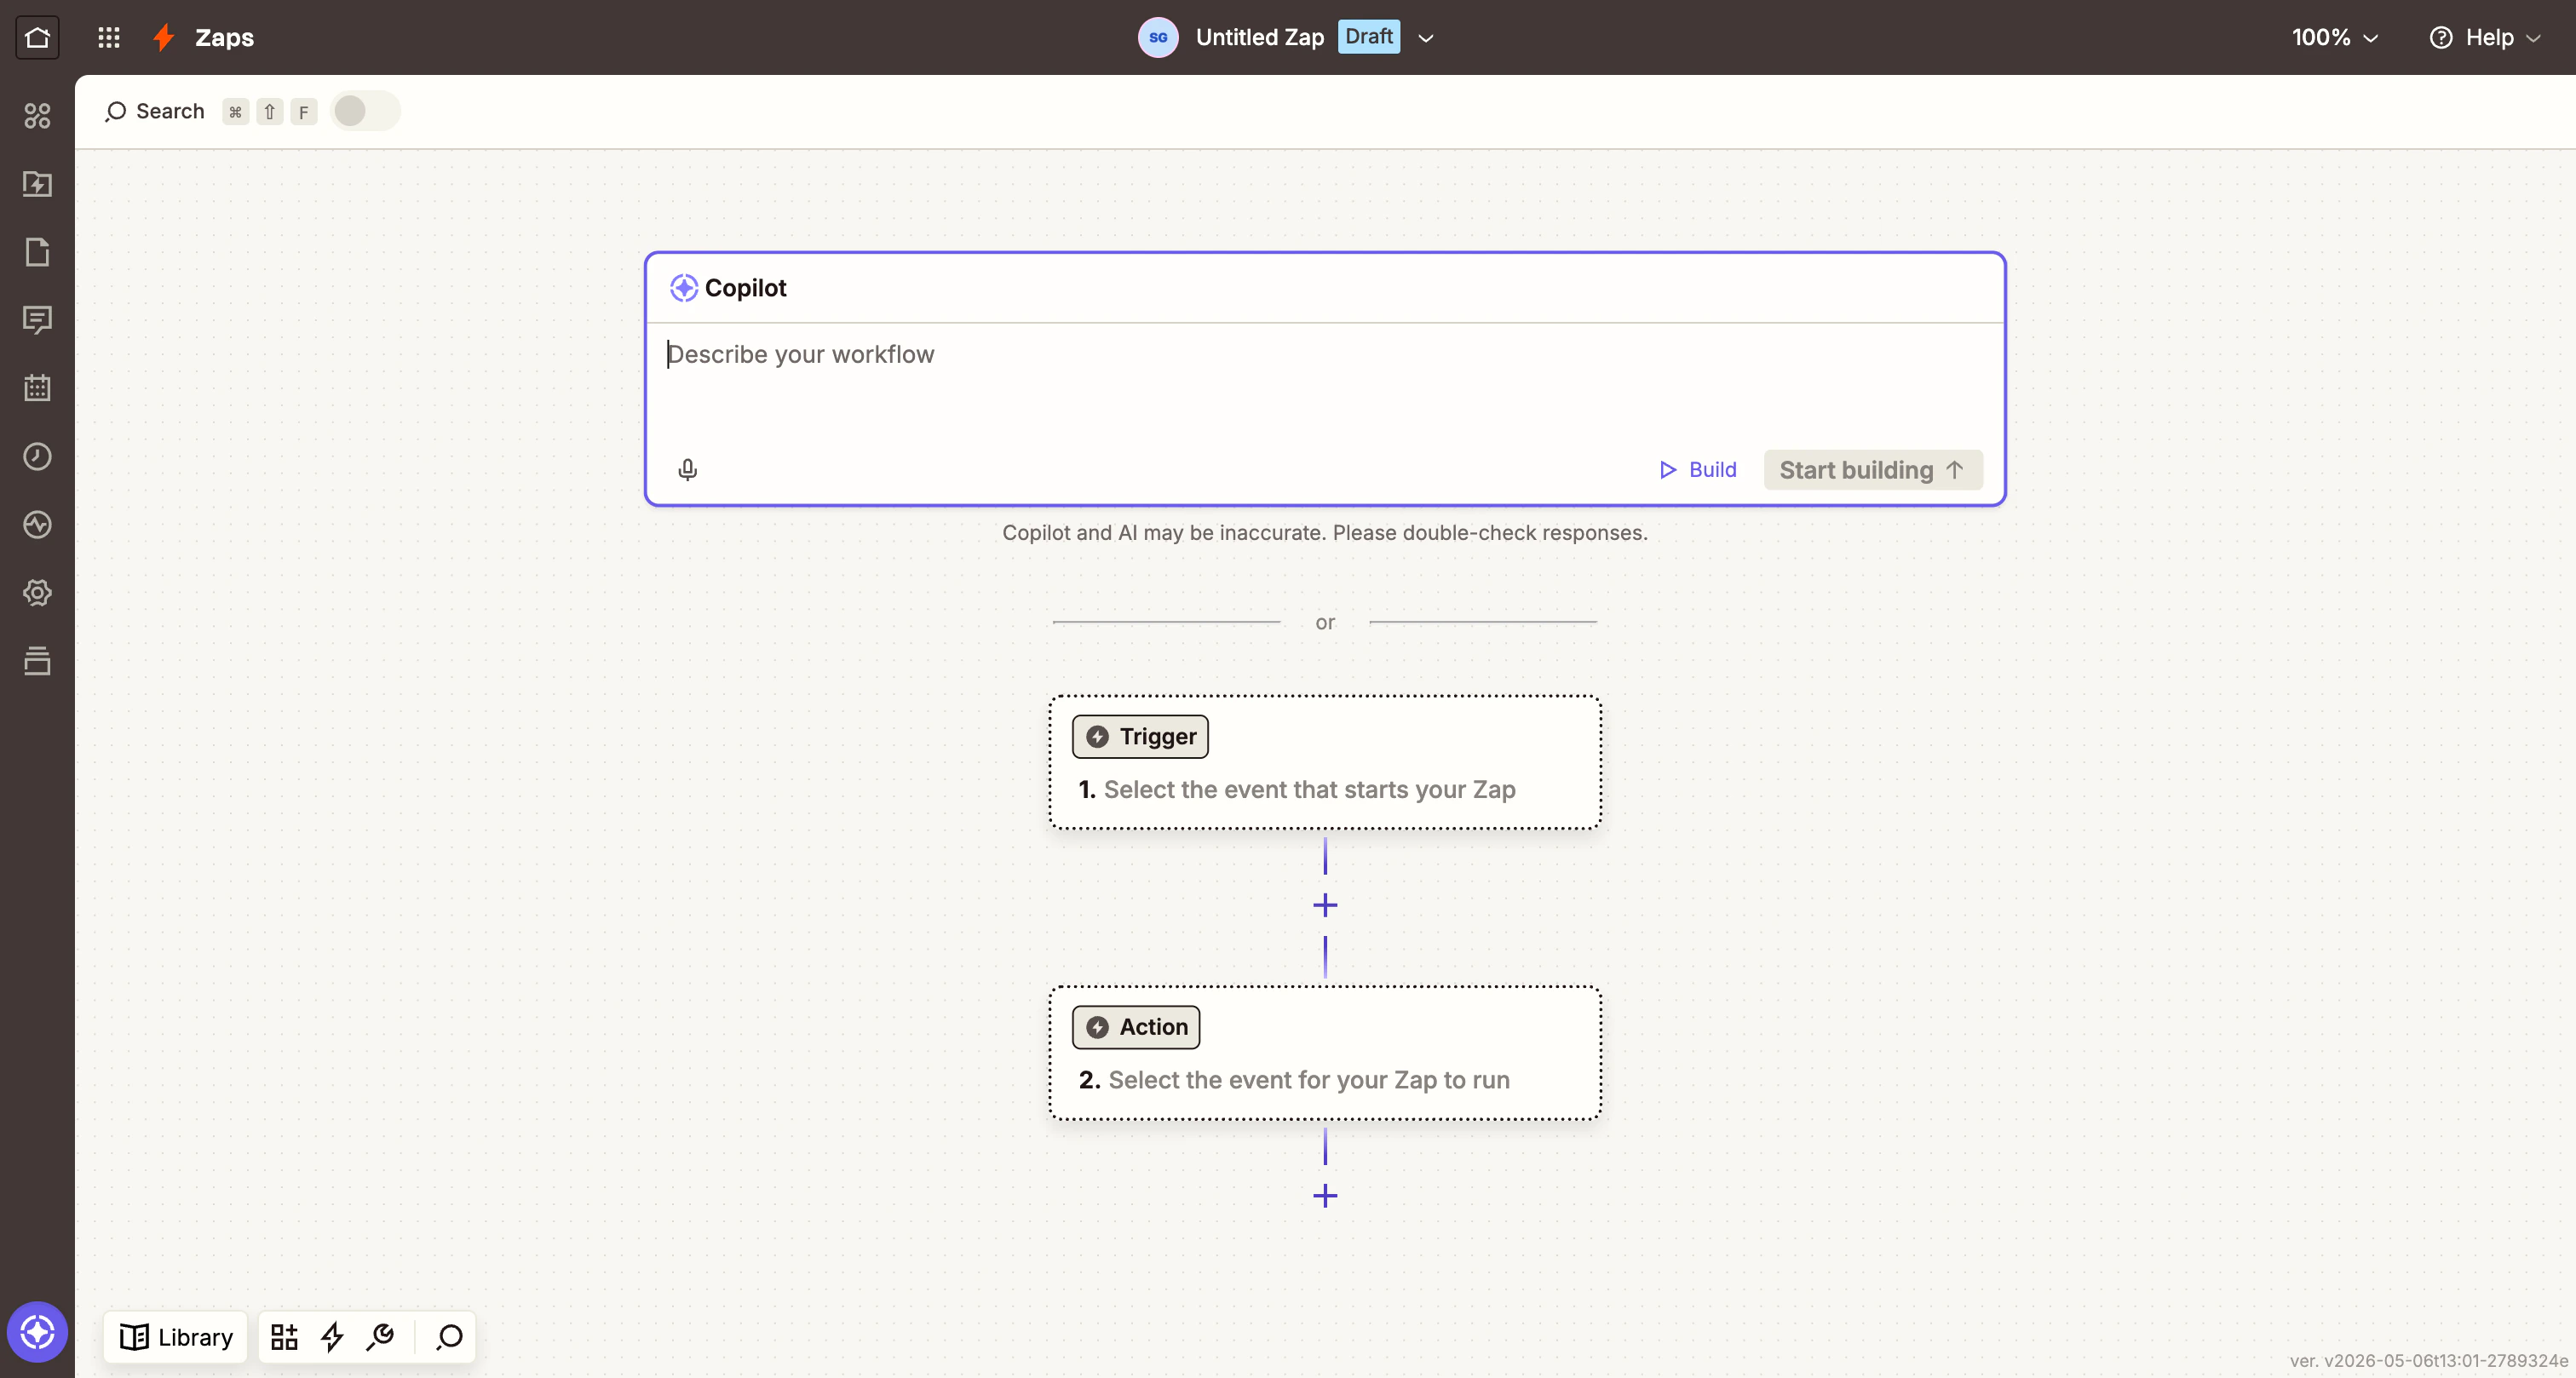 Click the **Trigger** card to open the app picker, search **Carousify**, and select the result tagged **Invite Only**.
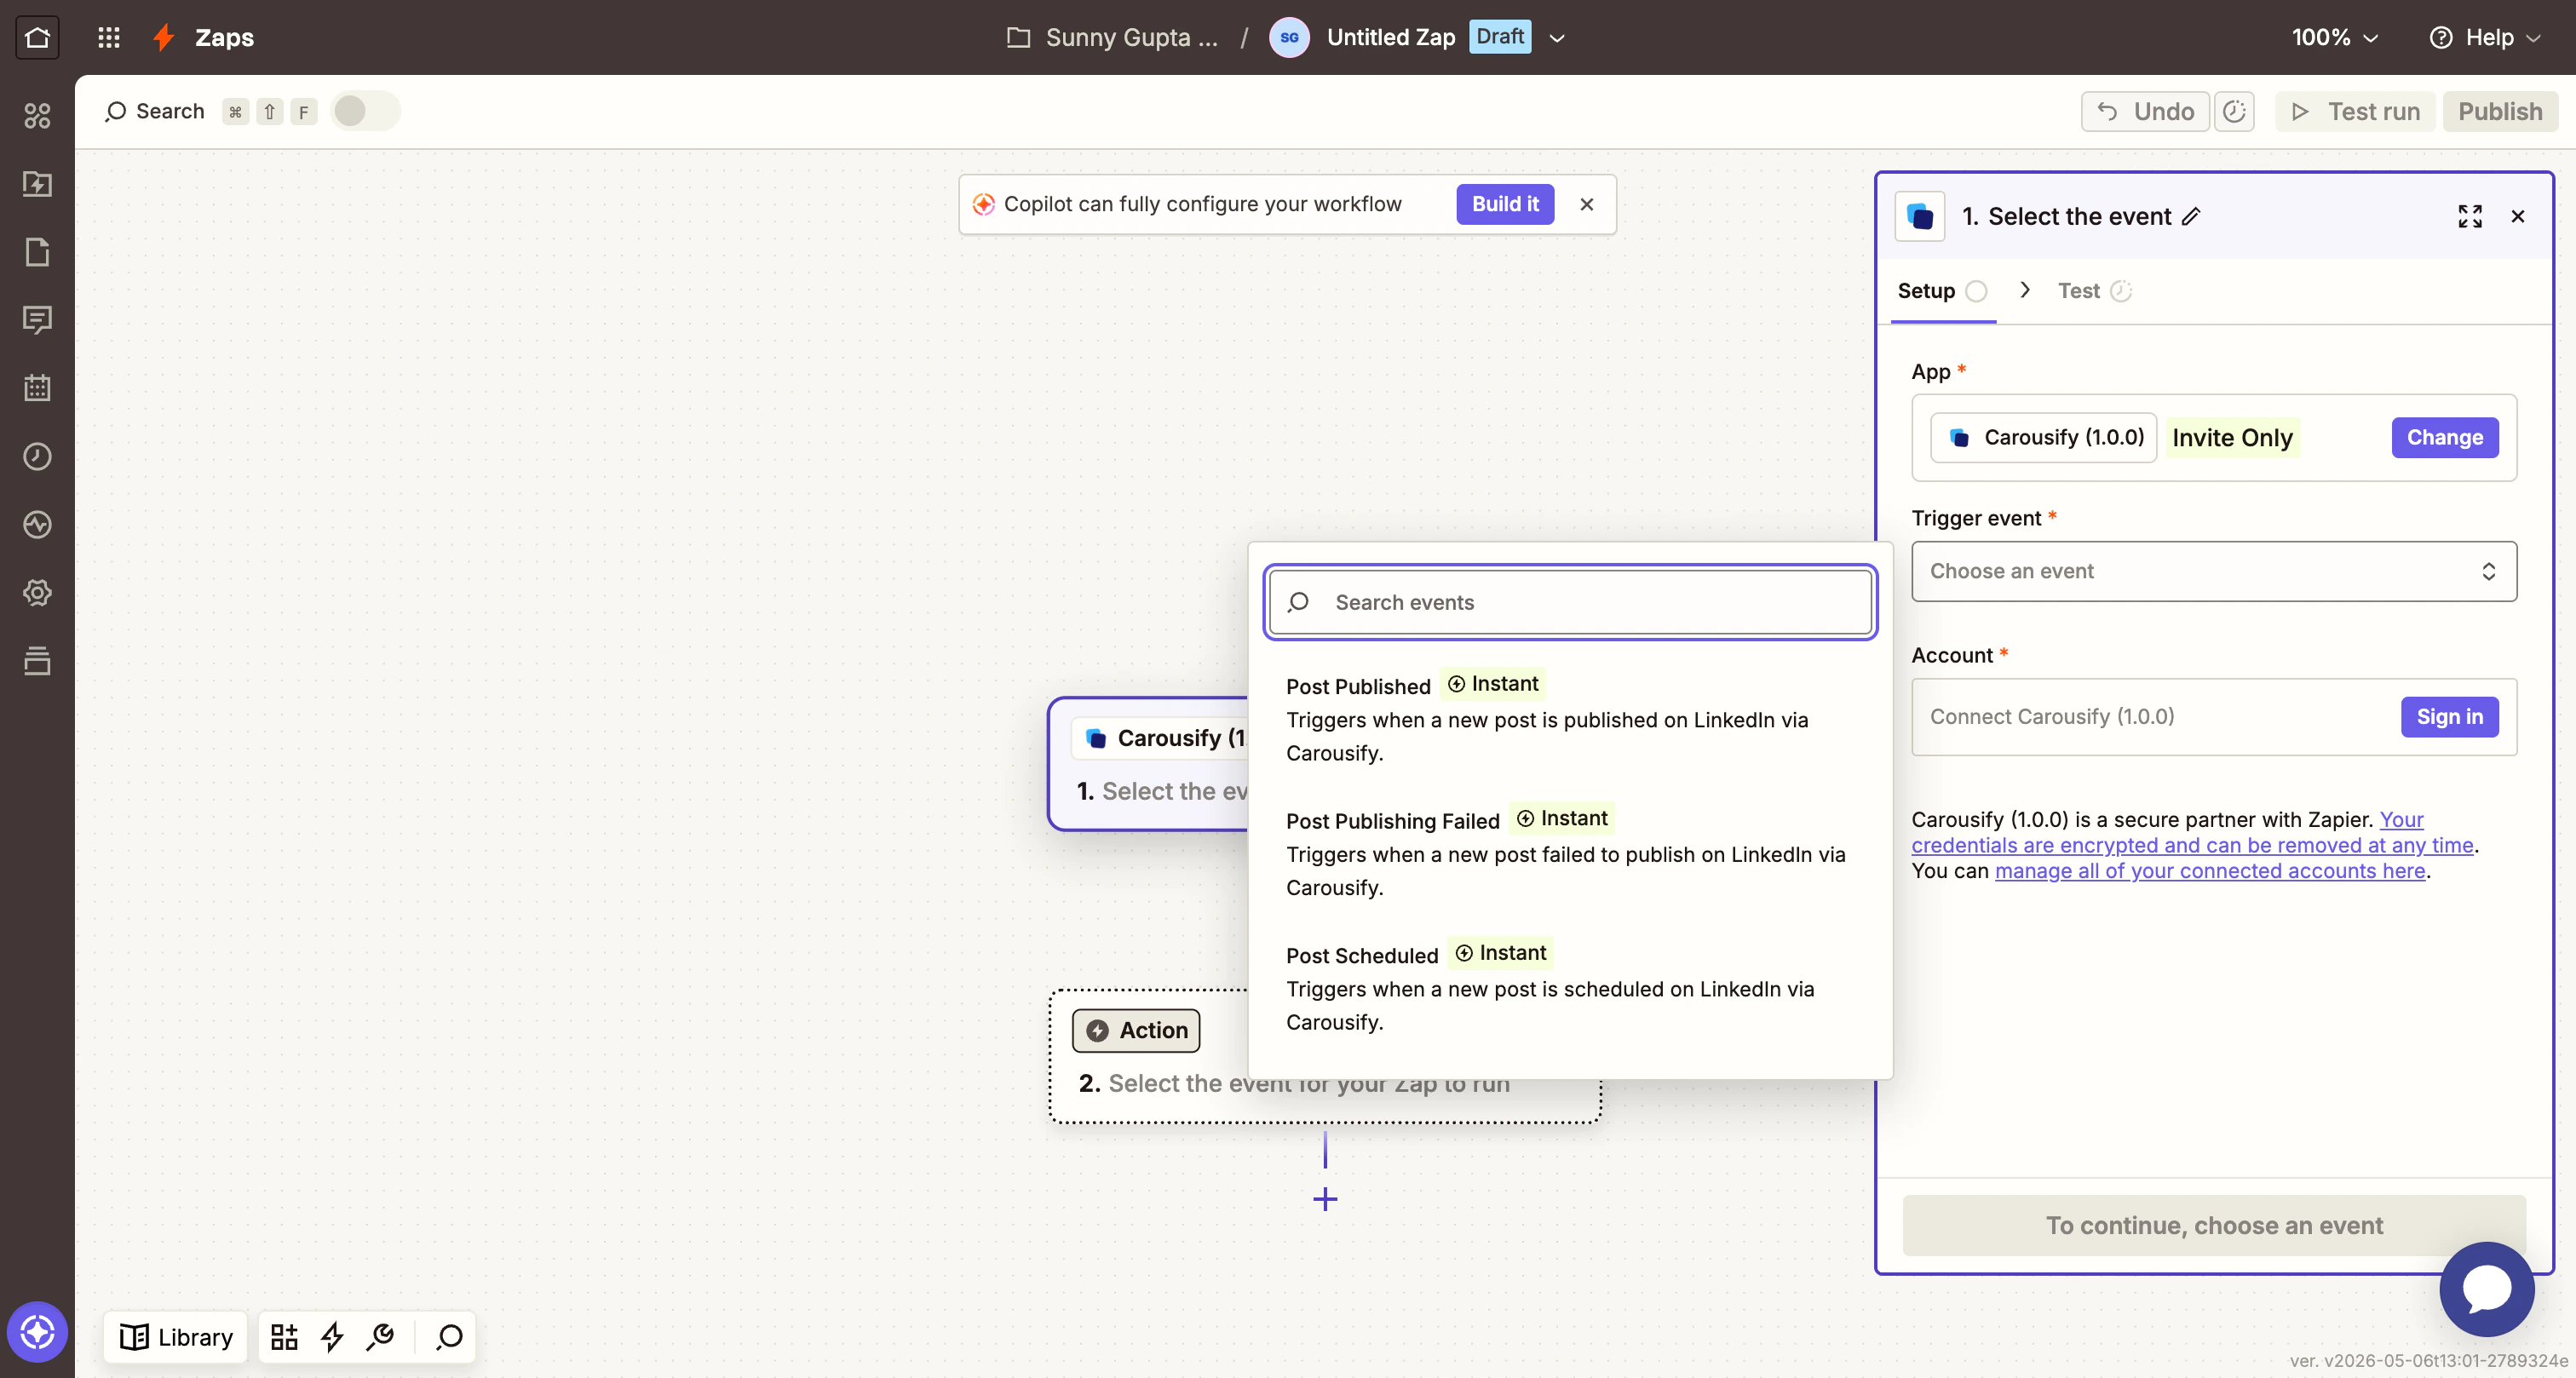
 In the **Trigger event** dropdown, pick the event you want — for the Google Sheets demo, choose **Post Published**.
 ## Step 4 — Sign in with your Carousify API key
Click **Sign in to Carousify** (or **Connect Carousify**). A popup appears asking for your **API Key**.
## Step 4 — Sign in with your Carousify API key
Click **Sign in to Carousify** (or **Connect Carousify**). A popup appears asking for your **API Key**.
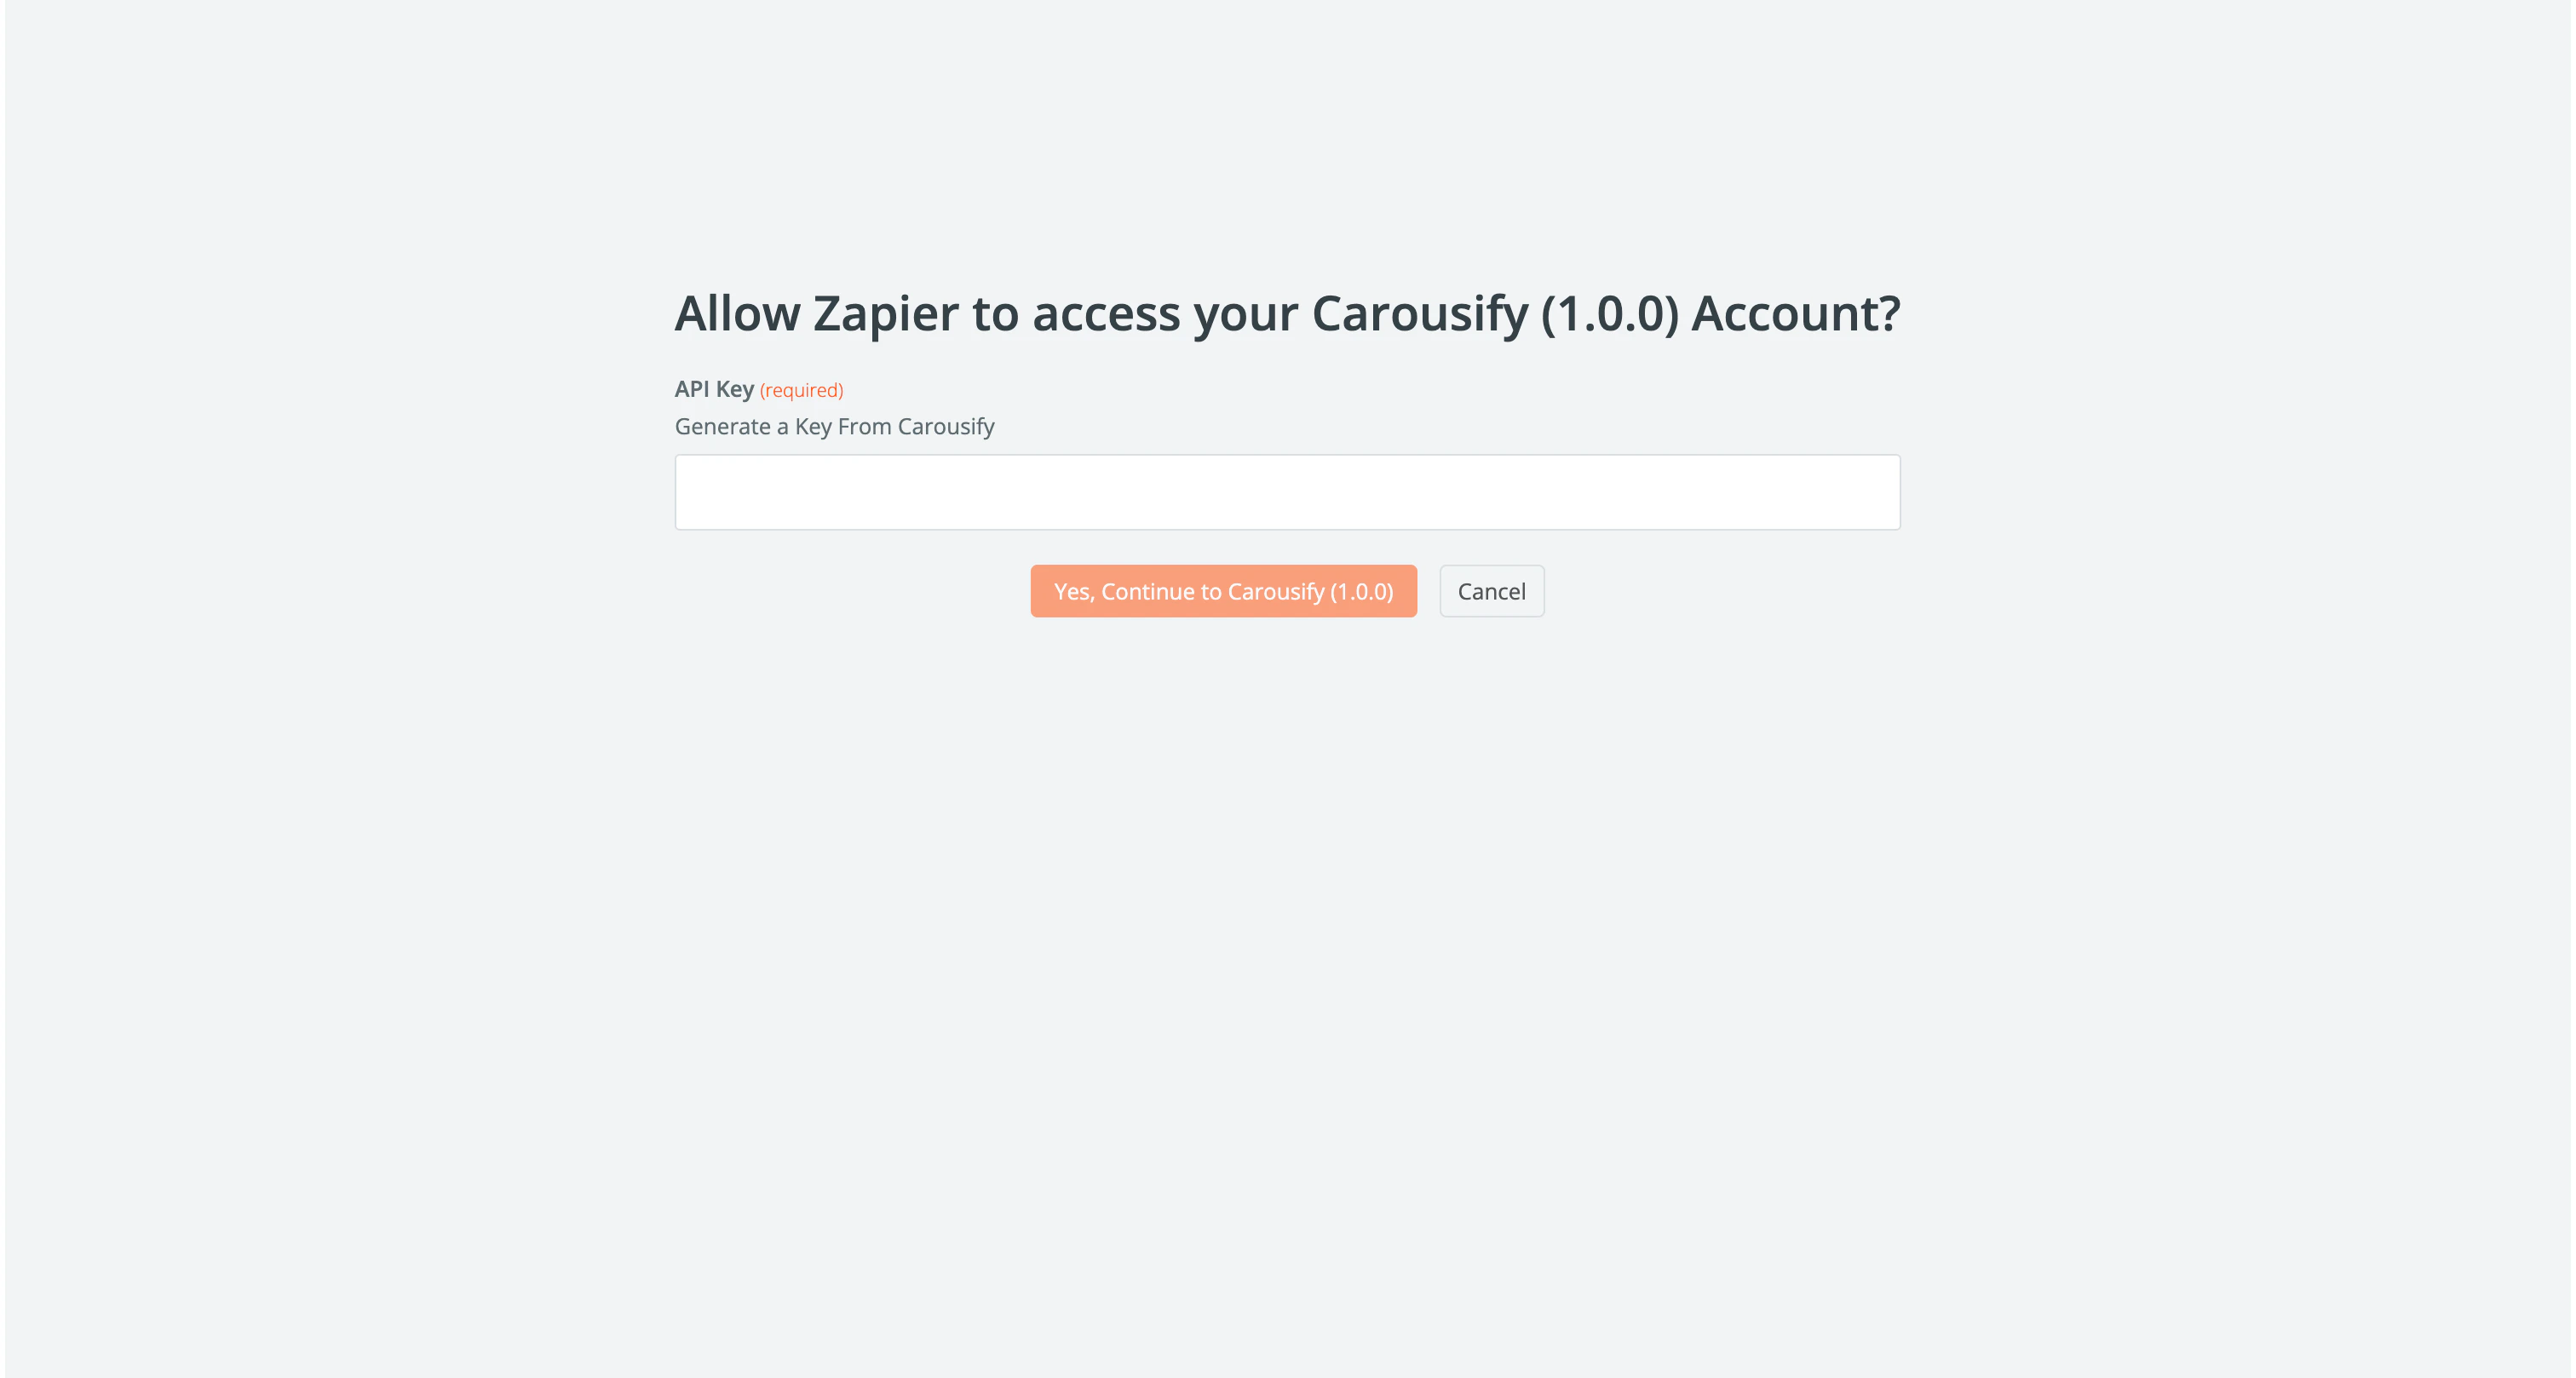 Paste the key from Step 1 and click **Yes, Continue to Carousify**. The popup closes and Zapier shows your Carousify workspace as the connected account.
Click **Continue**.
## Step 5 — Pull a sample event
Click **Test trigger**. Zapier asks Carousify for a recent event so you can see exactly what data the trigger emits.
Paste the key from Step 1 and click **Yes, Continue to Carousify**. The popup closes and Zapier shows your Carousify workspace as the connected account.
Click **Continue**.
## Step 5 — Pull a sample event
Click **Test trigger**. Zapier asks Carousify for a recent event so you can see exactly what data the trigger emits.
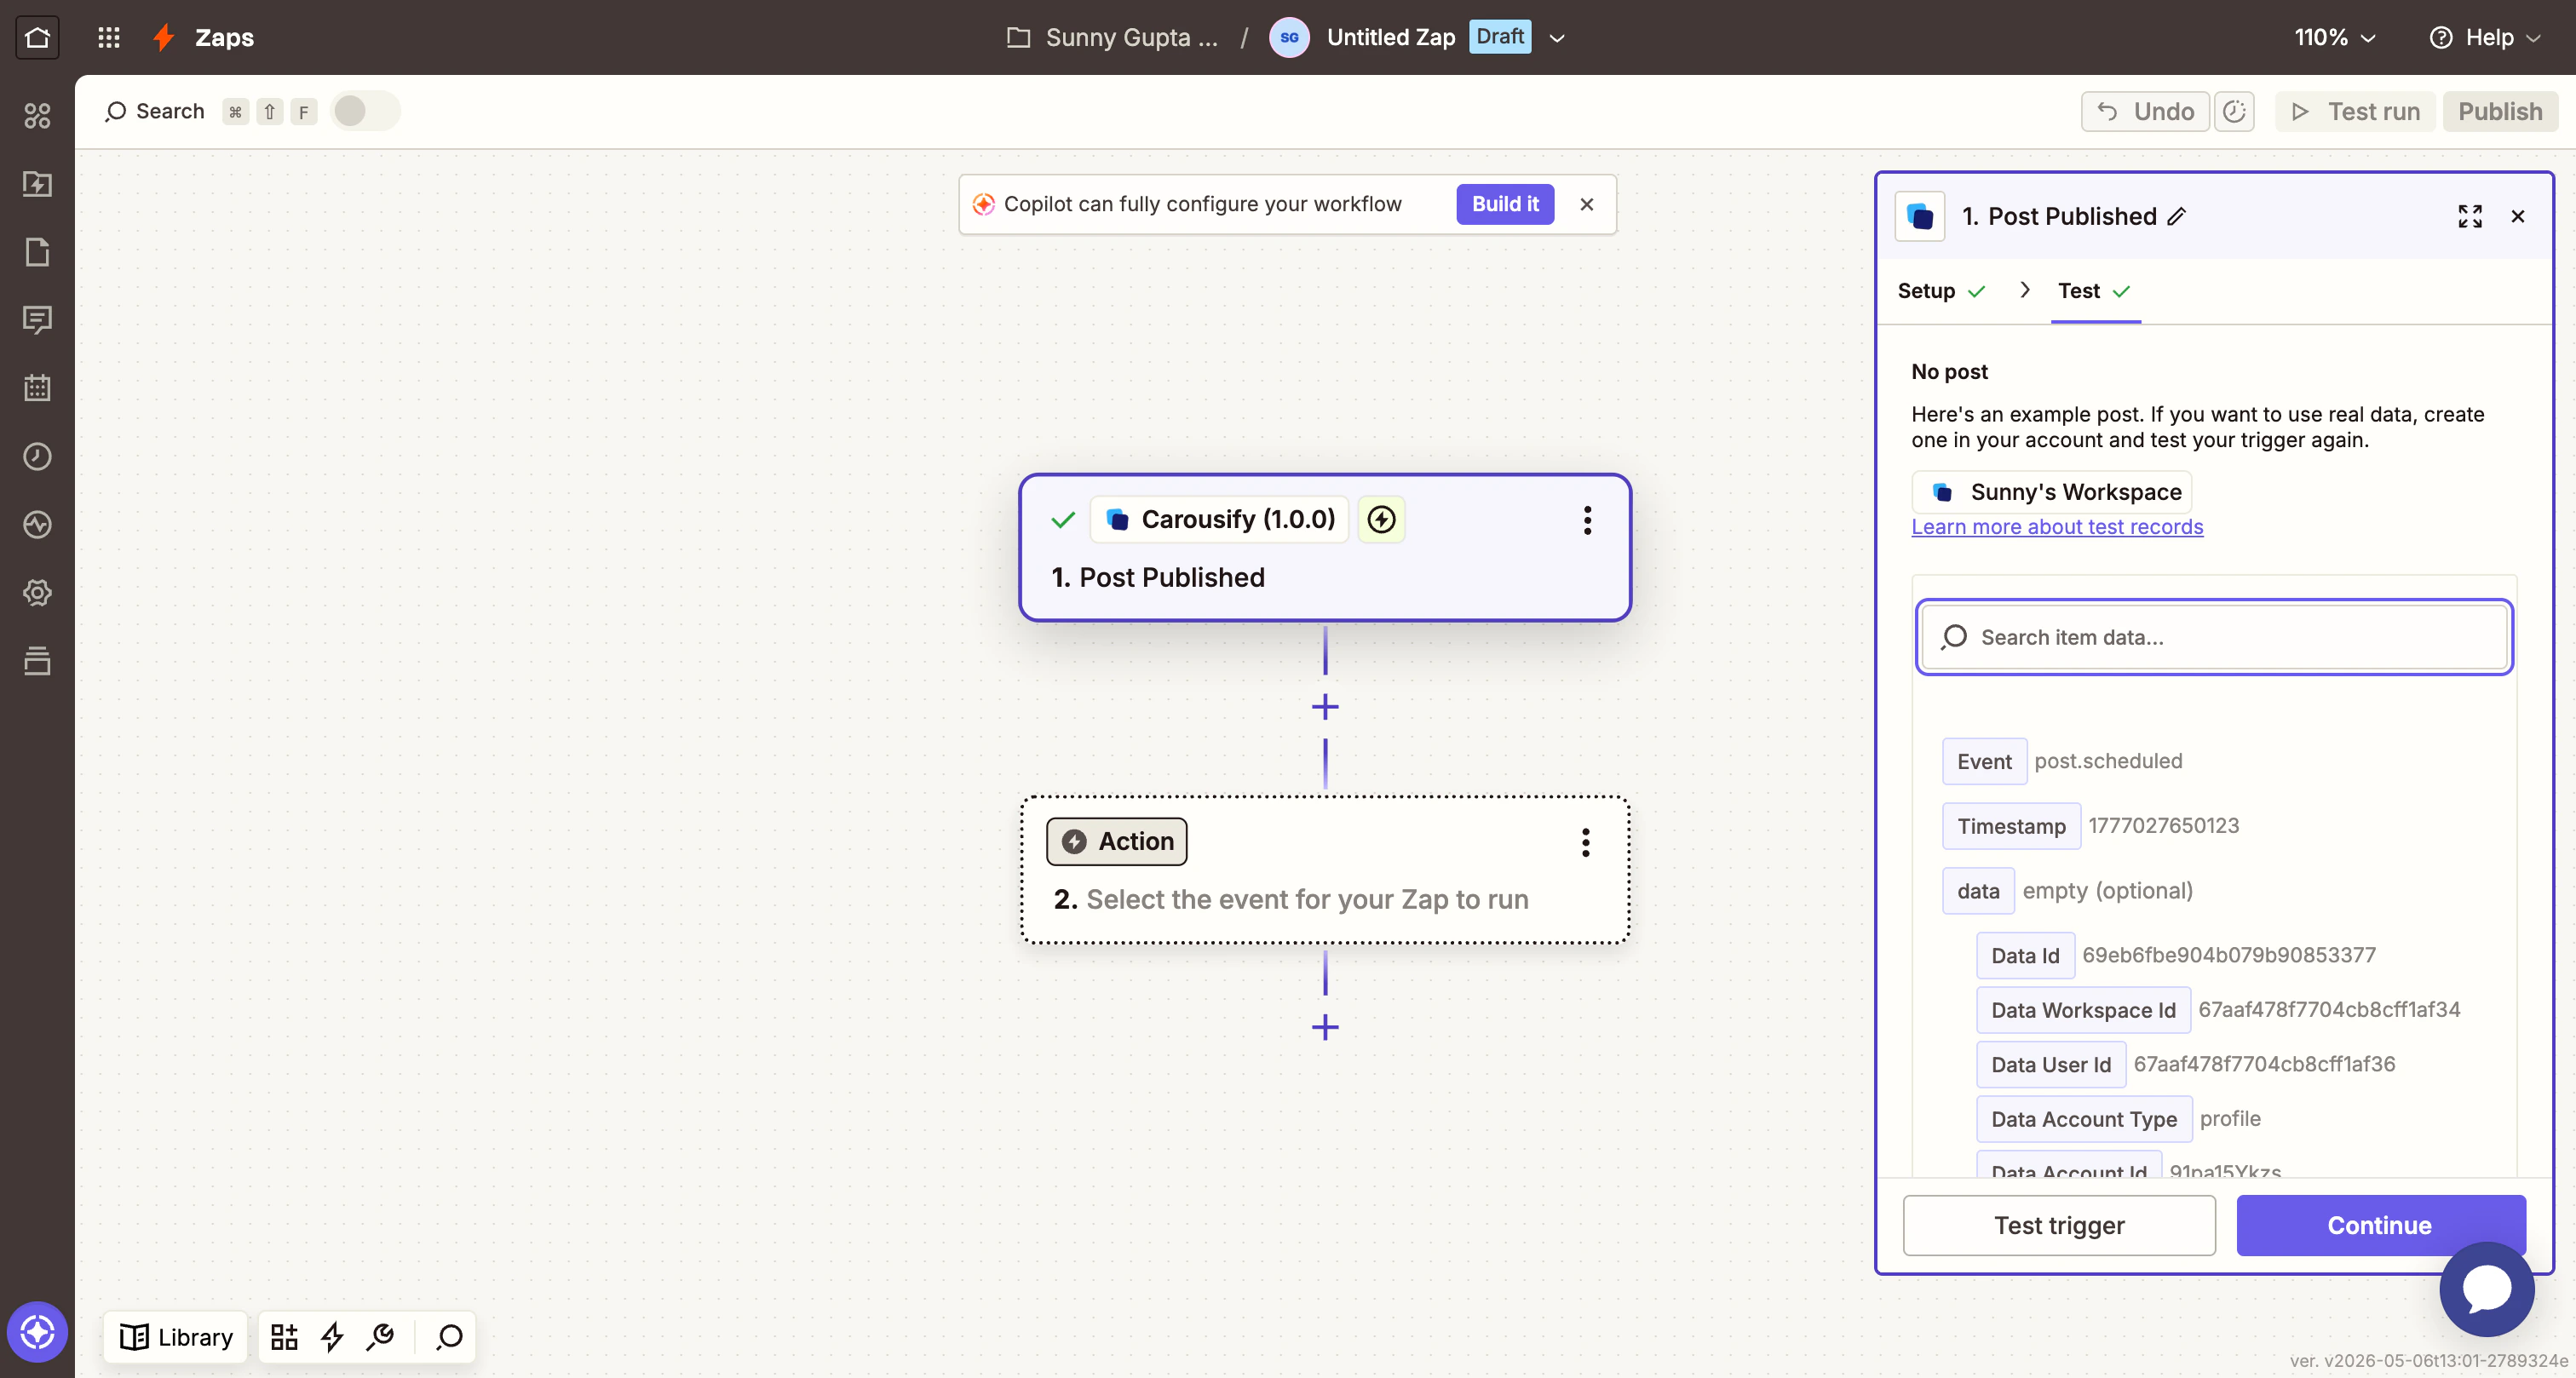 You should see the field list from the [Trigger payload](#trigger-payload) reference above. If you don't have any published posts yet, Zapier returns a stub example — that still works for mapping fields.
Click **Continue with selected record**.
## Step 6 — Add a Google Sheets action
Click the **Action** card. Search **Google Sheets** and pick it.
For **Action event**, choose **Create Spreadsheet Row** and click **Continue**.
You should see the field list from the [Trigger payload](#trigger-payload) reference above. If you don't have any published posts yet, Zapier returns a stub example — that still works for mapping fields.
Click **Continue with selected record**.
## Step 6 — Add a Google Sheets action
Click the **Action** card. Search **Google Sheets** and pick it.
For **Action event**, choose **Create Spreadsheet Row** and click **Continue**.
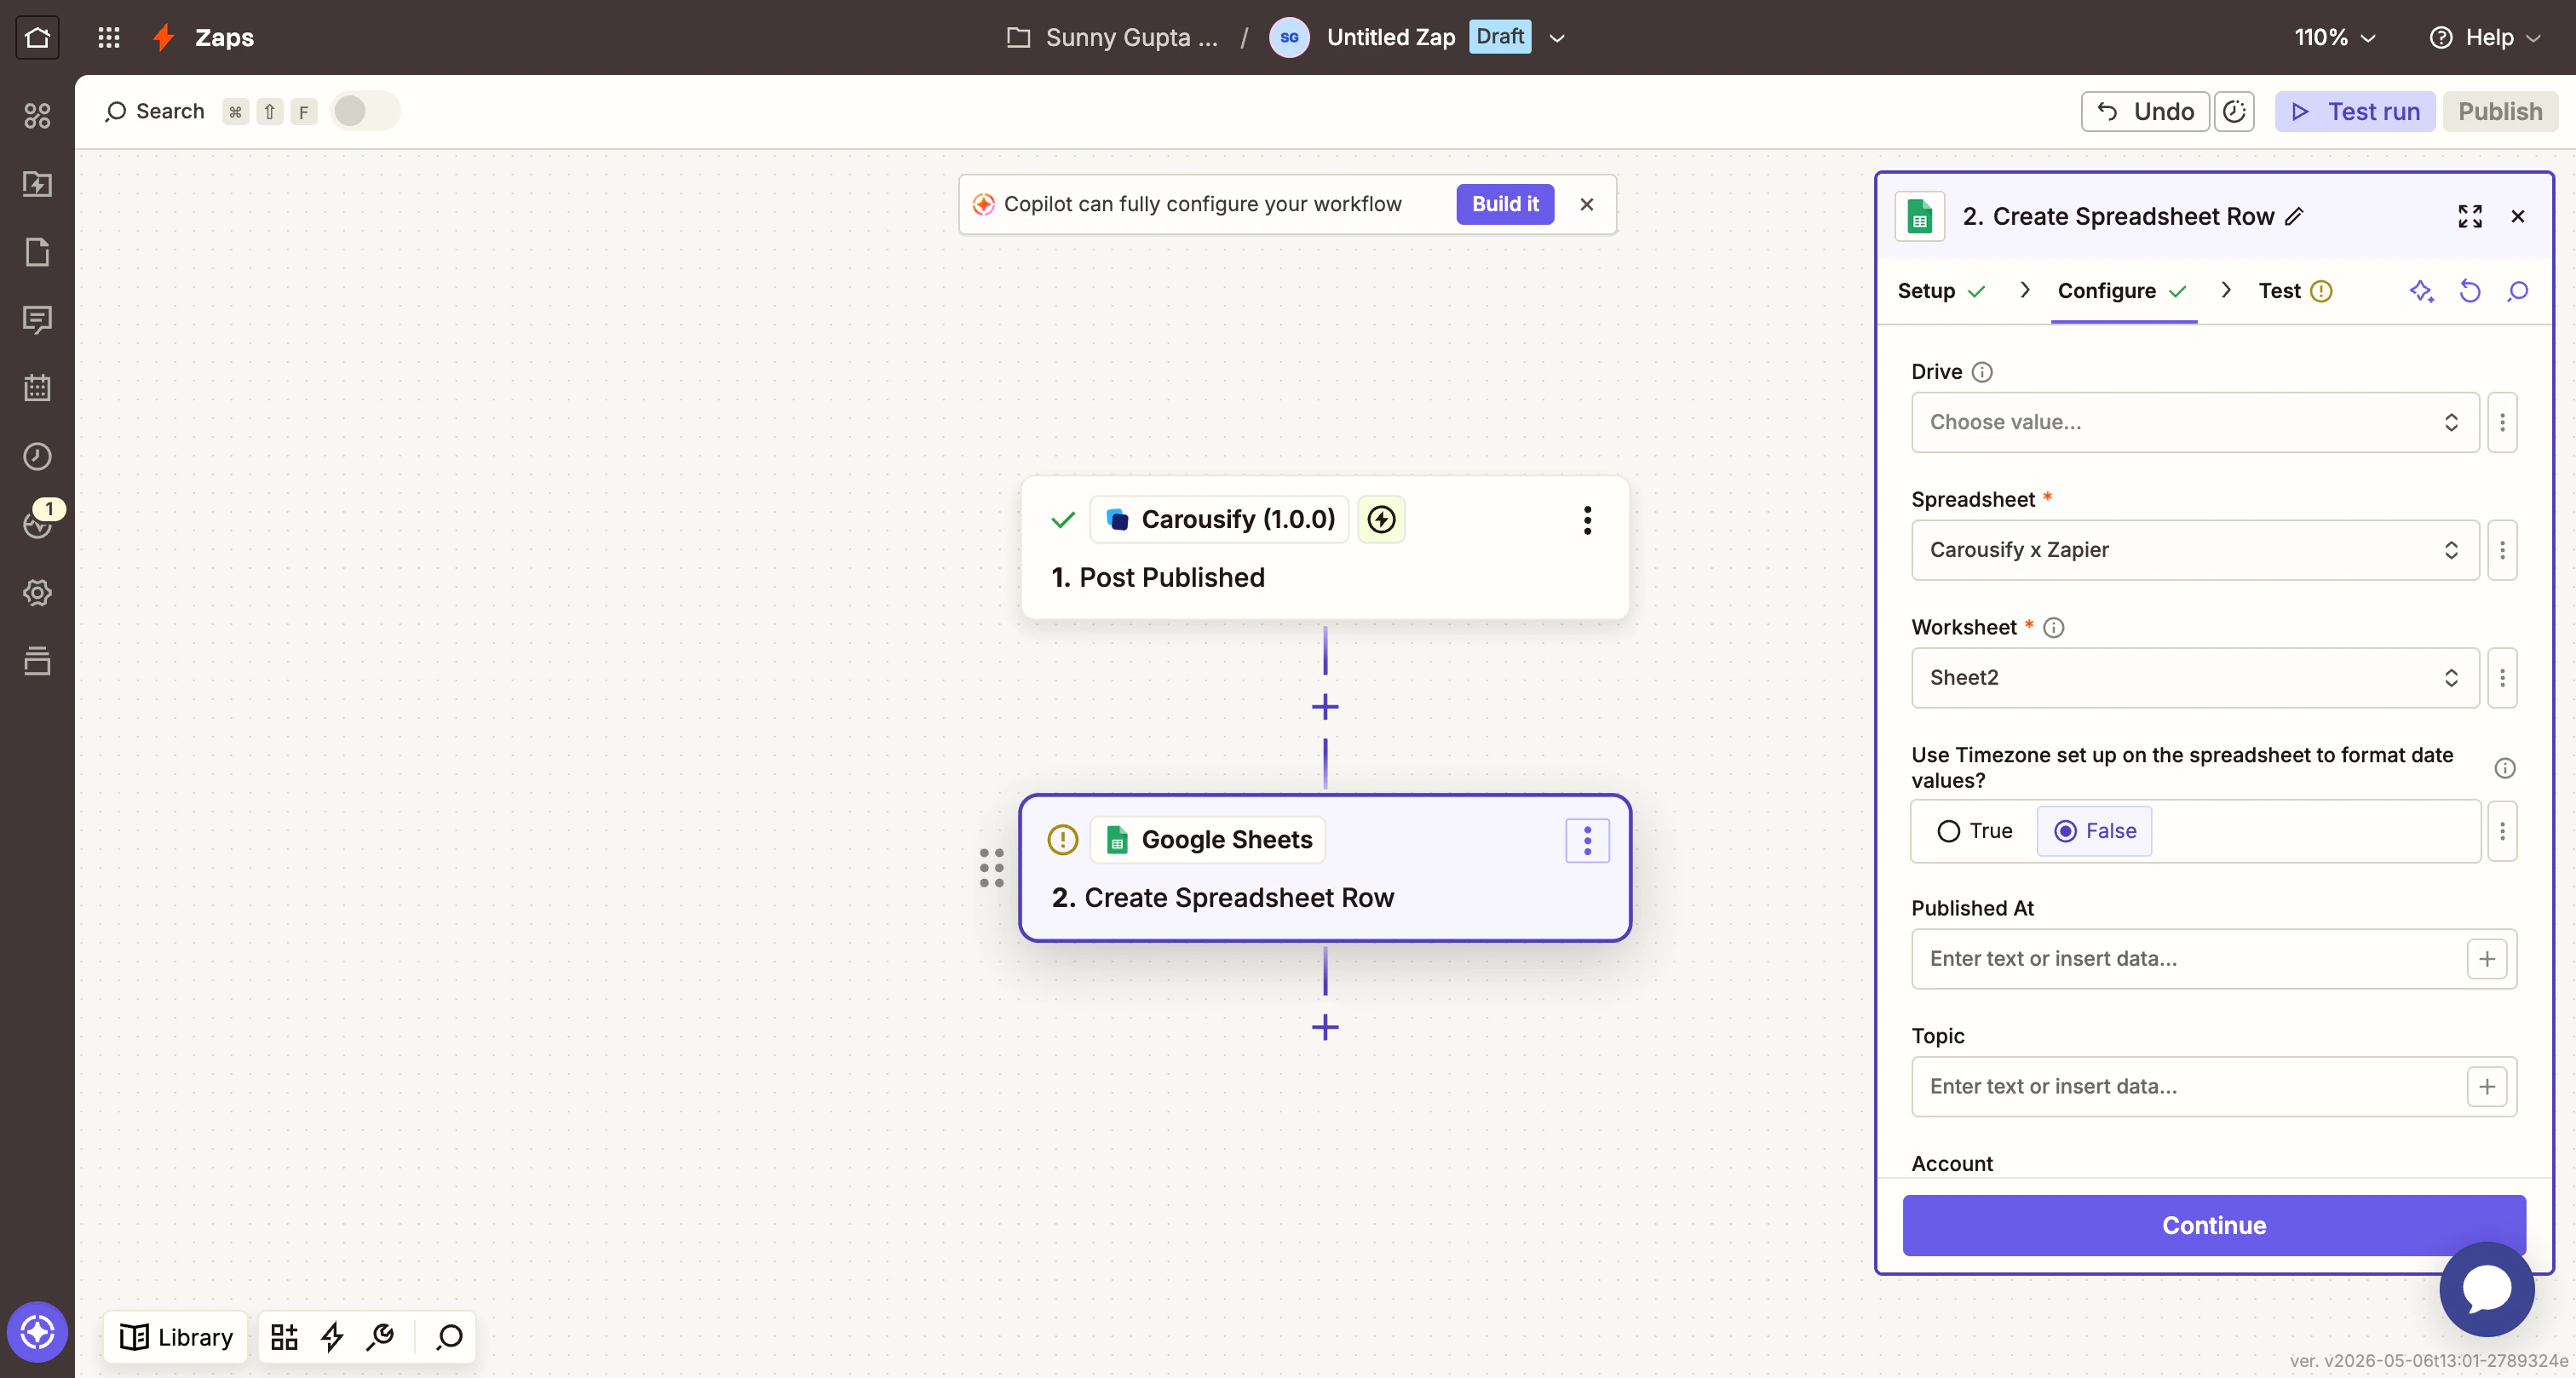
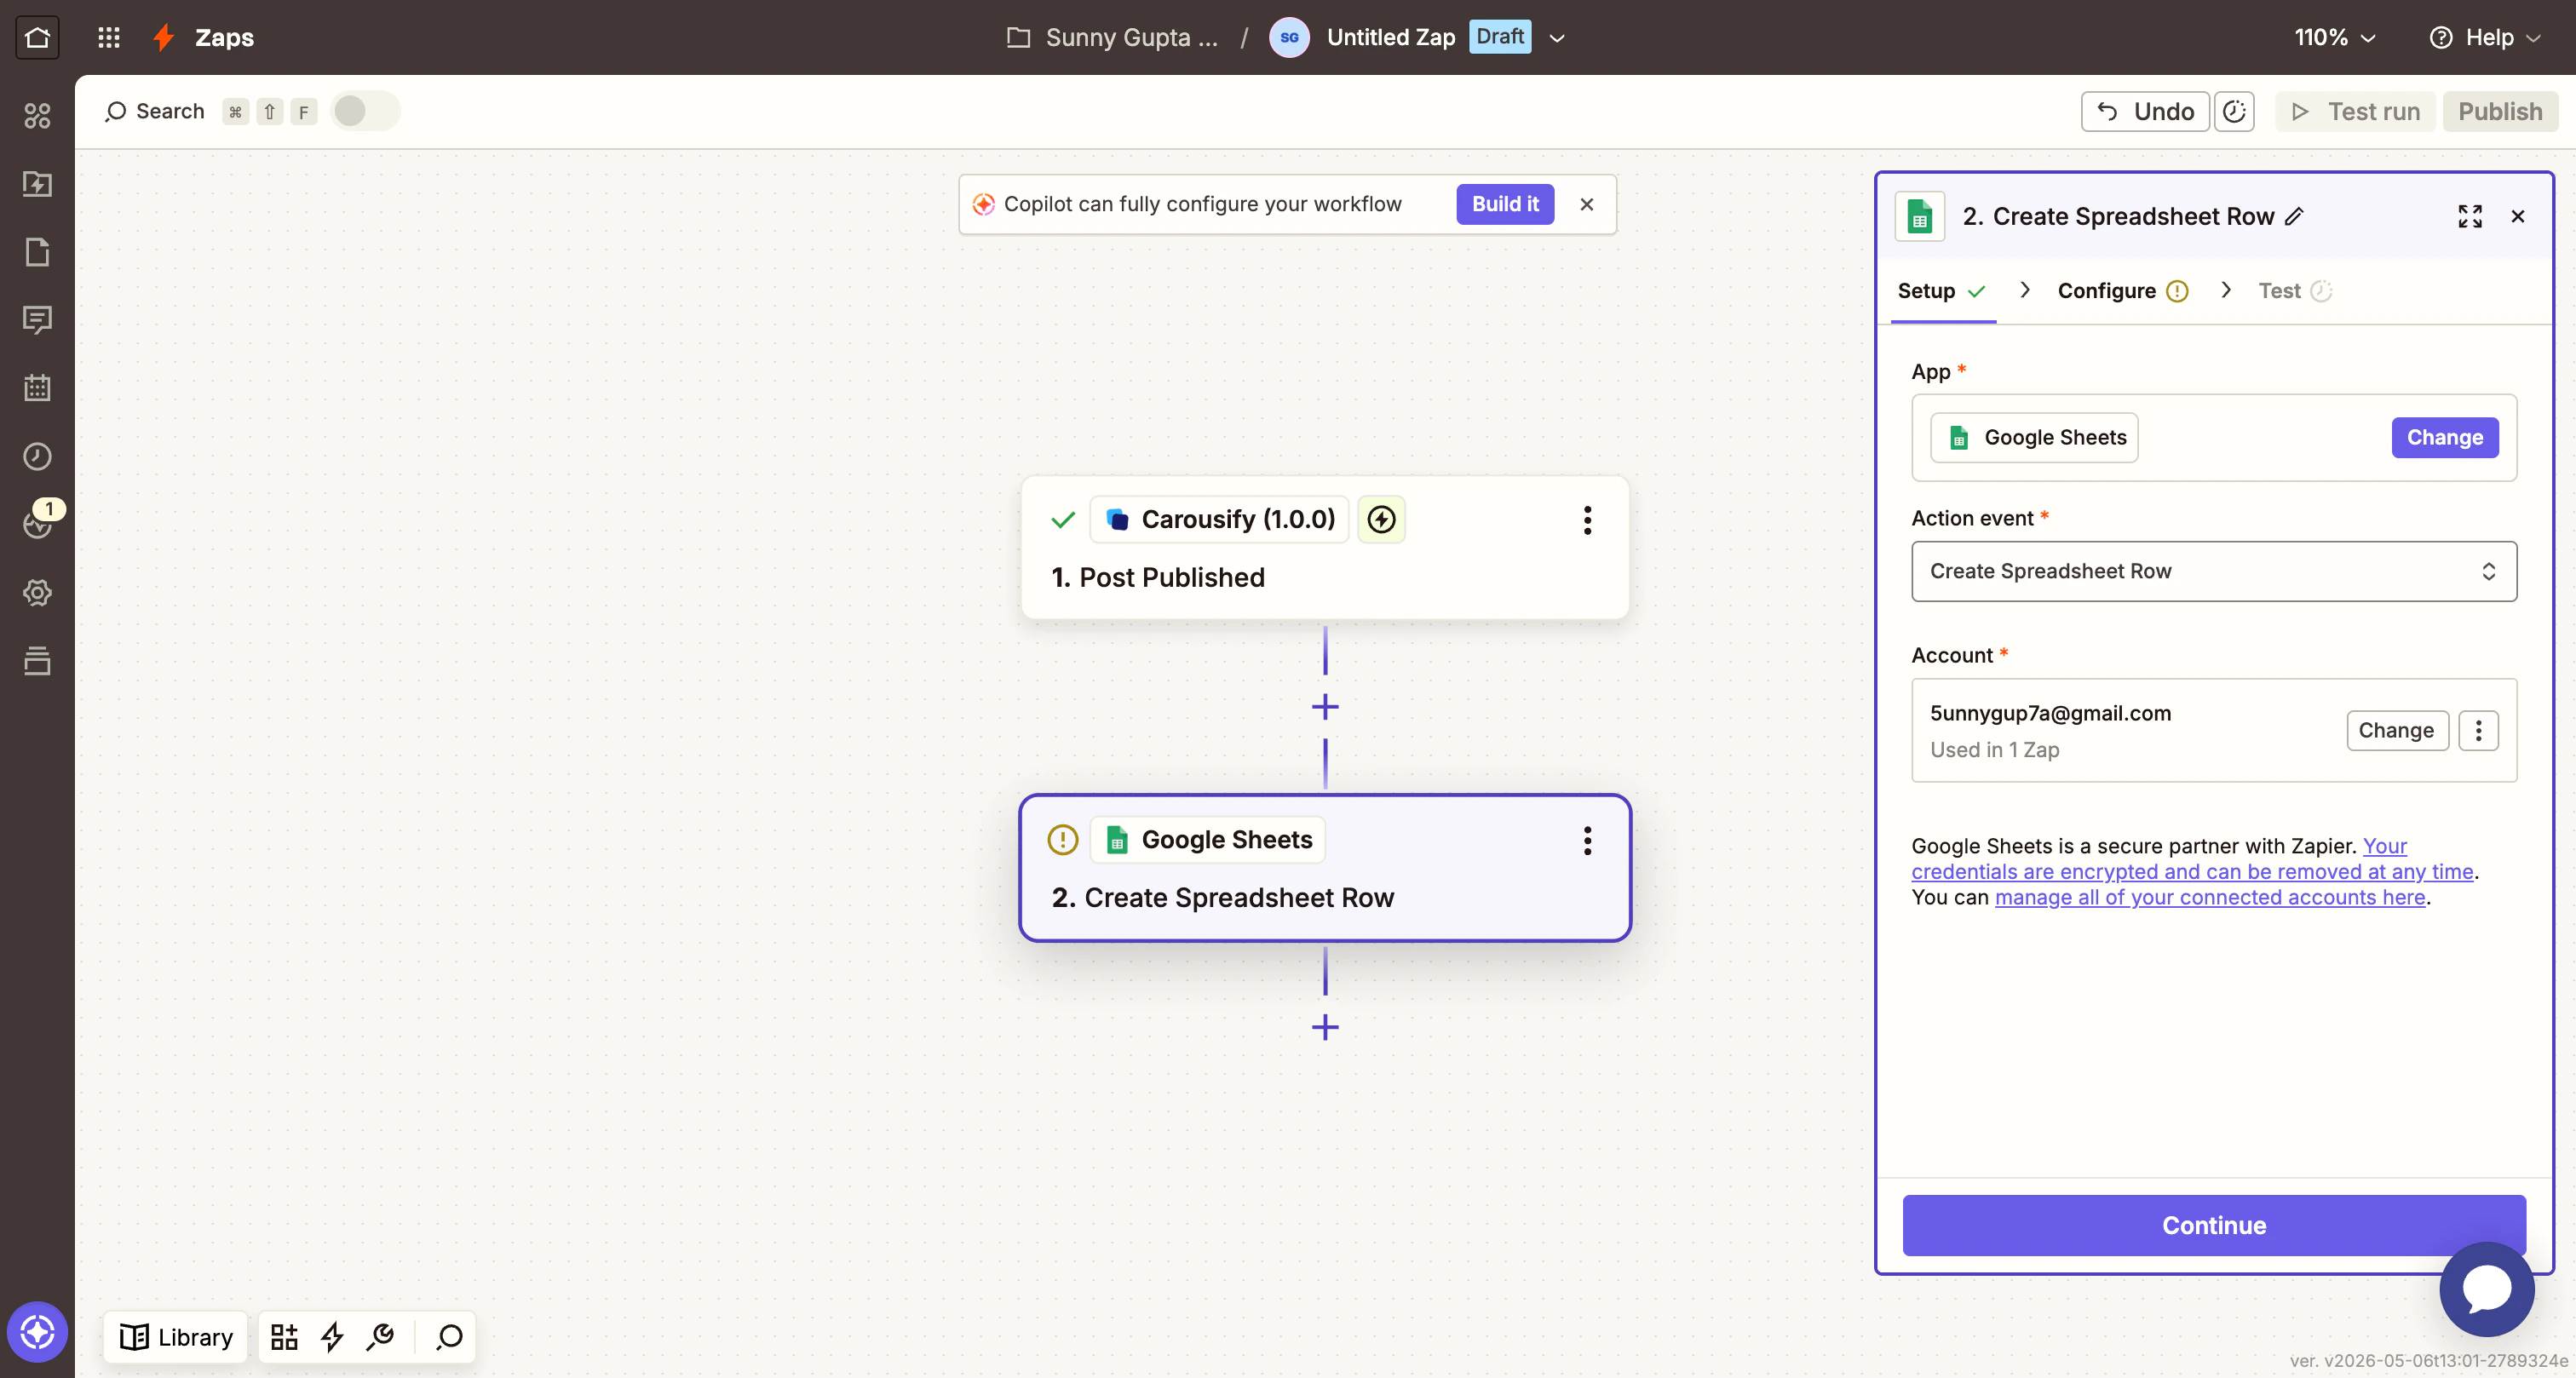 Sign in to your Google account if you haven't already. Then under **Configure**:
* **Spreadsheet** — pick the sheet you want to log into (e.g. *Carousify x Zapier*).
* **Worksheet** — pick the tab. Zapier reads the header row to populate the column inputs below.
Sign in to your Google account if you haven't already. Then under **Configure**:
* **Spreadsheet** — pick the sheet you want to log into (e.g. *Carousify x Zapier*).
* **Worksheet** — pick the tab. Zapier reads the header row to populate the column inputs below.
 ## Step 7 — Map Carousify fields to your sheet columns
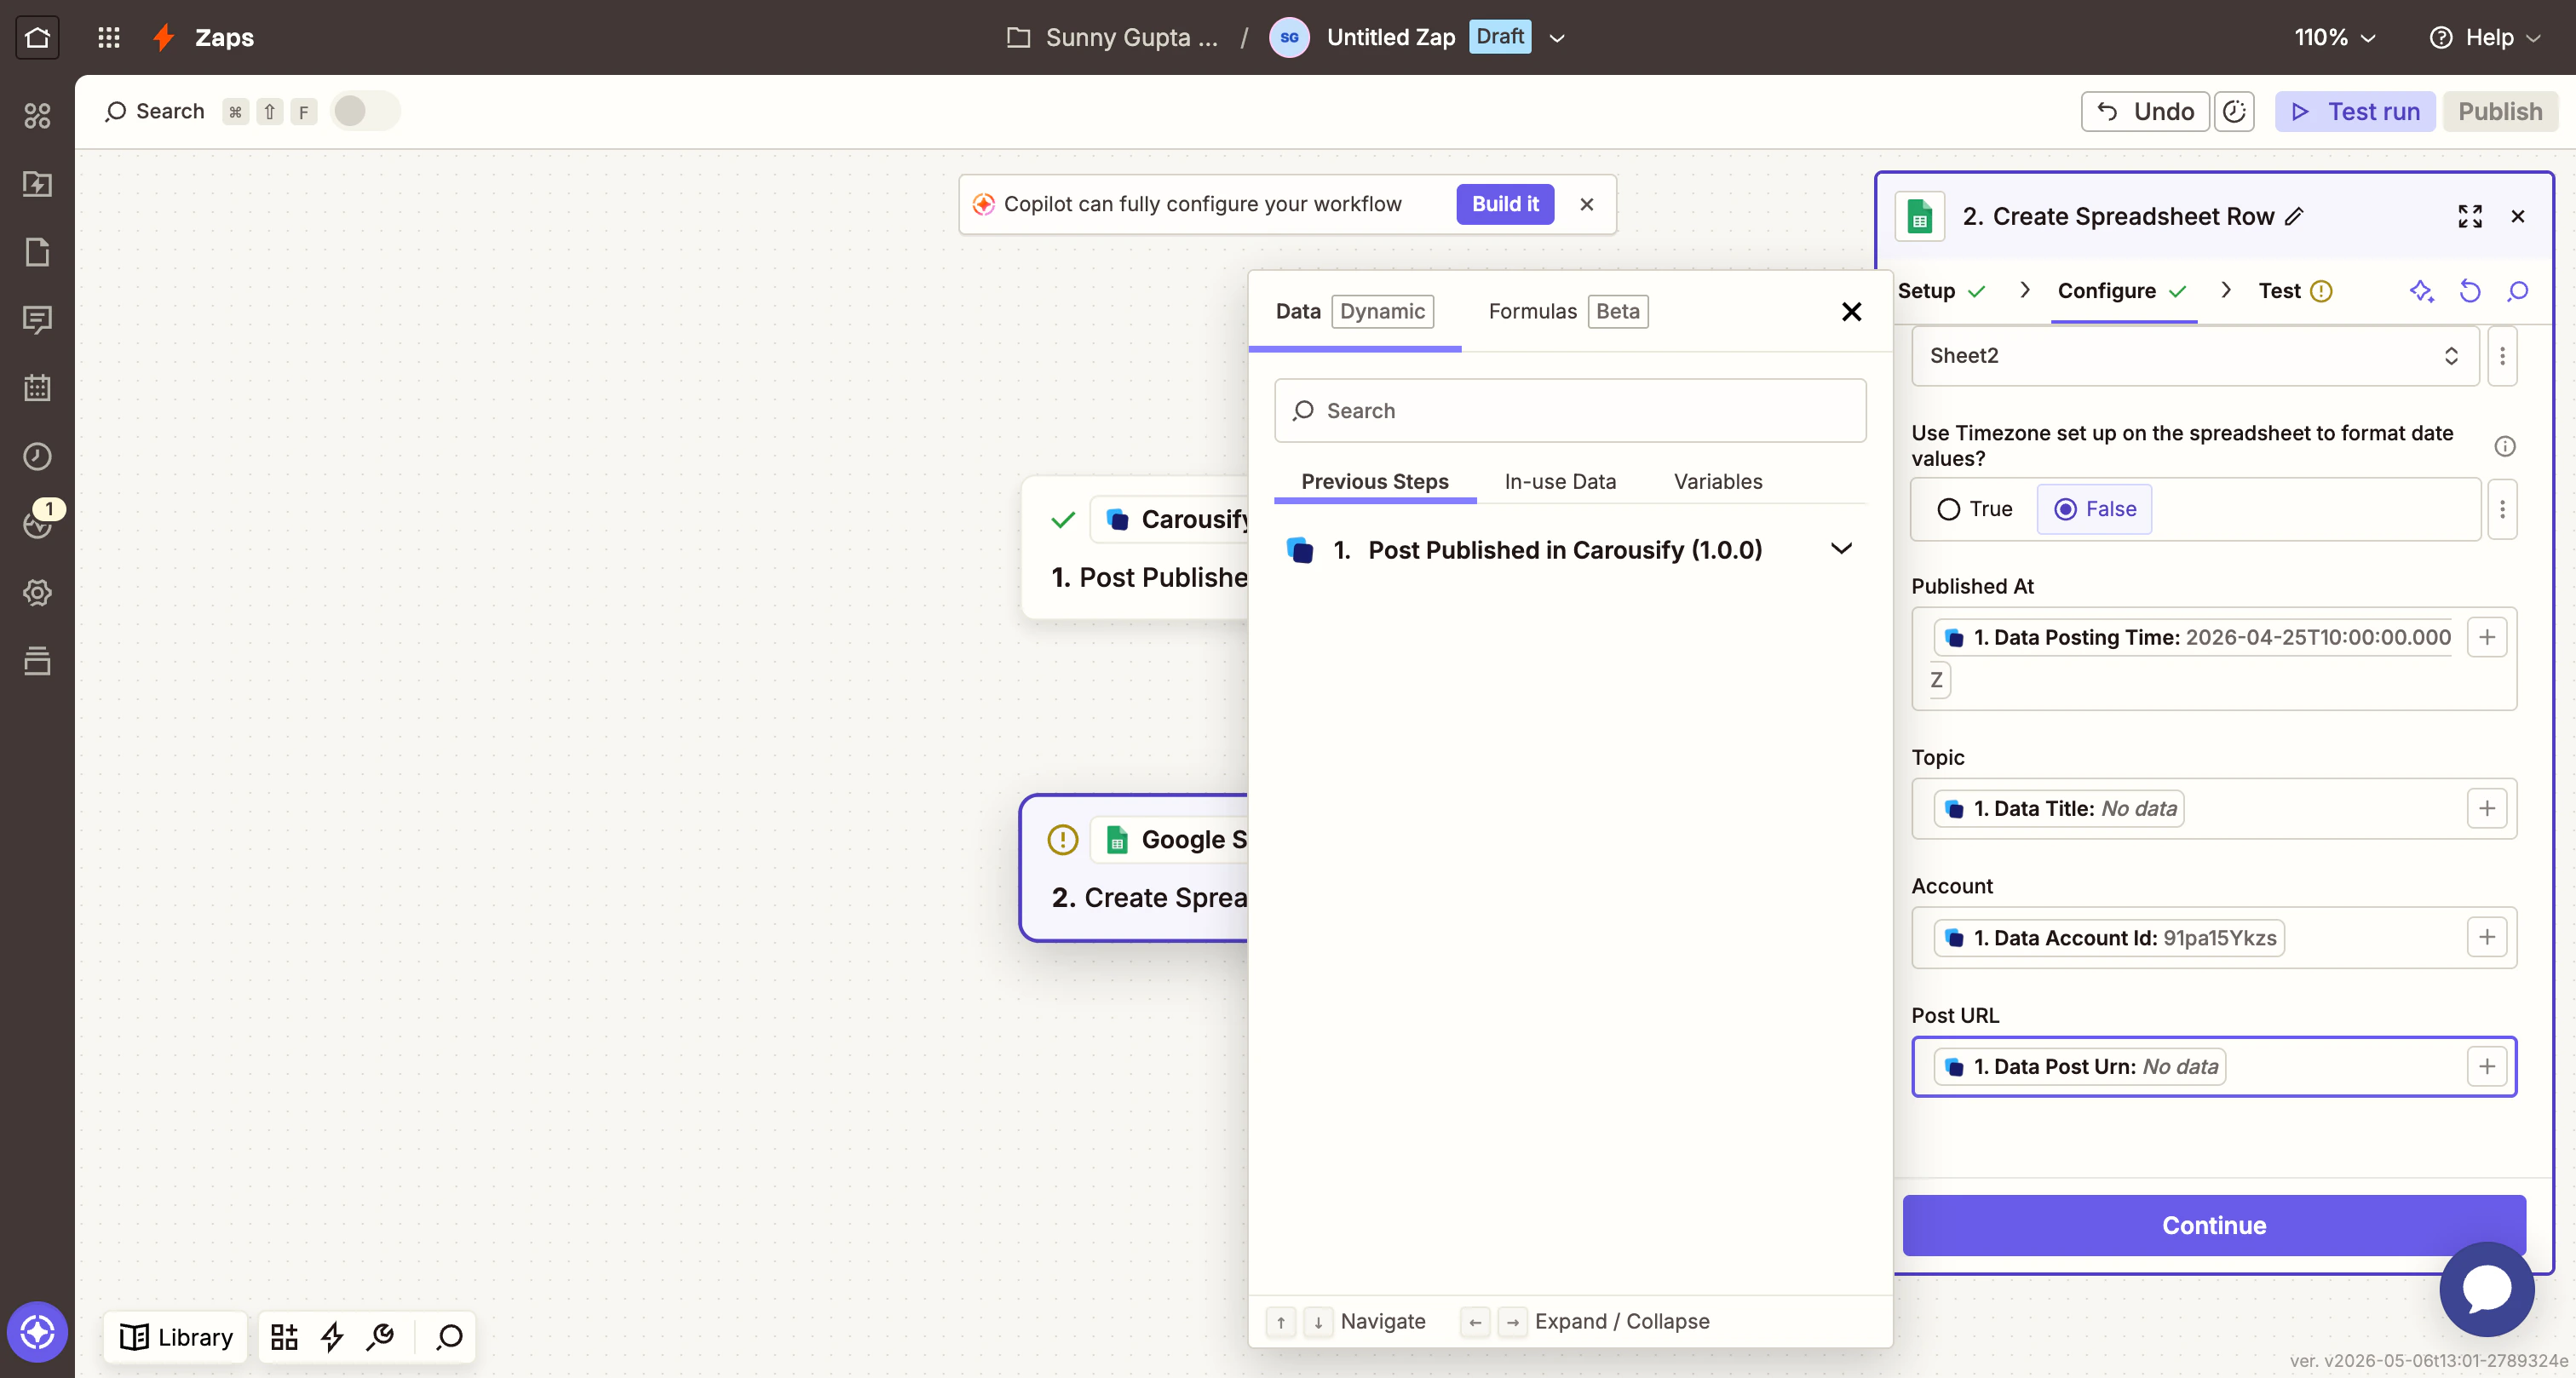
Each column in your sheet appears as an input. Click **Add a field mapping** next to each and pick the matching Carousify field from the previous step.
For a sheet with columns **Published At / Topic / Account / Post URL**, the natural mapping is:
| Sheet column | Carousify field |
| ------------ | ------------------------------------------------------------- |
| Published At | `Data Posting Time` |
| Topic | `Data Title` (or `Data Content` if you'd rather log the body) |
| Account | `Data Account Id` |
| Post URL | `Data Post Urn` |
## Step 7 — Map Carousify fields to your sheet columns
Each column in your sheet appears as an input. Click **Add a field mapping** next to each and pick the matching Carousify field from the previous step.
For a sheet with columns **Published At / Topic / Account / Post URL**, the natural mapping is:
| Sheet column | Carousify field |
| ------------ | ------------------------------------------------------------- |
| Published At | `Data Posting Time` |
| Topic | `Data Title` (or `Data Content` if you'd rather log the body) |
| Account | `Data Account Id` |
| Post URL | `Data Post Urn` |
 Click **Continue**.
## Step 8 — Test and publish
Zapier shows a preview of the exact payload it'll send to Google Sheets.
Click **Continue**.
## Step 8 — Test and publish
Zapier shows a preview of the exact payload it'll send to Google Sheets.
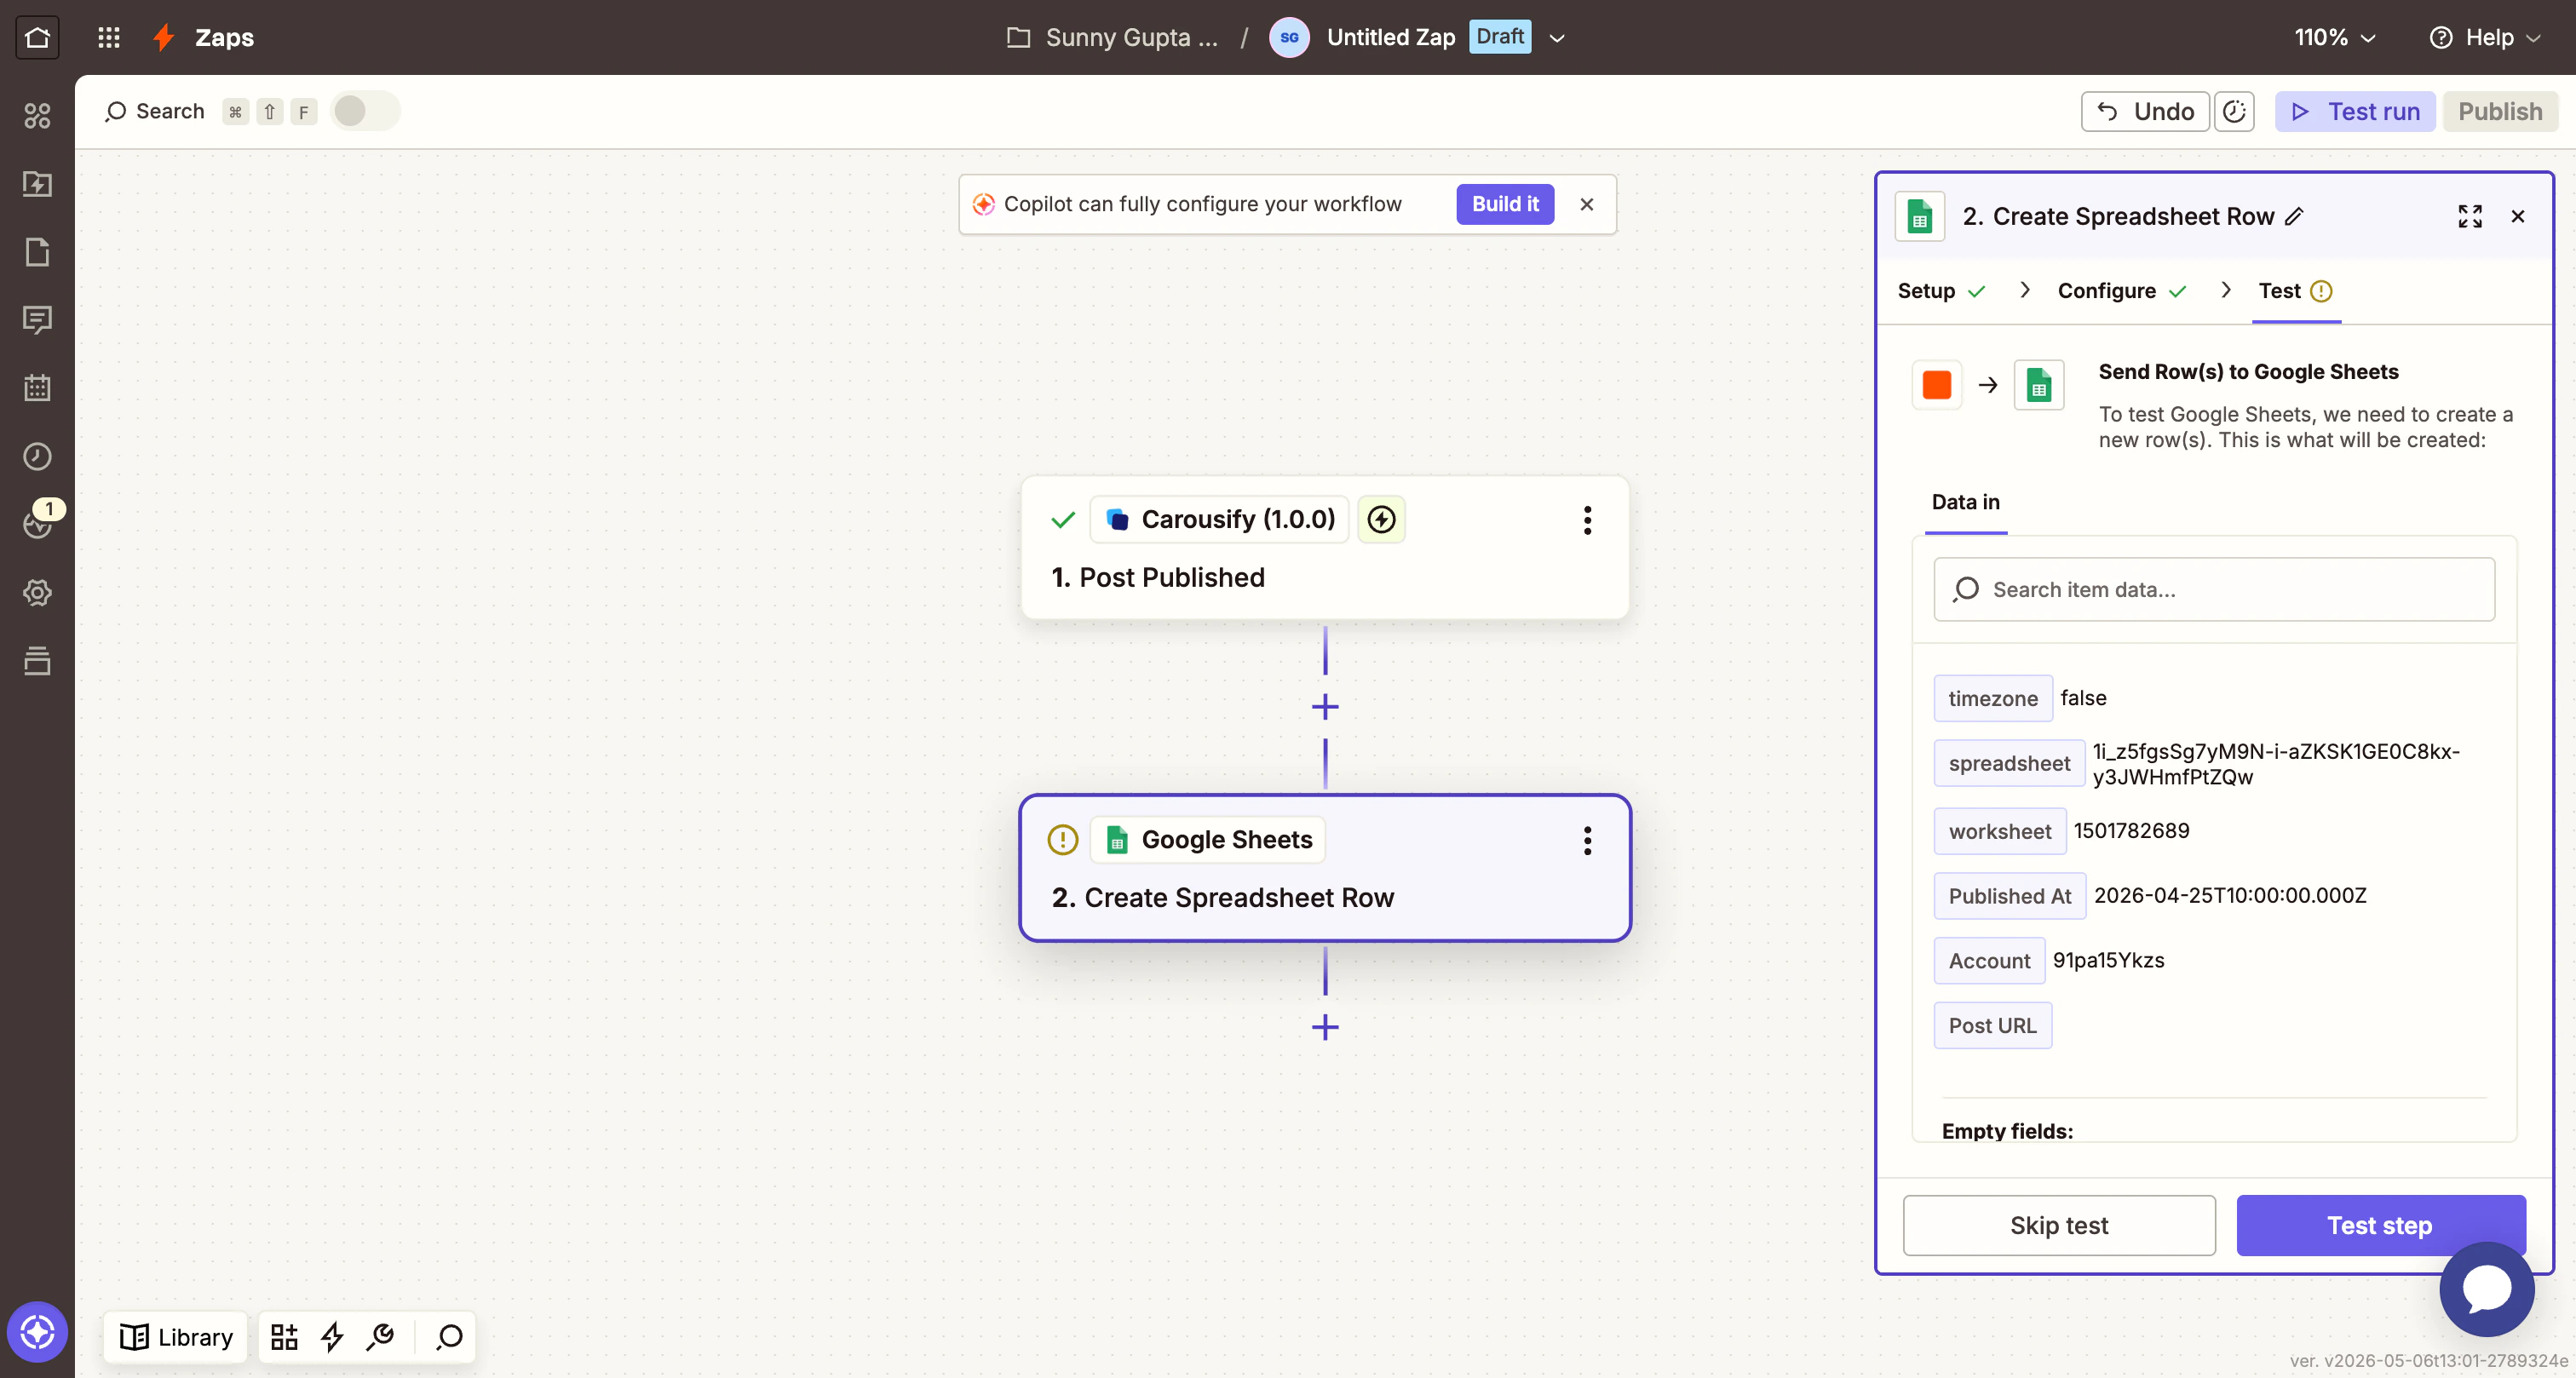 Click **Test step**. Zapier writes a real row to your sheet and reports back with the row number.
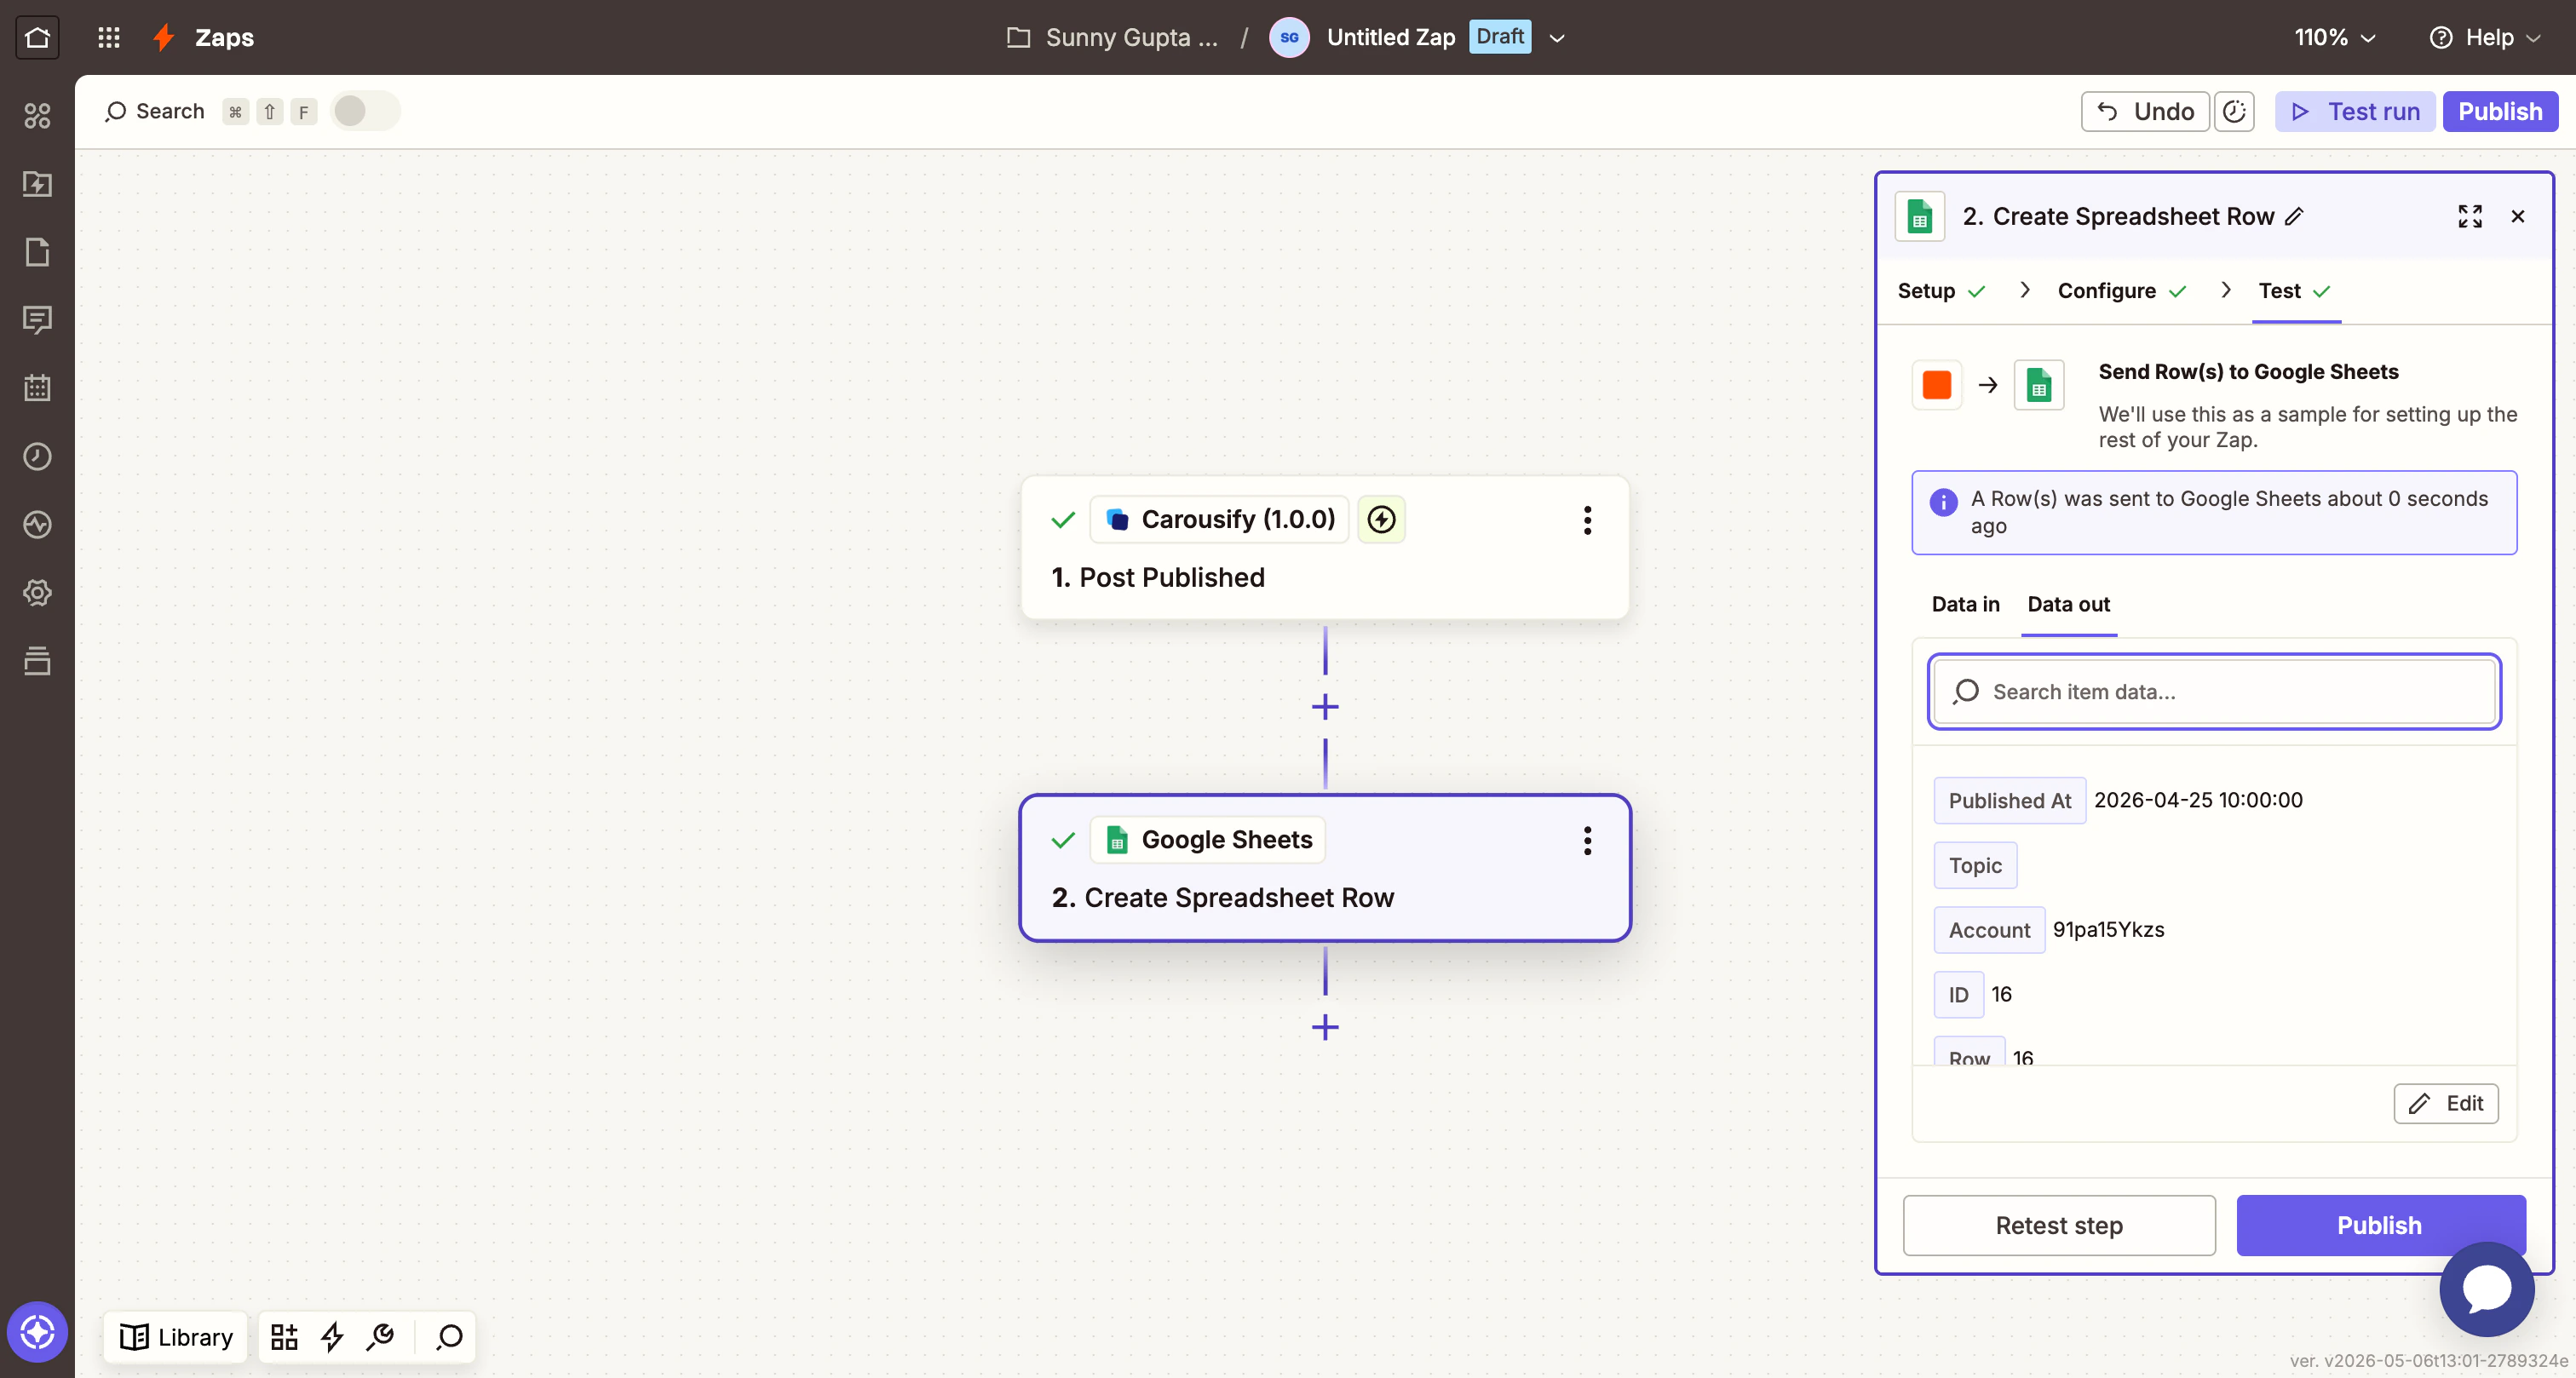 Open your Google Sheet — you should see a fresh row with the sample data. If everything looks right, click **Publish** in the top-right.
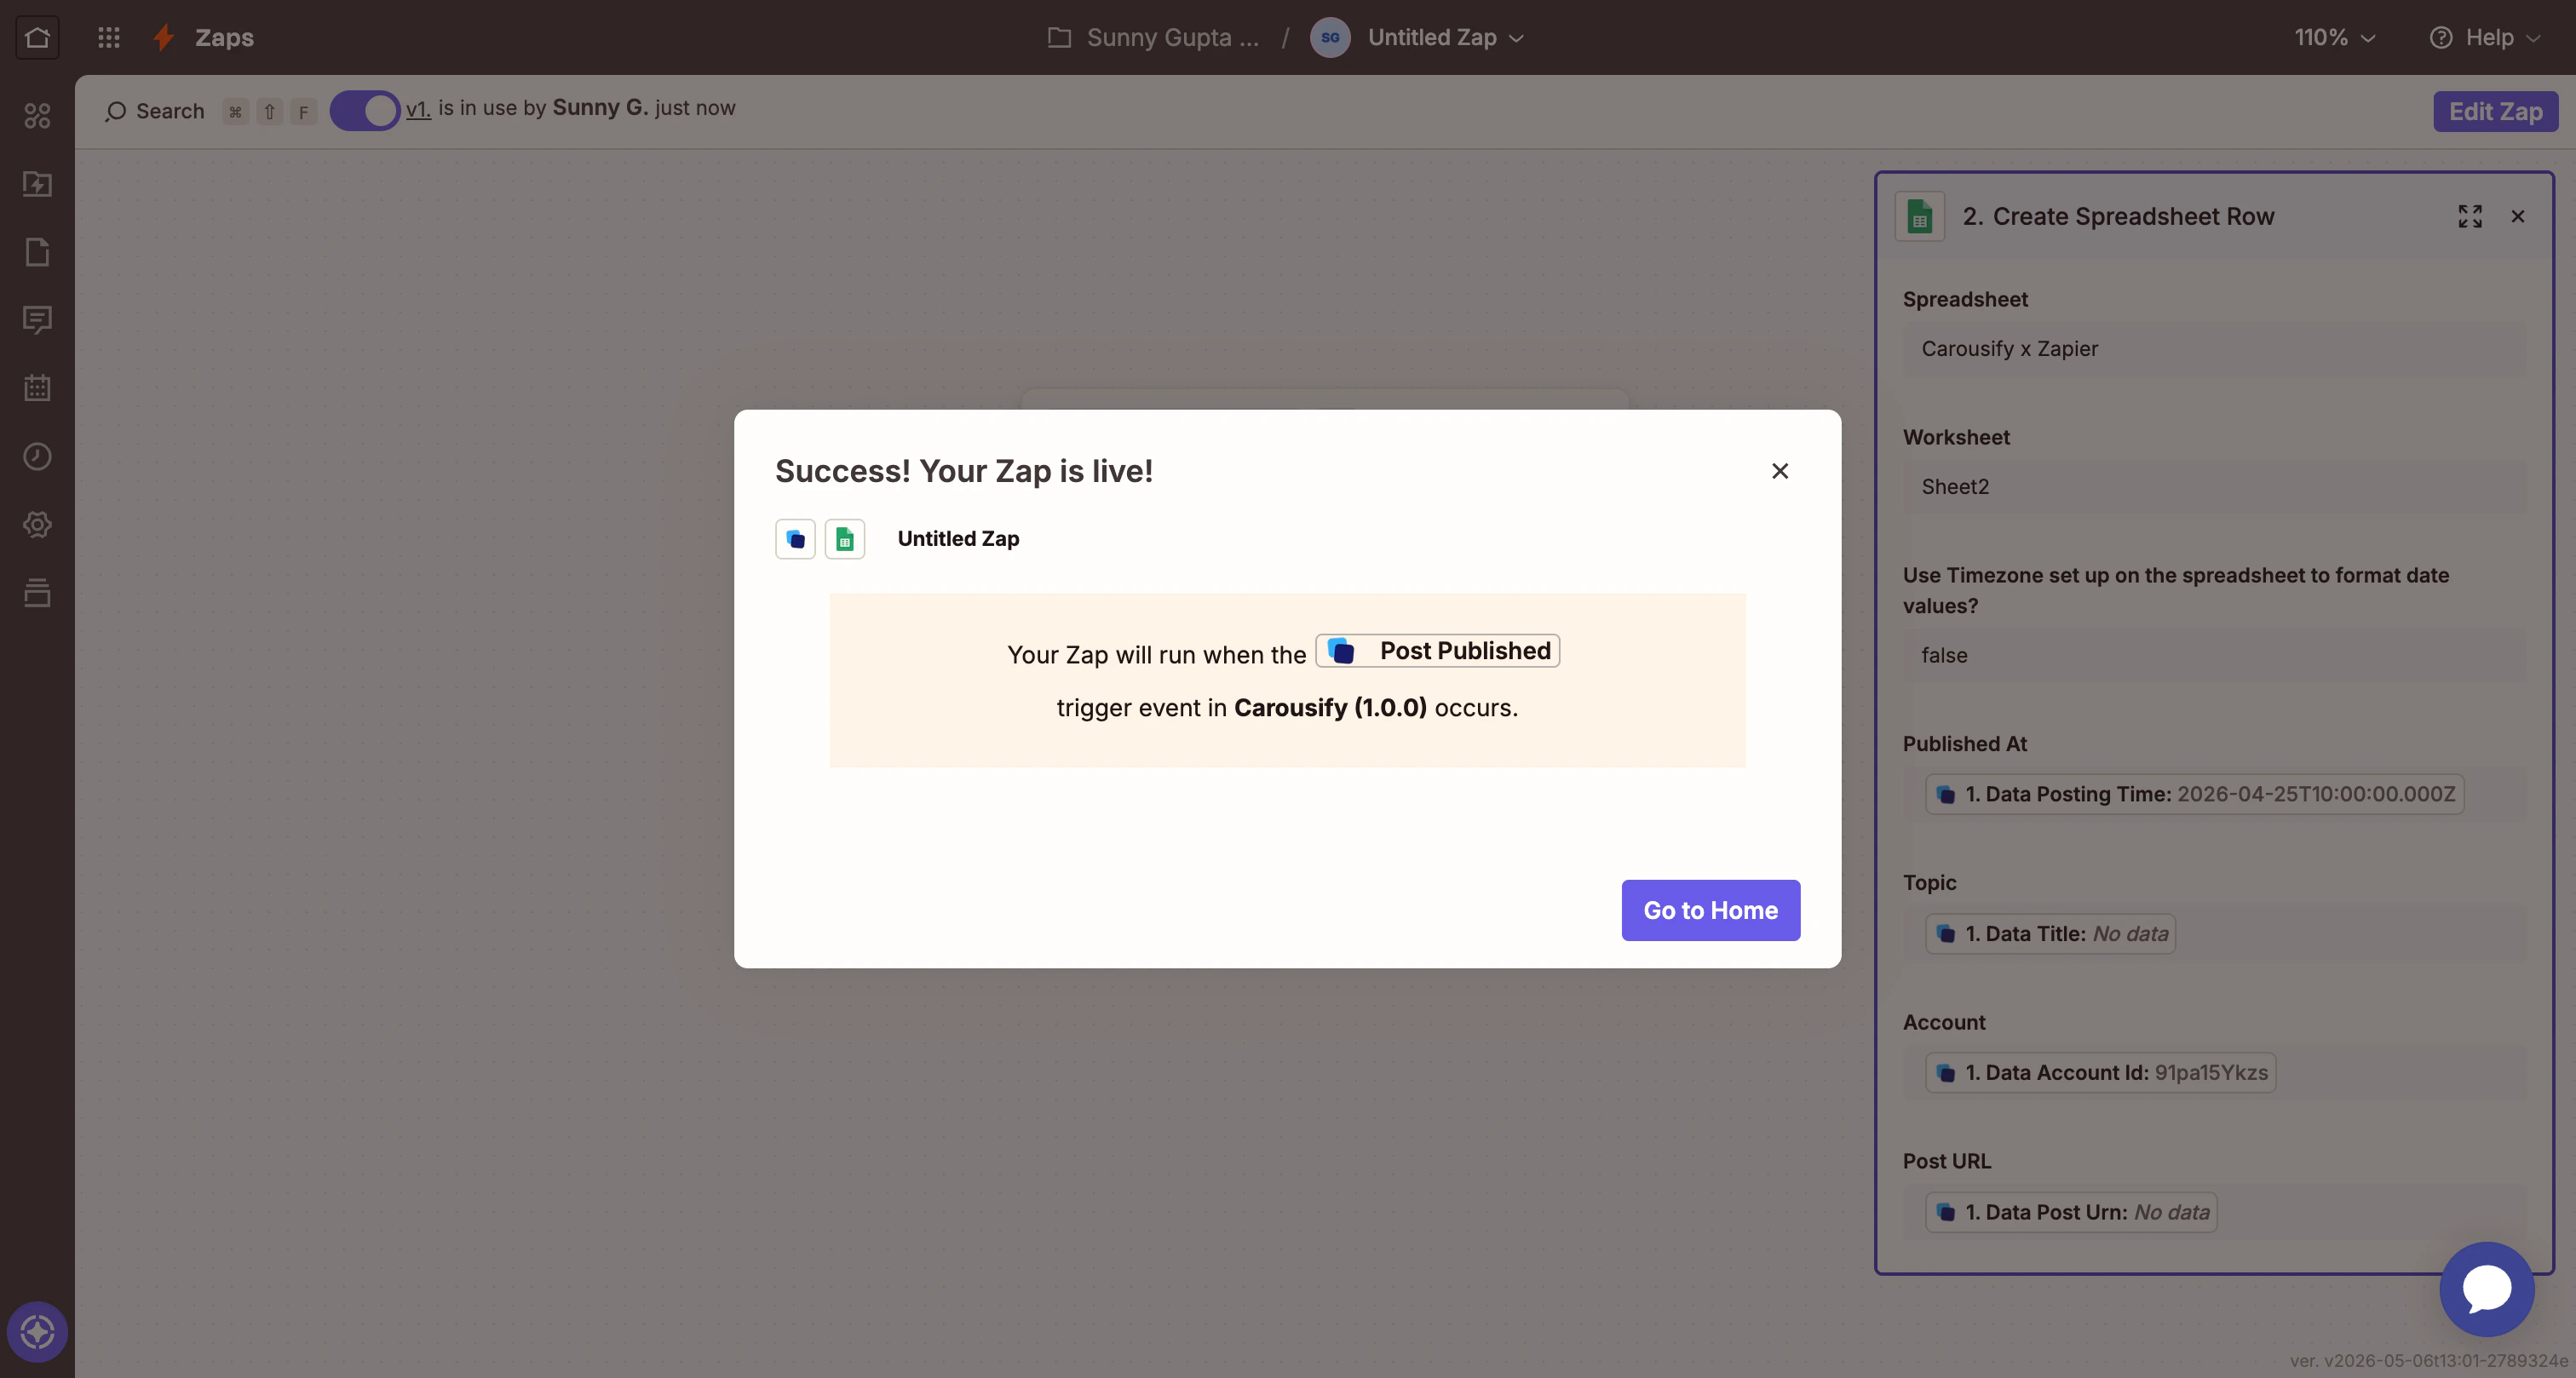 The Zap is now live. Every time Carousify publishes a post under this workspace, Zapier appends a new row to your sheet within a few seconds.
## Filtering by account or status
A common follow-up is restricting a Zap to a specific LinkedIn account or only failed posts. Add a **Filter by Zapier** step between the trigger and the action:
* **Field**: `Data Account Id` **Condition**: `(Text) Exactly matches` **Value**: your vanity, e.g. `carousify`
* **Field**: `Data Status` **Condition**: `(Text) Exactly matches` **Value**: `failed`
The Zap will only proceed past the filter when both conditions match.
## Disconnect or rotate the key
To rotate the API key (recommended every 90 days, or whenever someone leaves the team):
1. In Carousify, open **Manage Workspace › Integrations** and click **Disconnect** on the Zapier card. The current key stops working immediately.
2. Click **Connect** again, generate a new key.
3. In Zapier, open **App connections** and click **Reconnect** on the Carousify entry. Paste the new key.
Disconnecting in Carousify also invalidates any in-flight Zaps — they'll show an auth error until you reconnect on the Zapier side.
## Troubleshooting
* **"API Key Unrecognized" during sign-in.** The key was disconnected on the Carousify side, or you copied it with extra whitespace. Generate a fresh key and try again.
* **No sample data when testing the trigger.** You don't have any matching events in your account yet — schedule or publish a real post in Carousify and click **Test trigger** again.
* **Published At lands as a number in Sheets.** Toggle **Use Timezone set up on the spreadsheet to format date values?** to **True** in the Google Sheets action — Zapier will then format `Data Posting Time` as a readable timestamp.
* **Zap stops firing.** Check **Zap history** in Zapier for the failure reason. Most common causes: the Carousify API key was rotated without updating Zapier, or the underlying LinkedIn account got disconnected.
## What's next
Same three events delivered straight into a Slack channel without going through Zapier.
Schedule posts from a Notion database — no Zapier needed.
Trigger your first **Post Scheduled** event and watch the Zap run.
For developers who'd rather drive Carousify from Claude or VS Code.
The Zap is now live. Every time Carousify publishes a post under this workspace, Zapier appends a new row to your sheet within a few seconds.
## Filtering by account or status
A common follow-up is restricting a Zap to a specific LinkedIn account or only failed posts. Add a **Filter by Zapier** step between the trigger and the action:
* **Field**: `Data Account Id` **Condition**: `(Text) Exactly matches` **Value**: your vanity, e.g. `carousify`
* **Field**: `Data Status` **Condition**: `(Text) Exactly matches` **Value**: `failed`
The Zap will only proceed past the filter when both conditions match.
## Disconnect or rotate the key
To rotate the API key (recommended every 90 days, or whenever someone leaves the team):
1. In Carousify, open **Manage Workspace › Integrations** and click **Disconnect** on the Zapier card. The current key stops working immediately.
2. Click **Connect** again, generate a new key.
3. In Zapier, open **App connections** and click **Reconnect** on the Carousify entry. Paste the new key.
Disconnecting in Carousify also invalidates any in-flight Zaps — they'll show an auth error until you reconnect on the Zapier side.
## Troubleshooting
* **"API Key Unrecognized" during sign-in.** The key was disconnected on the Carousify side, or you copied it with extra whitespace. Generate a fresh key and try again.
* **No sample data when testing the trigger.** You don't have any matching events in your account yet — schedule or publish a real post in Carousify and click **Test trigger** again.
* **Published At lands as a number in Sheets.** Toggle **Use Timezone set up on the spreadsheet to format date values?** to **True** in the Google Sheets action — Zapier will then format `Data Posting Time` as a readable timestamp.
* **Zap stops firing.** Check **Zap history** in Zapier for the failure reason. Most common causes: the Carousify API key was rotated without updating Zapier, or the underlying LinkedIn account got disconnected.
## What's next
Same three events delivered straight into a Slack channel without going through Zapier.
Schedule posts from a Notion database — no Zapier needed.
Trigger your first **Post Scheduled** event and watch the Zap run.
For developers who'd rather drive Carousify from Claude or VS Code.