> ## Documentation Index
> Fetch the complete documentation index at: https://docs.carousify.com/llms.txt
> Use this file to discover all available pages before exploring further.
# Brand Kit
> Save your logo, identity, fonts, and colors once — and apply them to every carousel in a click.
A Brand Kit holds the identity bits that should be consistent across every carousel you publish — logo, full name, @username, heading and body fonts, font colors, and a default background. Once saved, you can apply it to any carousel from the editor and watch the whole deck pick up your fonts and colors instantly. Override the toggle and even template-designed slides adopt your kit.
You can manage Brand Kits from two places — both update the same workspace-level kit:
* **Carousel Maker › Brand Kit tab** — apply, switch between, or create kits while you're editing a deck. This is where most of the work happens.
* **Manage Workspace › Brandkit** — full Brand Kit manager for the workspace, useful when you want to set things up before you start designing.
## Apply a Brand Kit from the Carousel Maker
Open any carousel in the editor and click the **Brand Kit** tab.
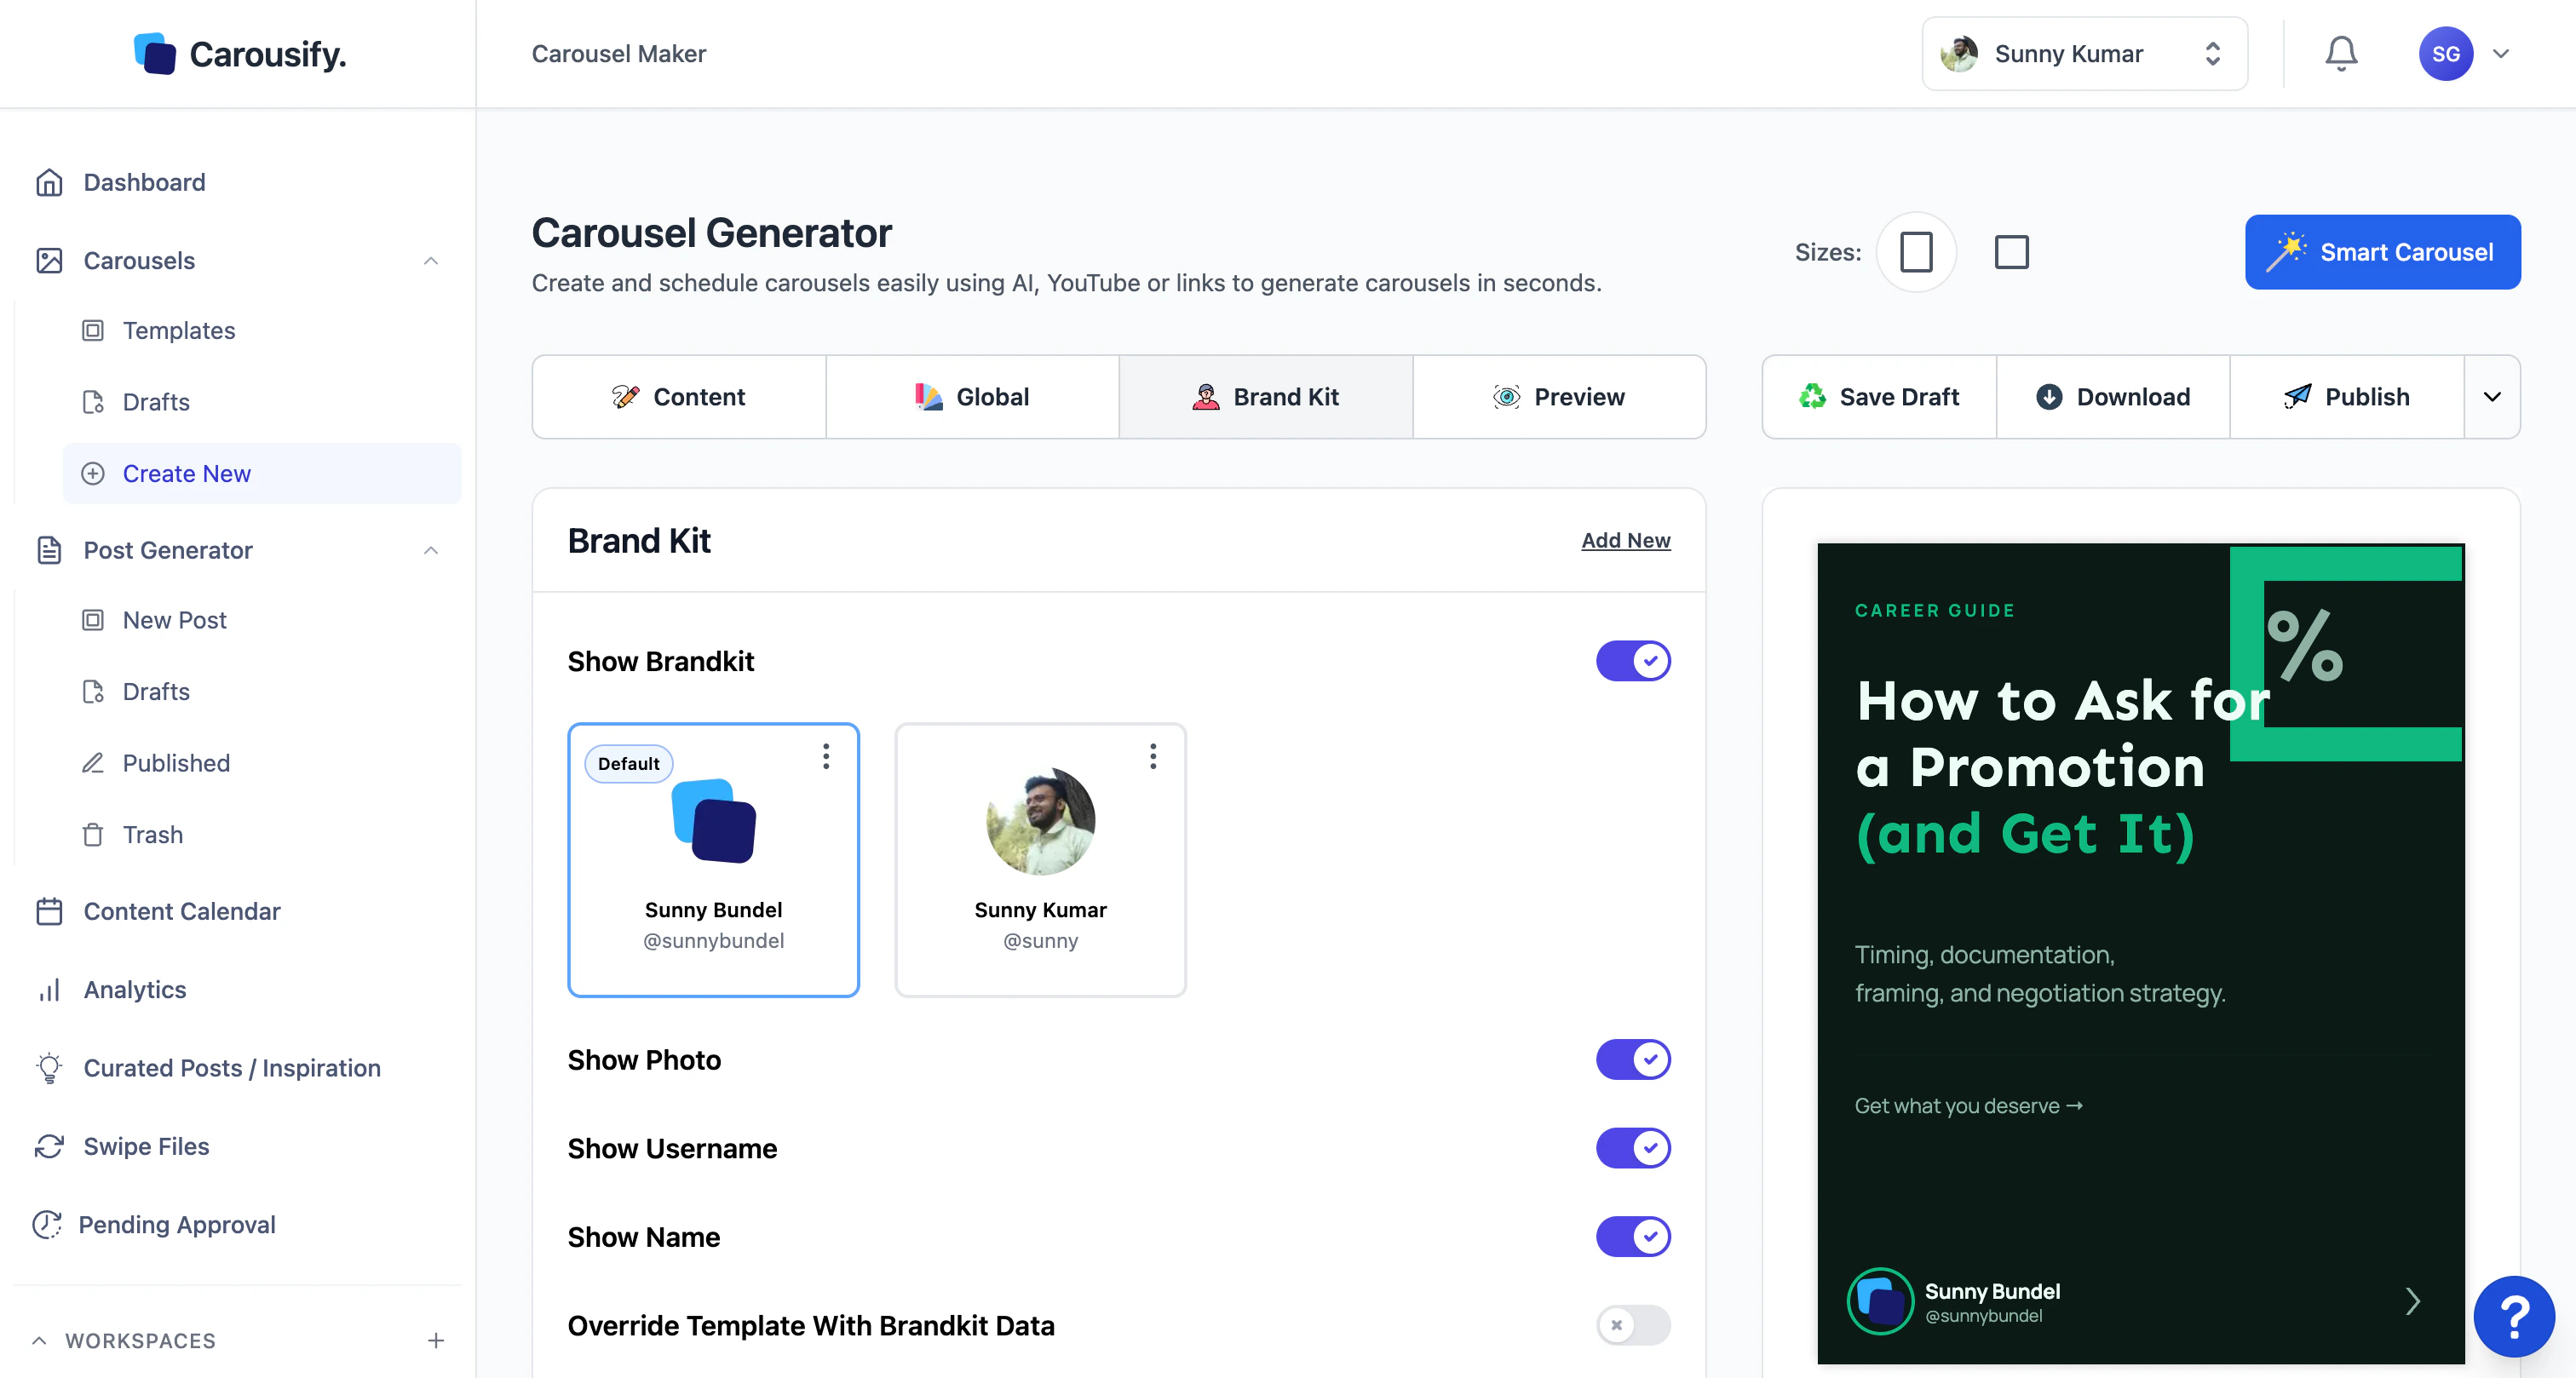 You'll see every Brand Kit in the current workspace as a card, plus a few toggles that control how the kit shows up on the slide.
Click the card for the kit you want. The active kit is highlighted, and the carousel preview updates with the kit's logo, name, and @username on the footer.
Use the toggles below the kit cards to control what shows on the slide:
| Toggle | What it does |
| ---------------------------------------- | ---------------------------------------------------------------------------------------------------------------- |
| **Show Brandkit** | Master switch. Off = no logo/name/handle anywhere on the deck. |
| **Show Photo** | Shows the kit's logo. |
| **Show Username** | Shows the @handle. |
| **Show Name** | Shows the full name. |
| **Override Template With Brandkit Data** | Forces the deck to use the kit's fonts, colors, and background — replacing whatever the template originally had. |
By default, applying a Brand Kit only updates the footer (logo, name, handle). If you want the kit's **fonts, colors, and background** to take over the whole deck — heading, subheading, body, background — flip **Override Template With Brandkit Data** on.
Leave **Override** off when you want to keep a template's hand-tuned typography and only need your logo and handle on the slides. Turn it on when you want every deck to feel exactly like your brand.
## Create a new Brand Kit
You can create a kit from either surface — same form, same fields.
* **From the editor** — click **Add New** in the top-right of the Brand Kit tab.
* **From the workspace** — go to **Manage Workspace › Brandkit** and click **Add New Brand Kit**.
You'll see every Brand Kit in the current workspace as a card, plus a few toggles that control how the kit shows up on the slide.
Click the card for the kit you want. The active kit is highlighted, and the carousel preview updates with the kit's logo, name, and @username on the footer.
Use the toggles below the kit cards to control what shows on the slide:
| Toggle | What it does |
| ---------------------------------------- | ---------------------------------------------------------------------------------------------------------------- |
| **Show Brandkit** | Master switch. Off = no logo/name/handle anywhere on the deck. |
| **Show Photo** | Shows the kit's logo. |
| **Show Username** | Shows the @handle. |
| **Show Name** | Shows the full name. |
| **Override Template With Brandkit Data** | Forces the deck to use the kit's fonts, colors, and background — replacing whatever the template originally had. |
By default, applying a Brand Kit only updates the footer (logo, name, handle). If you want the kit's **fonts, colors, and background** to take over the whole deck — heading, subheading, body, background — flip **Override Template With Brandkit Data** on.
Leave **Override** off when you want to keep a template's hand-tuned typography and only need your logo and handle on the slides. Turn it on when you want every deck to feel exactly like your brand.
## Create a new Brand Kit
You can create a kit from either surface — same form, same fields.
* **From the editor** — click **Add New** in the top-right of the Brand Kit tab.
* **From the workspace** — go to **Manage Workspace › Brandkit** and click **Add New Brand Kit**.
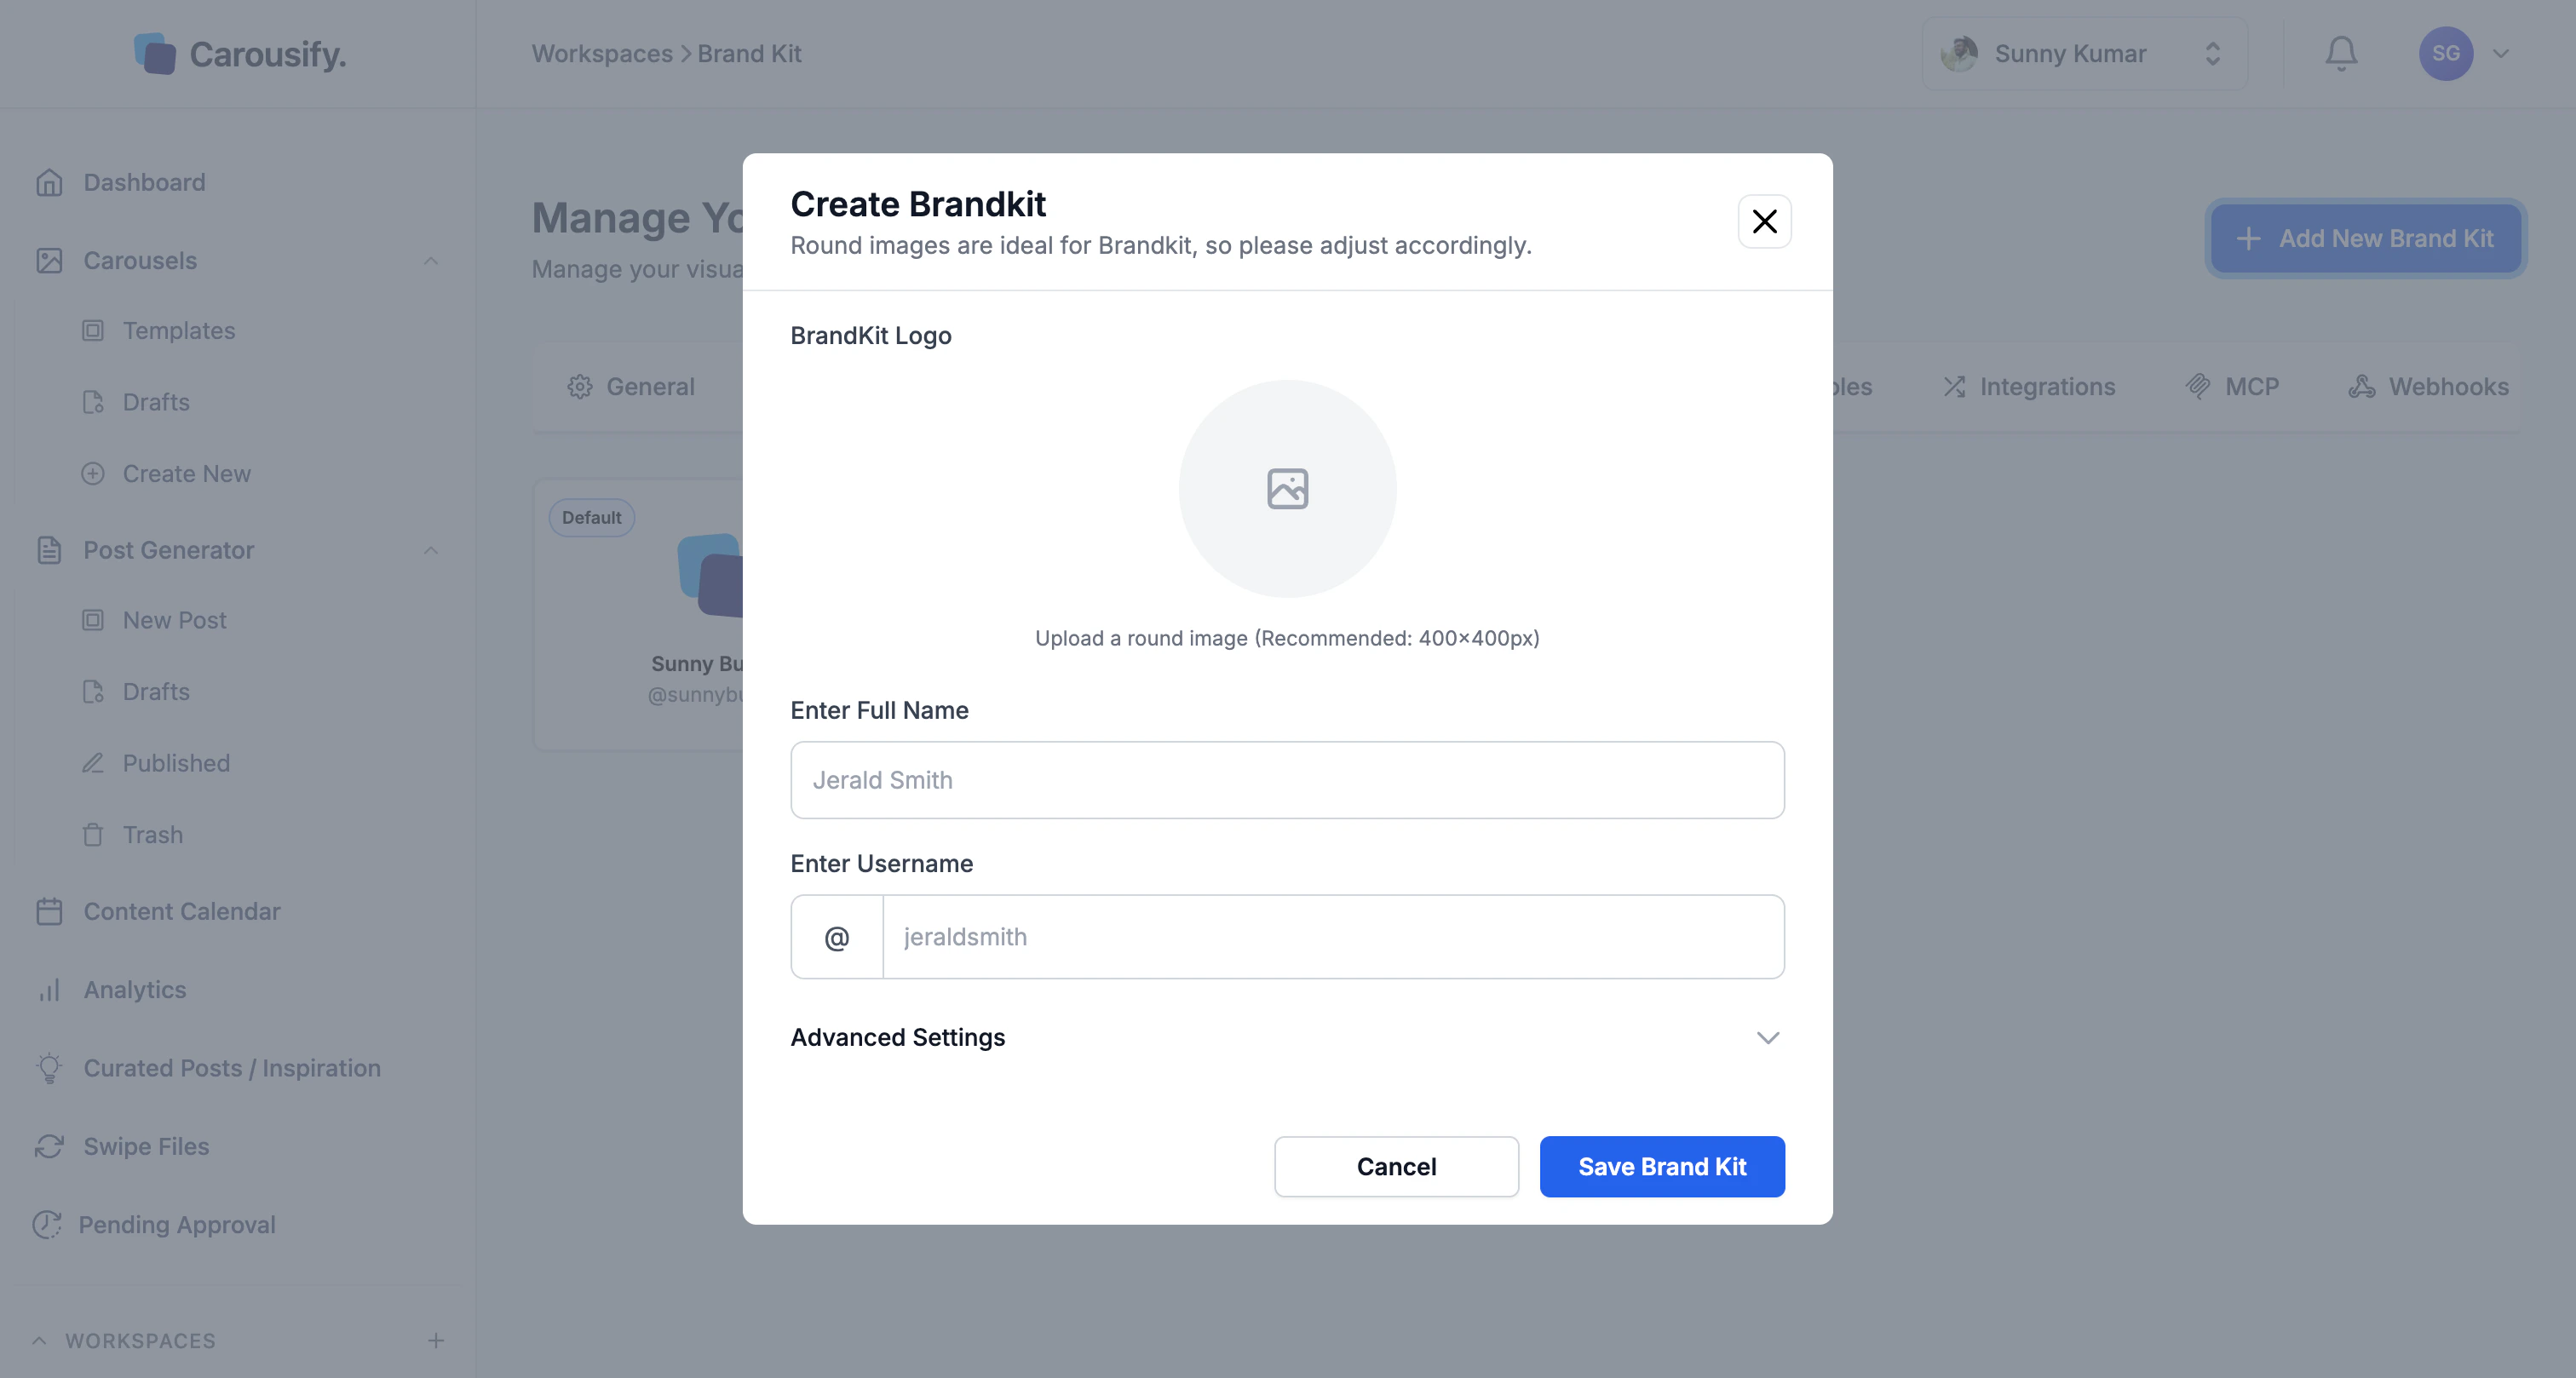 Click **Choose File** and pick a square image — Carousify recommends **400×400 px** and a round-ready design (the logo is masked into a circle on the slide). PNG or JPG works.
* **Enter Full Name** — what shows up next to your logo on each slide.
* **Enter Username** — your @handle. The `@` is added automatically.
Click **Advanced Settings** to expand the typography and background panel.
Click **Choose File** and pick a square image — Carousify recommends **400×400 px** and a round-ready design (the logo is masked into a circle on the slide). PNG or JPG works.
* **Enter Full Name** — what shows up next to your logo on each slide.
* **Enter Username** — your @handle. The `@` is added automatically.
Click **Advanced Settings** to expand the typography and background panel.
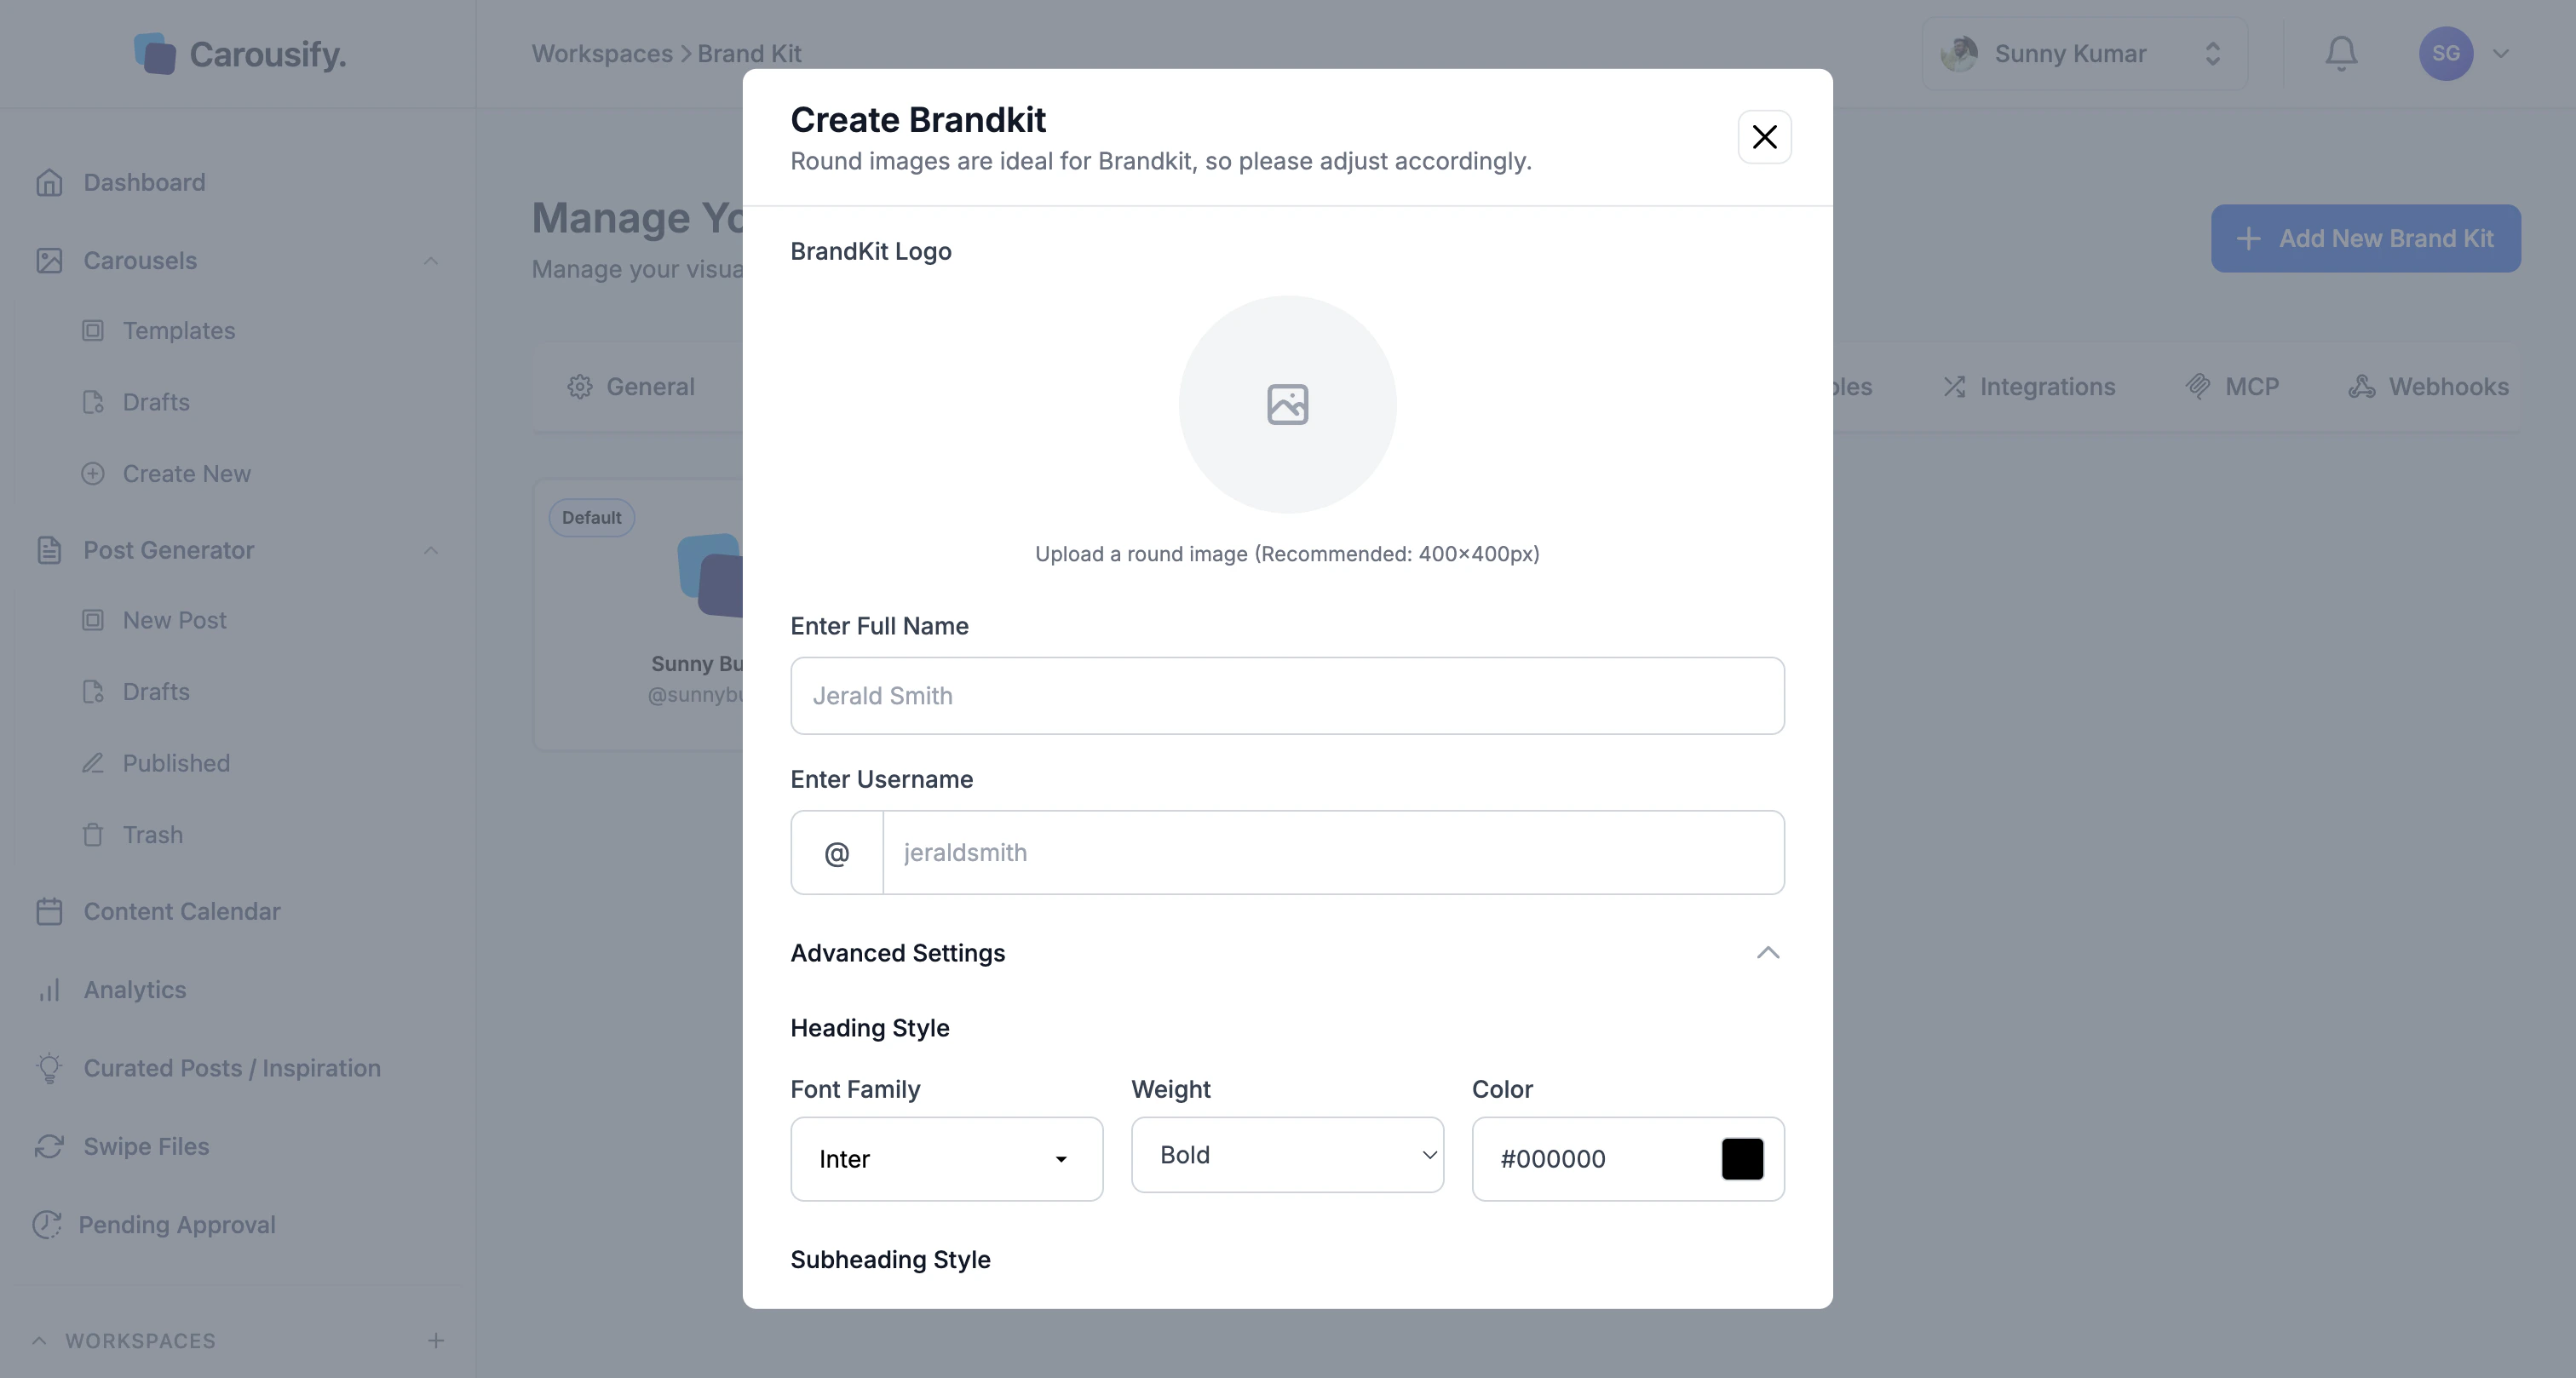 Configure each text style and the slide background:
| Field | Sets |
| -------------------- | -------------------------------------------------------- |
| **Heading Style** | Font family, weight, and color for slide headings. |
| **Subheading Style** | Same controls for subheadings. |
| **Body Text Style** | Same for body copy. |
| **Background** | Default background color for slides built from this kit. |
These only apply to the deck when **Override Template With Brandkit Data** is enabled in the editor — otherwise the template's own typography wins.
Click **Save Brand Kit**. The new kit appears in the editor and on the workspace page immediately.
## Manage kits at the workspace level
Open **Manage Workspace › Brandkit** to see every kit in the workspace at a glance.
Configure each text style and the slide background:
| Field | Sets |
| -------------------- | -------------------------------------------------------- |
| **Heading Style** | Font family, weight, and color for slide headings. |
| **Subheading Style** | Same controls for subheadings. |
| **Body Text Style** | Same for body copy. |
| **Background** | Default background color for slides built from this kit. |
These only apply to the deck when **Override Template With Brandkit Data** is enabled in the editor — otherwise the template's own typography wins.
Click **Save Brand Kit**. The new kit appears in the editor and on the workspace page immediately.
## Manage kits at the workspace level
Open **Manage Workspace › Brandkit** to see every kit in the workspace at a glance.
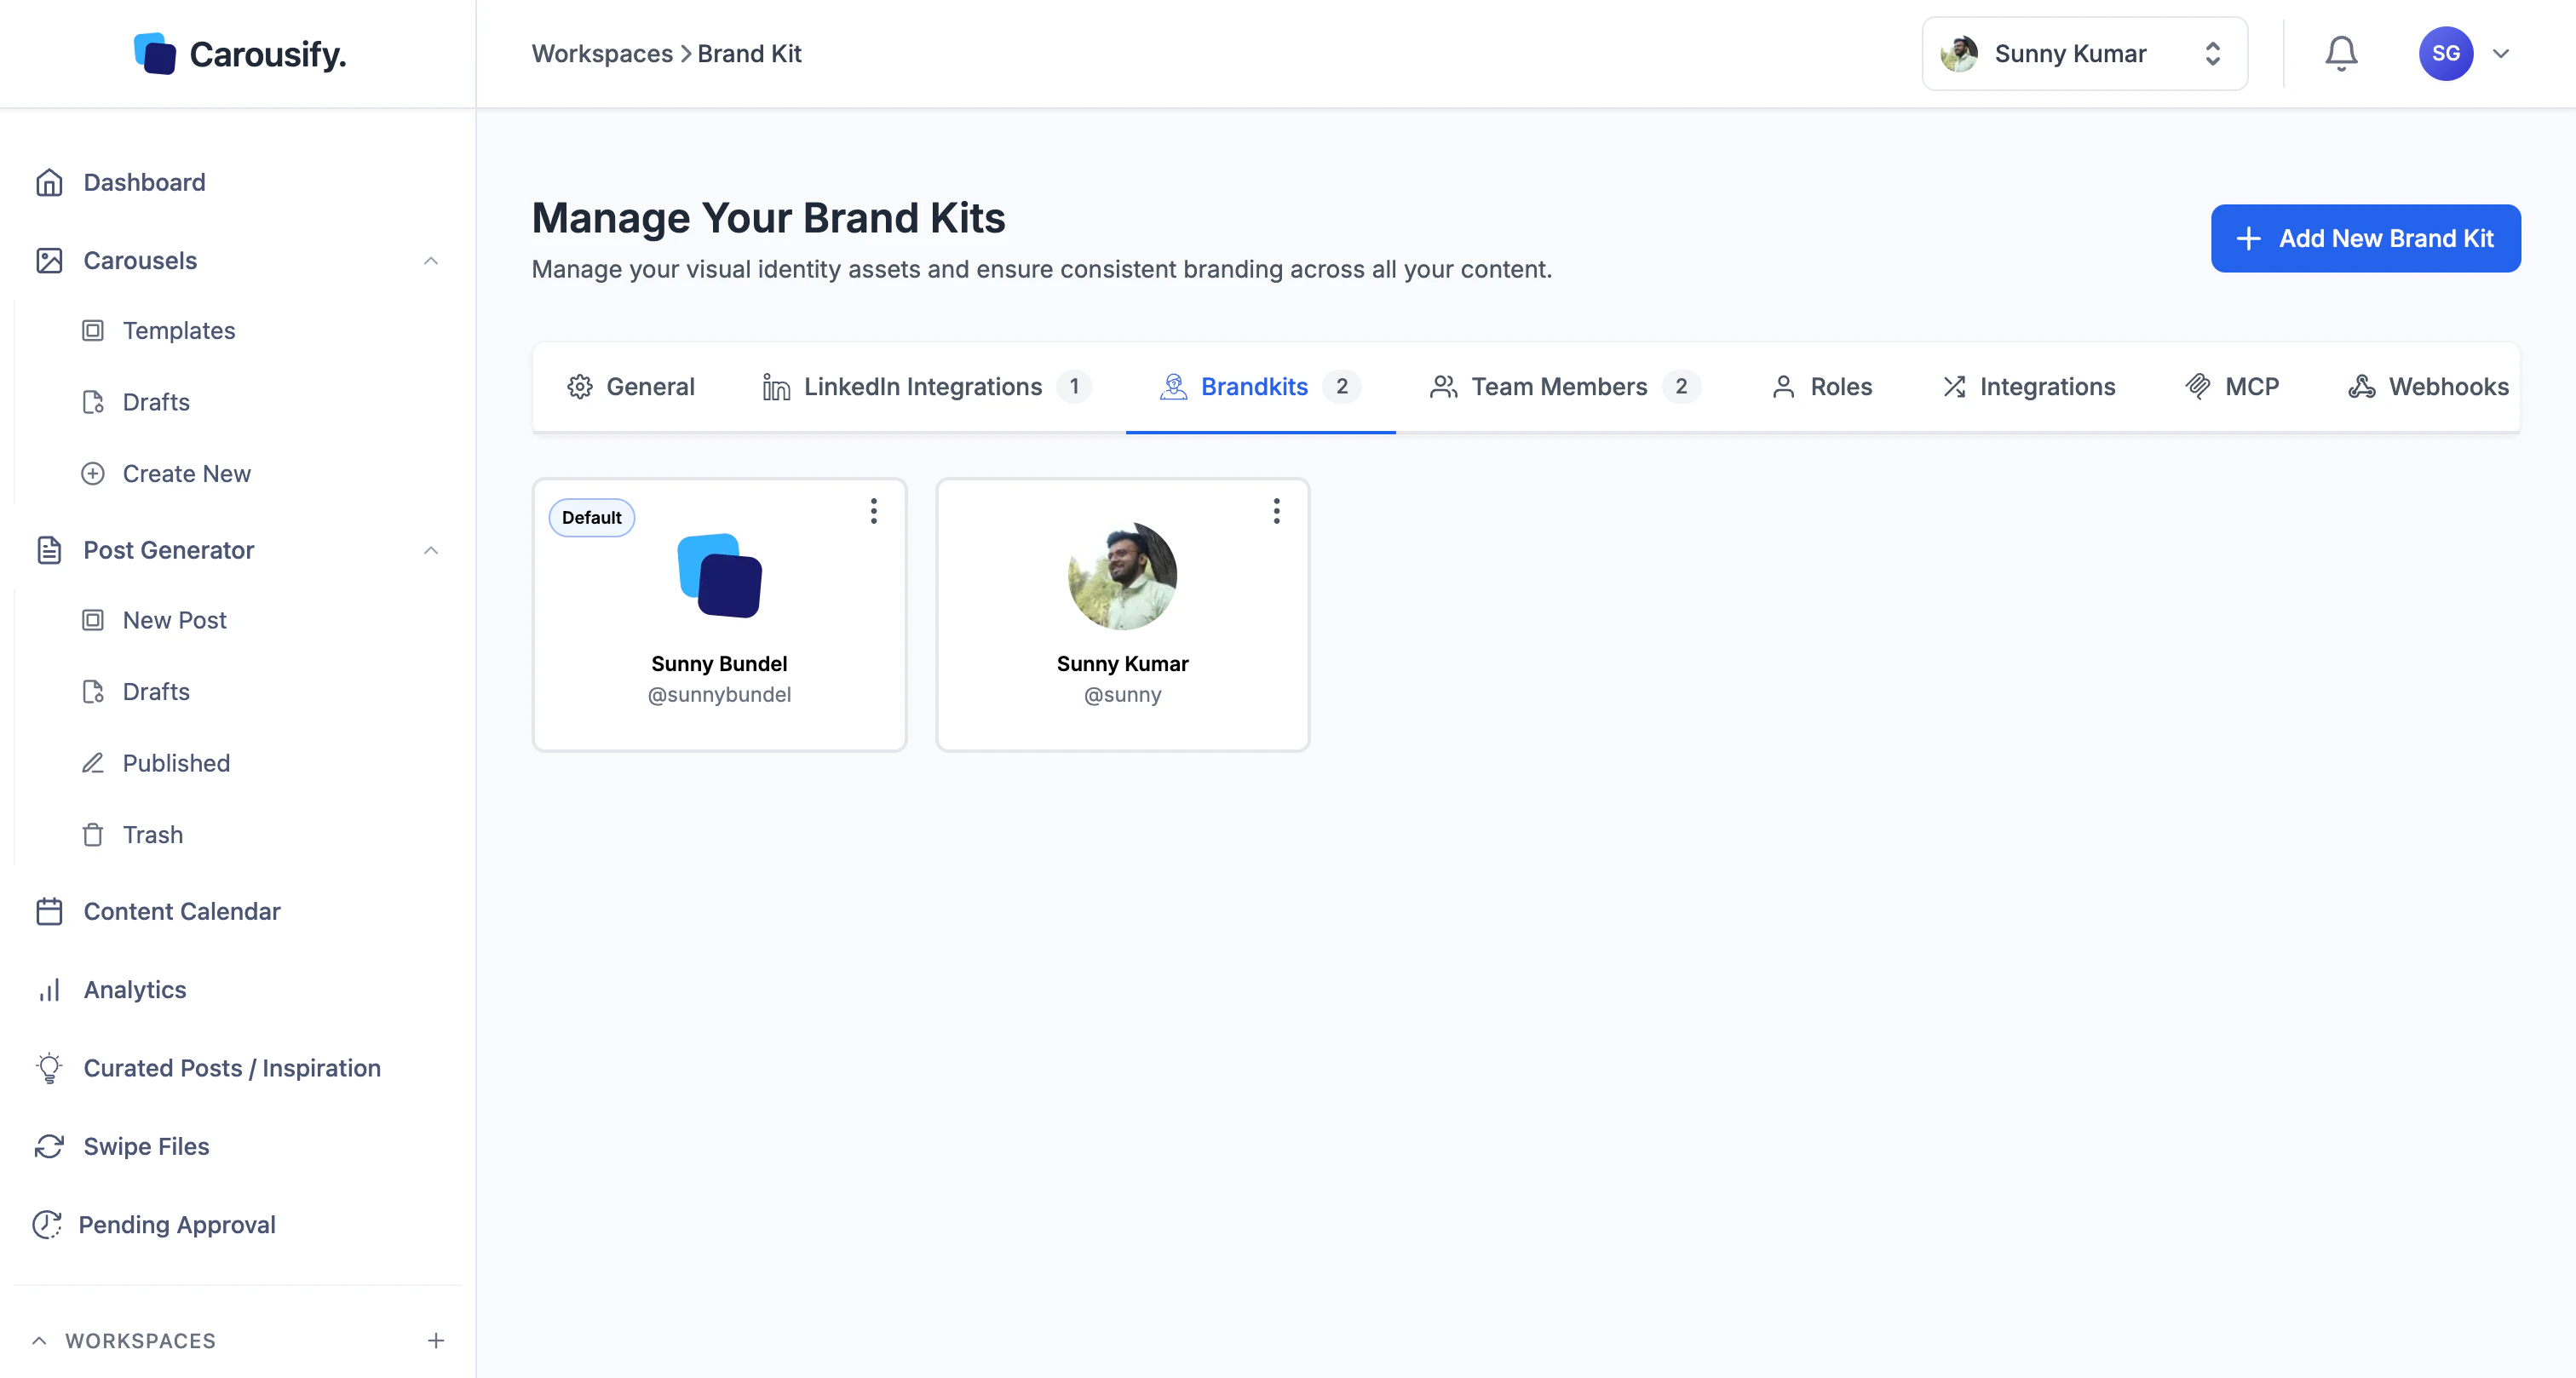 From here you can:
* Add a new kit with **Add New Brand Kit**.
* Edit or delete an existing kit using the menu on its card.
* See which kit is marked **Default** — the one Carousify pre-selects when you start a new carousel in this workspace.
Brand Kits are scoped to a single workspace. If you run a workspace per client, set up a kit inside each — they don't carry across.
## What's next
Pair a polished template with your Brand Kit for a deck that ships in minutes.
Start with a blank canvas and have your Brand Kit applied from slide one.
Get LinkedIn-ready PDFs and image sets out of the editor.
Hand the finished deck to the post composer and pick a publish time.
From here you can:
* Add a new kit with **Add New Brand Kit**.
* Edit or delete an existing kit using the menu on its card.
* See which kit is marked **Default** — the one Carousify pre-selects when you start a new carousel in this workspace.
Brand Kits are scoped to a single workspace. If you run a workspace per client, set up a kit inside each — they don't carry across.
## What's next
Pair a polished template with your Brand Kit for a deck that ships in minutes.
Start with a blank canvas and have your Brand Kit applied from slide one.
Get LinkedIn-ready PDFs and image sets out of the editor.
Hand the finished deck to the post composer and pick a publish time.